So you have a WordPress website and you have been posting articles for a while. However, you are looking at ways to add more functionality to your posts. Having a custom meta box on your website will allow you to perform custom functions within your posts and pages.
What Are Meta Boxes?
Within the WordPress post and page editor, there are several default boxes. You will recognize them as boxes like:
- Editor
- Publish
- Categories
- Tags
These are called WordPress meta boxes. Every WordPress theme will have these, and some will have other meta boxes already added by default. It all depends on your theme. There are even meta boxes to add meta descriptions and keywords.
You can add custom meta boxes to your WordPress website using plugins, code, or a combination of both. We will talk about this more below, but let’s talk about why you should add a meta box when needed to your editor.
Why Use Meta Boxes?
There are different thought processes behind this. Adding a custom meta box and using it may be essential, or it may be tied to something fun. Maybe you want to see how the weather is or display a mood emoji. There are many types of meta fields and boxes you can add.
That being said, meta boxes and meta fields are also very handy to have if you want to collect certain information related to the post that is being edited.
When you create a custom meta box, it will appear on the same screen as all the other post related information you have. A clear relationship is established and you can see how they all work together based on how you build them.
Meta boxes do not appear to your site users and article readers. They are only visible to you in the back end of your WordPress admin dashboard. Furthermore, you can arrange your custom meta boxes in the back end however you want. Website owners get full control over the editing environment and can display them how they see fit.
Let’s take a look at how you can add a WordPress custom meta box to your website and use it in the future.
Meta Box
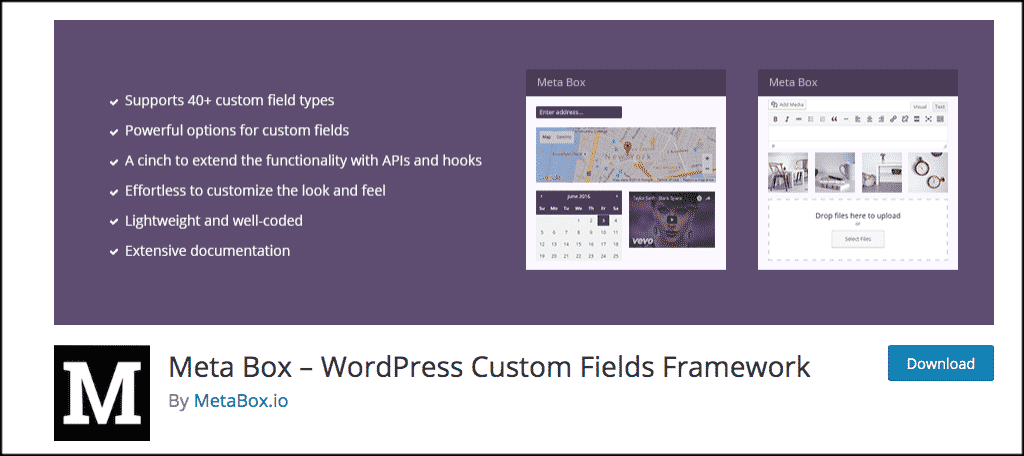
Meta Box is a very powerful, yet lightweight, plugin that allows developers or website owners (if you know how) the ability to create unlimited custom meta boxes on their website. It also gives you the ability to create custom fields.
This plugin comes with a ton of functionality. Once installed and activated, you will be able to create over 40 different types of custom meta boxes for your website. Some of the more popular ones include:
- Text
- Images
- File Uploads
- Checkboxes
- Radio buttons
- Date & Time Picker
- Post Select
- Taxonomy
- User
Again, these are just a few of the custom meta boxes you can create once you install the plugin.
You will need to perform a few steps once the plugin has been installed. This included copying and pasting code from the source plugin into your functions.php file. However, we will go over that together below.
Let’s go over how to add a custom meta box to your WordPress website.
Install and Activate Meta Box
In order to add a WordPress custom meta box to your website, you first need to install and activate the plugin. You can do this by going to the Plugins page of your WordPress admin dashboard and searching for the plugin name there.

Once the plugin has been installed and activated you will be ready to start creating custom meta boxes to add to your website for use.
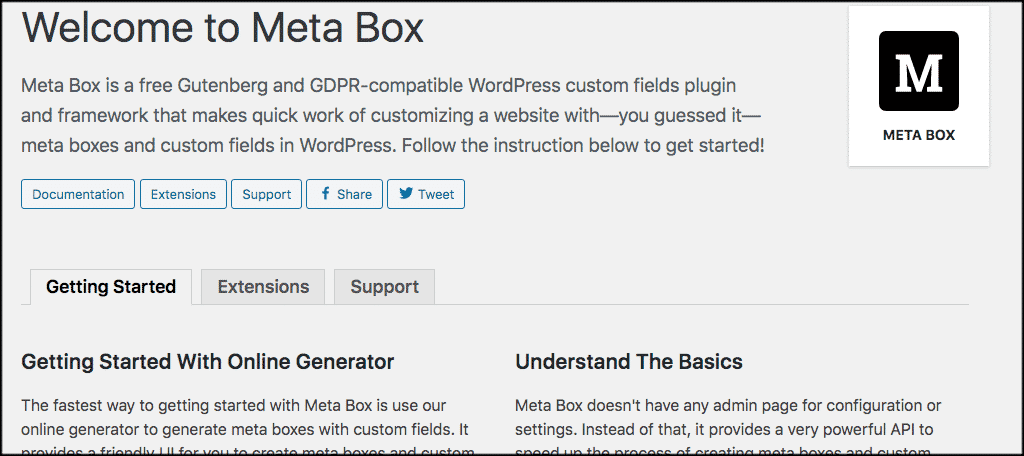
Note: The Meta Box plugin does not actually have an admin page for configuration or settings. Instead, you need to use the online generator that provides a UI that speeds up the process and allows you to easily create meta boxes on the fly.
Once you activate the plugin, you will be automatically bumped to a homepage where there will be some information for you.
Getting Started
Before anything else, you will see a getting started page for the Meta Box plugin. This will include a getting started, extension, and support tab.
Now, you are more than welcome to view the other tabs. You can check out some other extensions they recommend for other purposes, and even click on the support tab to access the developers and help documentation when needed.
That being said, we are going to stick to the setup of a meta box in this tutorial. So, stay on the page you are on and let’s move forward from here.
Accessing the Online Generator
In order to add a custom meta box to your website, you are going to have to make use of the “online generator” that the meta box plugin provides. Scroll down to the bottom right of the getting started page and click on the “Go to Online Generator” button.
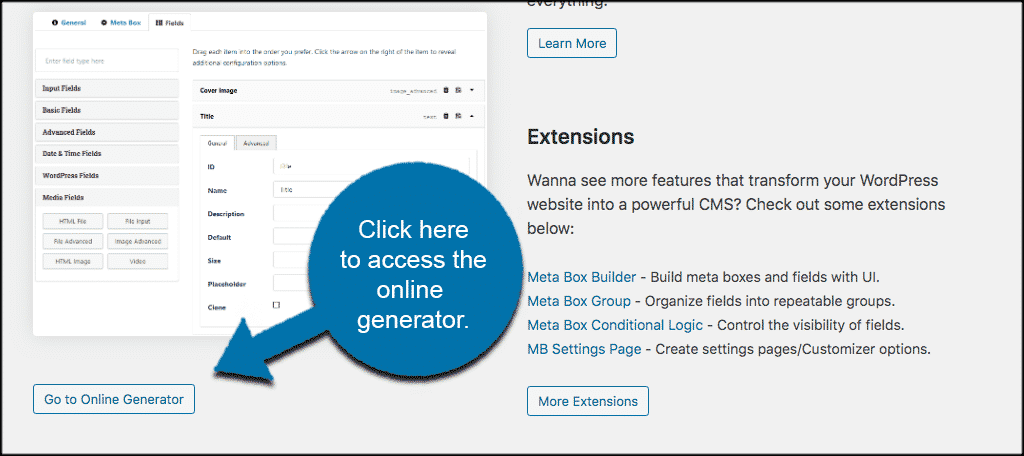
Note: The online generator that Meta Box provides allows you to easily generate meta boxes with custom fields. It is directly linked to the plugin and provides a very powerful and user-friendly UI that allows you to build a custom meta box using a drag and drop method.
Adding a Custom Meta Box
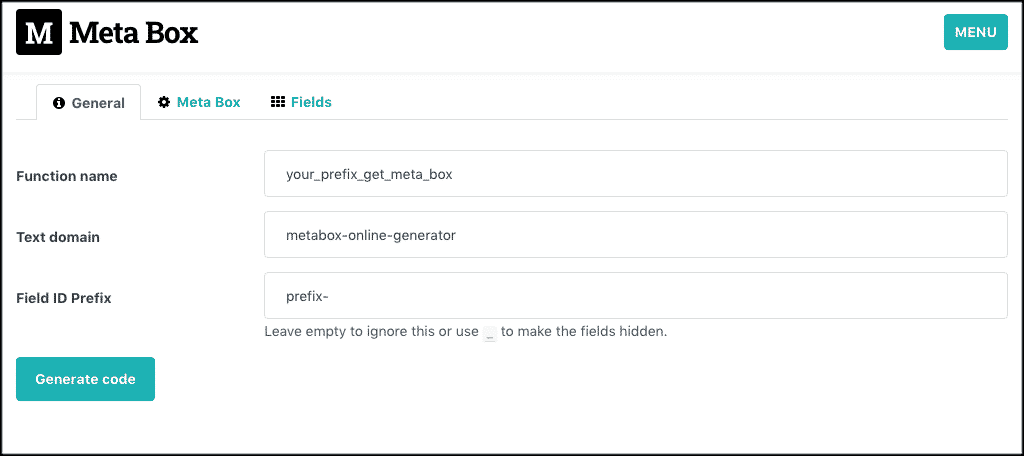
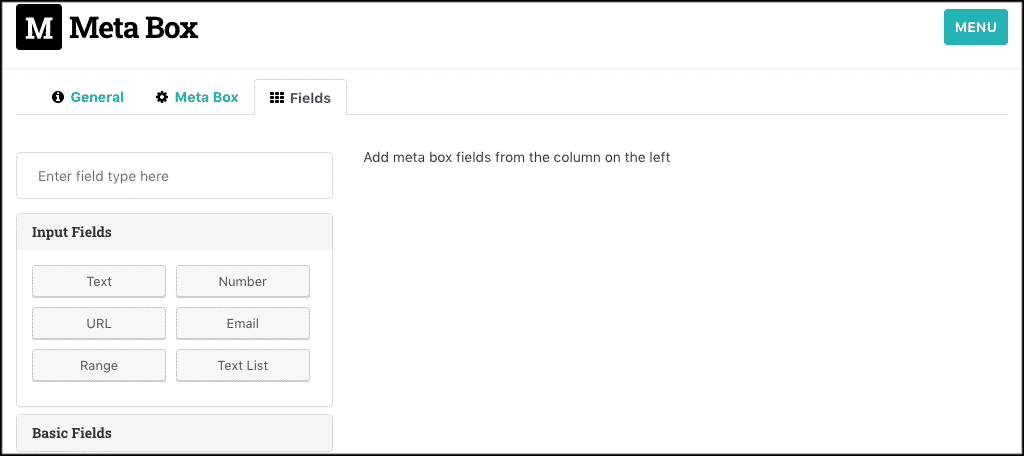
When you arrive on the online generator page for the Meta Box plugin, you will see that there are three tabs. These include:
- General
- Meta Box
- Fields
These are the three main parts you need to fill out in order to create a custom meta box for your website. You will fill out each tab accordingly, and when you generate the code you will need to put it into the functions.php file of your website.
Let’s go over the tabs together and do a demo.
General
First, click on the “General” tab. This is where you will fill in all the general information needed. This will include Function name, Text domain name and Field ID Prefix.
Meta Box
Now go ahead and click on the “Meta Box” tab. This is where you will set up the parameters you need for the meta box you are creating.
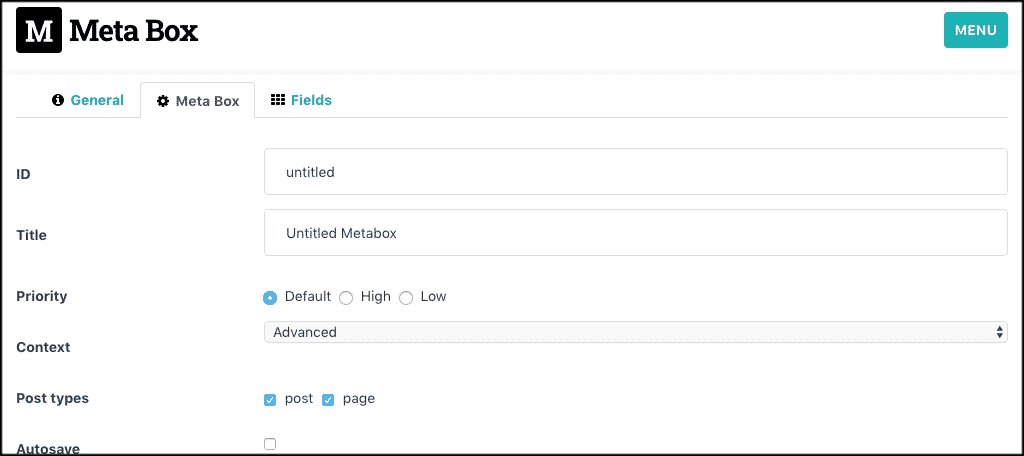
To help you, here is what all of the parameters mean:
- ID: Meta box ID. This field is not compulsory. If you didn’t type anything in here, meta box’s ID would be automatically created from the title by using the sanitize_title function.
- Title: Meta box title. This a very important field, and you are asked to fill in the information.
- Priority: Order priority when displaying multiple fields. This field is not compulsory. But if your meta box is important and you want users to easily see it, you should set it a high number so meta box will display it on top.
- Context: The position you want the meta box placed.
- Post Type: What kind of post does your meta box belong to? Select your target post types only.
- Autosave: Do you want to automatically save custom fields’ values? If yes, tick the box.
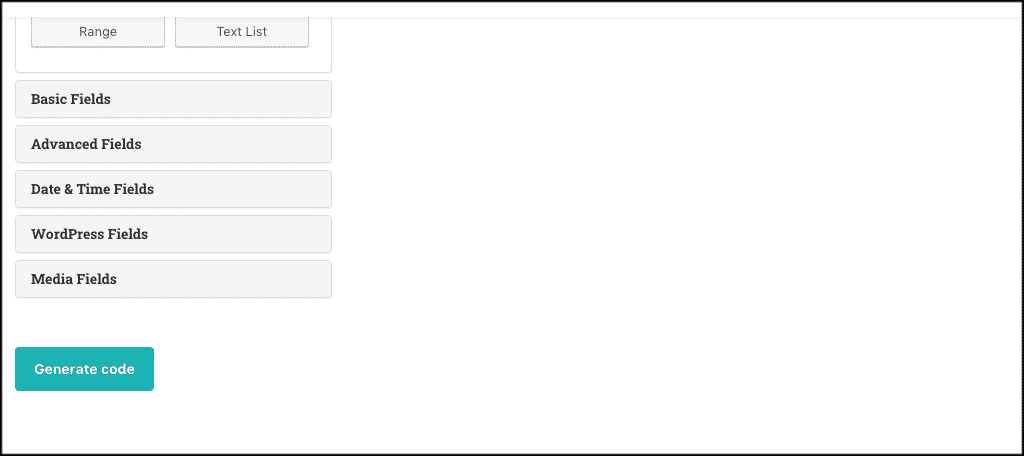
Fields
This is where you have the option to set up custom fields if you want to. These include parameters, actions, orders, and more.
Think of this area how you would when you are putting together a drag and drop contact form. It is the same principle. Simply drag, drop, and edit the fields you would like accordingly.
Generate Code and Paste Into functions.php File
Now that you have everything filled out and configured how you want for your new custom meta box, it is time to generate the code you need.
Remember, you can generate code from any tab when you are ready. Simply click on the “Generate Code” button to move forward.
Once you click that button, you will get a bunch of code automatically generated for you. Go ahead and copy the code from the box.
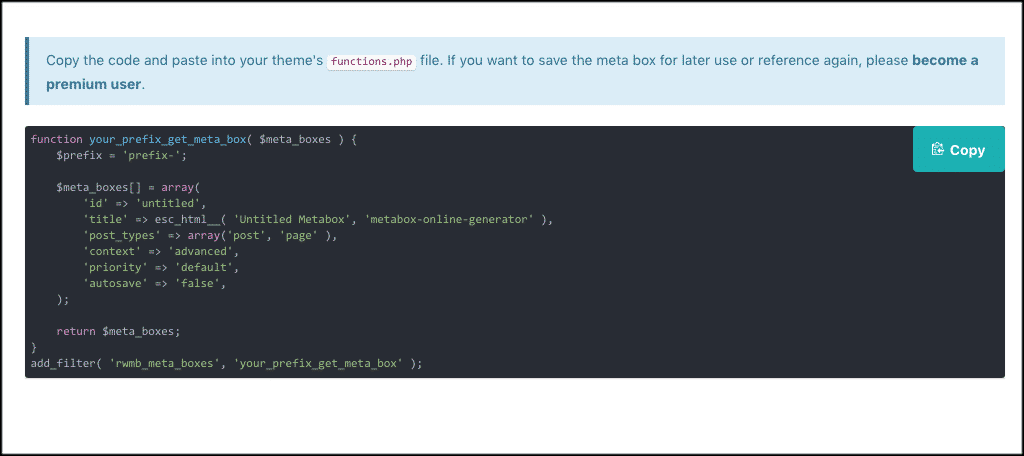
Once you have the code copied, you need to access your website’s functions.php file so that you can paste the code in.
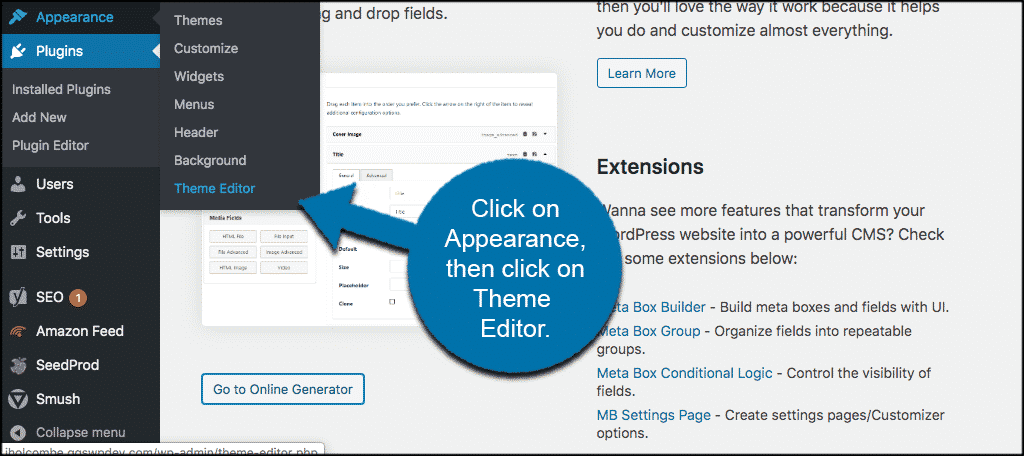
To access this file, click on Appearance > Theme Editor, located in the left menu area of your WordPress admin dashboard.
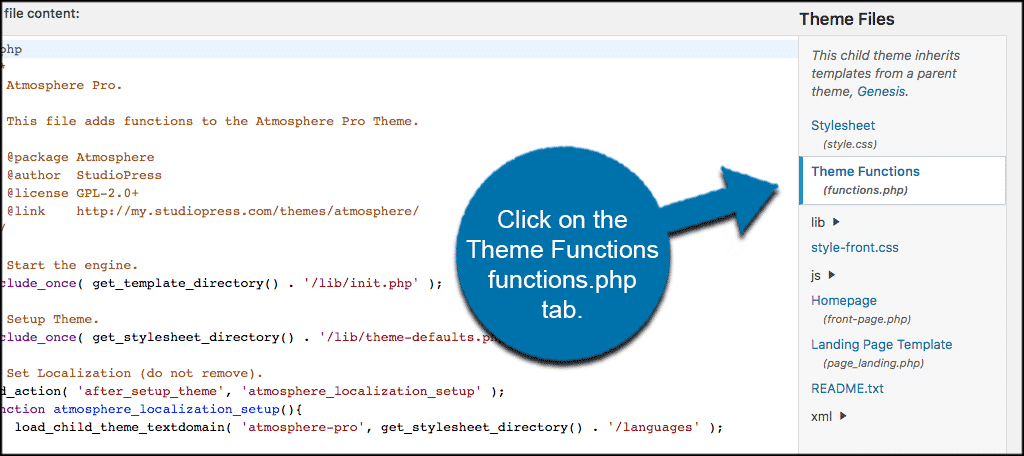
This will take you to your theme files. From here click on the “Theme Functions (functions.php) tab to access the file.
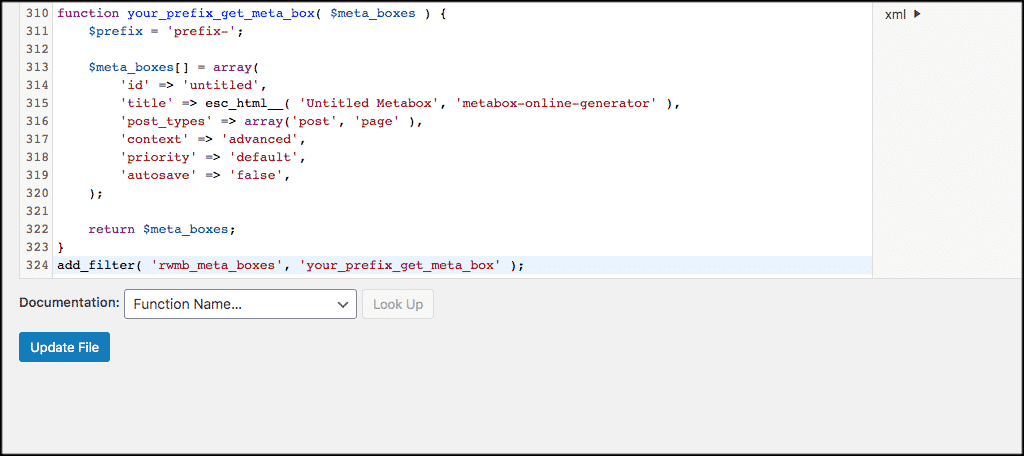
 Scroll to the bottom of the file and paste the relevant code there. Click on the “Update File” button when you are done.
That’s it! You have successfully created a new custom meta box for your website based on the information you used to build it using the online generator.
All the new custom meta boxes you create are now in your post editor. You can repeat this process as many times as you want and build as many custom meta boxes as you need.
Final Thoughts
Creating a custom meta box for your WordPress site gives you expanded functionality and allows you to do things within posts that you couldn’t do before. While you do have to copy and paste a little code, you don’t have to write any yourself.
Simply use the drag and drop meta box editor to build exactly what you need.
Have you created a custom meta box using this plugin? Are you more comfortable using a different method?