Building a system of tags on your WordPress website takes time. You have to create them and then manually apply them properly to each post. What if I told you that you could automatically tag posts in WordPress with the right plugin?
You see, categories are not the only thing you have to layout properly when creating a good content structure. While tags in WordPress don’t really have much impact on SEO, they can be very valuable to your site users. This is because they act as another way for users to search your website for the content they want.
What is a WordPress Tag?
A WordPress tag is a tool that is provided in the backend of WordPress that you can apply to posts and use to categorize them in a way that makes it easier for site users to look for the specific content they are interested in.
Every post on your site can have multiple tags. They are clickable links, so users can click on any tag they want to find similar content to what they are reading or viewing.
It is free to add tags to your posts, as it is built-in to WordPress by default. That being said, tags are not based on any sort of hierarchy or structure, and you can publish posts without any tags at all.
Oftentimes tags can become time-consuming in WordPress. This is especially true if you have a large, content-driven site and you are trying to categorize and tag each post with multiple tags.
Categories are different than tags and should be treated as such. Today, I am going to show you how you can automatically tag posts on the fly with the use of a plugin.
Not only does this make the process of tagging posts easier, but it also saves a lot of time. Let’s take a look at the plugin in question and see what all it offers.
TaxoPress
TaxoPress is a smooth, clean, fast WordPress tagging plugin that allows you to easily manage tags, categories, and even taxonomy terms. In this case, we are going to focus on the auto tag portion of the plugin.
This plugin allows you to easily add the best auto tags available on your site. With TaxoPress, you can build tags and taxonomies. After they are built, set the plugin up to automatically tag posts in WordPress the right way.
Think of this plugin as a related posts tool, except this is built specifically for tags. The TaxoPress plugin is pretty straightforward, despite having numerous configurations that you can set up. Once the plugin is installed and activated, you will have the ability to:
- Manage Taxonomies
- Create Tag Clouds
- Manage Terms
- Auto-Create Terms From Posts
- Automatically Suggest Terms From Posts
- Link Words to Tags
If you are looking for the easiest way to manage tags in WordPress, then this is the plugin for you. Let’s get it installed and set up together.
Note: There is a pro version of this plugin that unlocks even more features for WordPress auto tags. If you feel this is something your site needs, then go ahead and give it a look. The rest of this tutorial is based on the free version of the plugin.
How to Automatically Tag Posts in WordPress
Step 1: Install and Activate the Plugin
Before you can start automatically tagging your WordPress posts, you first need to install and activate the plugin. To do this, head over to the Plugins page in the WordPress admin dashboard.

On that page, you will find a search field. Use that field to search the plugin by name. When you see it come up, go ahead and install and activate it right from there.
Step 2: Go to the TaxoPress Settings Page
Now that the plugin is installed and activated, you want to go ahead and access the main settings page for it. This is where you will set all of the configurations you want.
To access this page, click on TaxoPress > Settings, located on the left side menu area of WordPress.
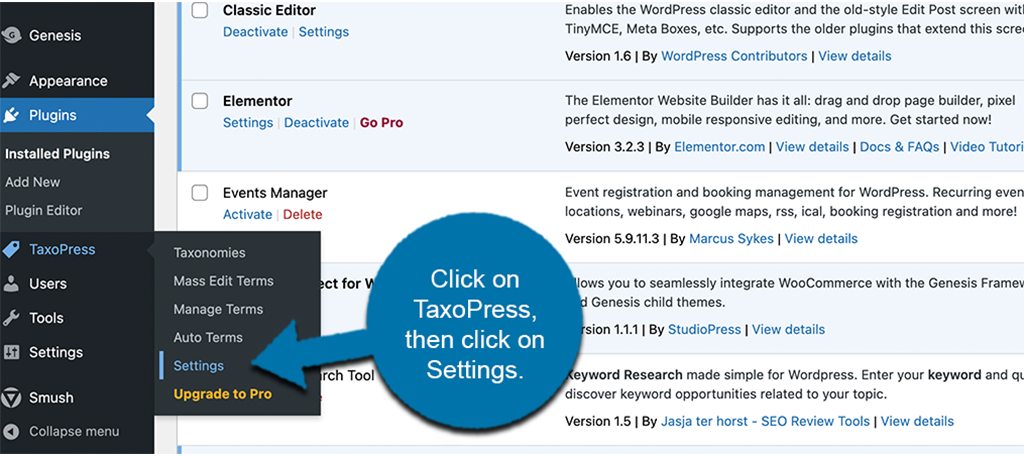
You can see that this is now an available option because you activated the plugin.
Step 3: Configure the Plugin
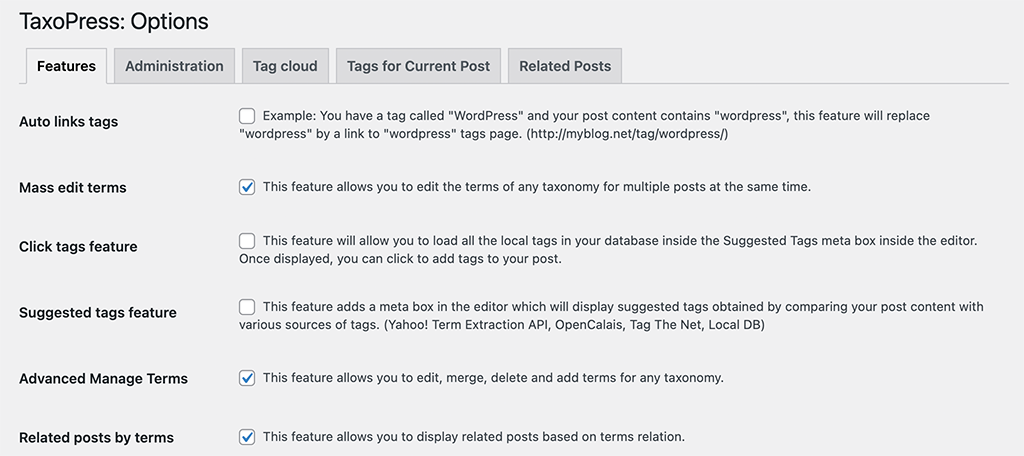
At this point, you have made it to the main settings page. It is time to go through everything and configure it all how you want. You will see that there are five main tabs on the settings page. They include:
- Features
- Administration
- Tag Cloud
- Tags for Current Post
- Related Posts
Let’s take a look at each tab.
Features
This is where you can select all of the main features you want to have. Run through them and make the selections that are relevant for your website.
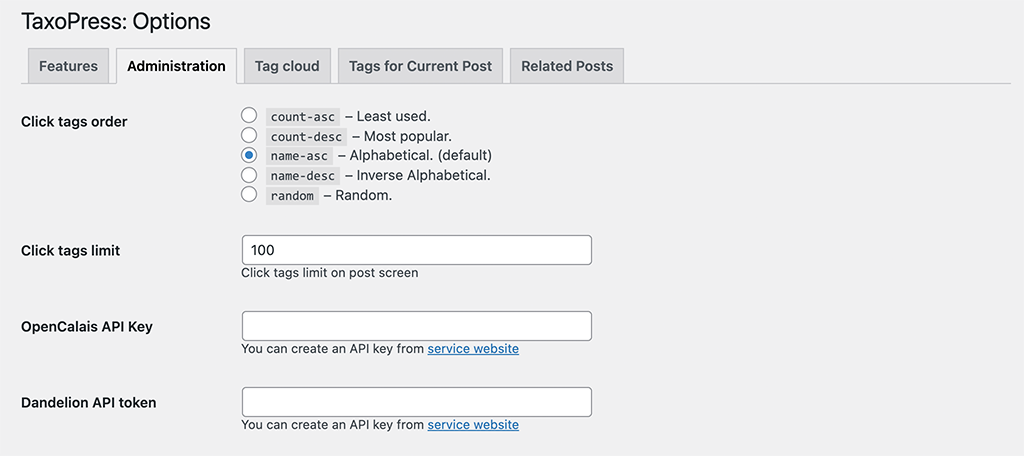
Administration
These are several administration-related options to configure. They include things like a tag order, a limit, and API options.
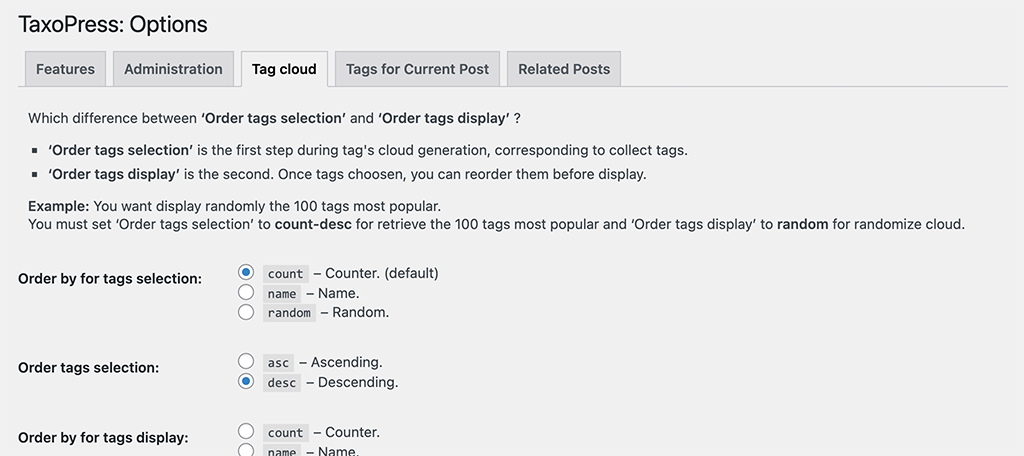
Tag Cloud
There are quite a few configurations to be made under this tab. You want to set your tag cloud options how you want them to act on your site.
You will want to choose link colors, font sizes, popularity, display order, and link format.
Tags for Current Post
In this section, you will configure how tags will automatically be added to singular posts. Scroll down through the options and set it how you see fit. You can always come back and reconfigure a few things if needed.

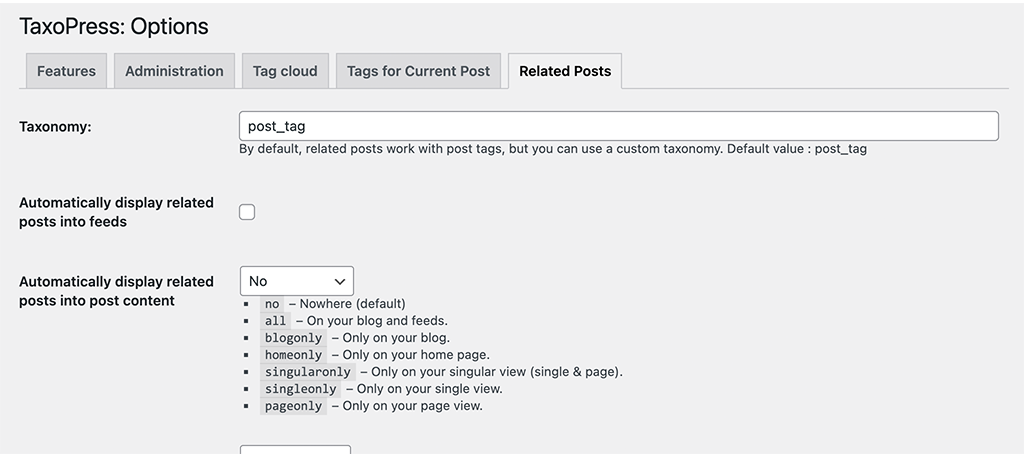
Related Posts
Last, but not least, is the “Related Posts” tab. This tab is made available so that you can configure how tags and related posts will work together. Link formats and post orders are a couple of the available options.
Make sure you click on the “Update Options” button when you are finished. This will ensure all the configurations you made are applied.
Step 4: Manage Terms
Let’s go over to the ‘Manage Terms” tab. You will find this tab under the main TaxoPress tab on the left side menu area.
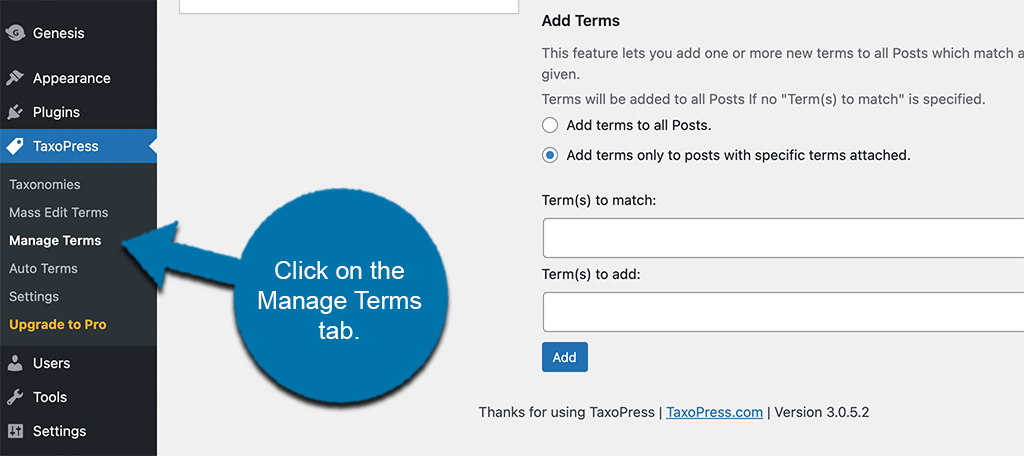
Once on the ‘Manage Terms” page, go ahead and manage any of the existing terms you have. This page allows you to:
- Add
- Rename
- Merge
- Remove
- Delete
- Delete Unused
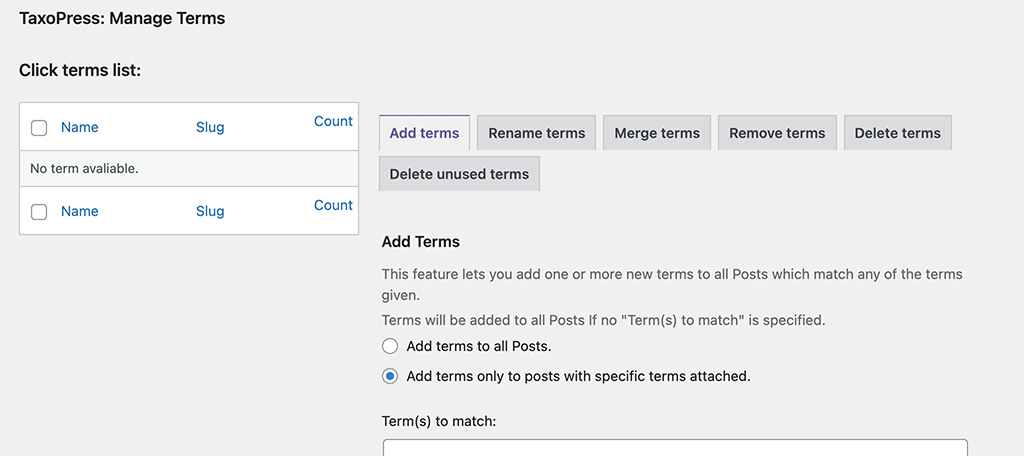
This is where you can fully manage all your tags/terms at any point so come back here to do that whenever you need to.
Step 5: Configure the Auto Terms Settings
You have made all the configurations you need and have visited the “Manage Terms” page and set all that up. Right now, you should have plenty of terms to work with and use.
Click the “Auto Terms” tab on the left side menu area.
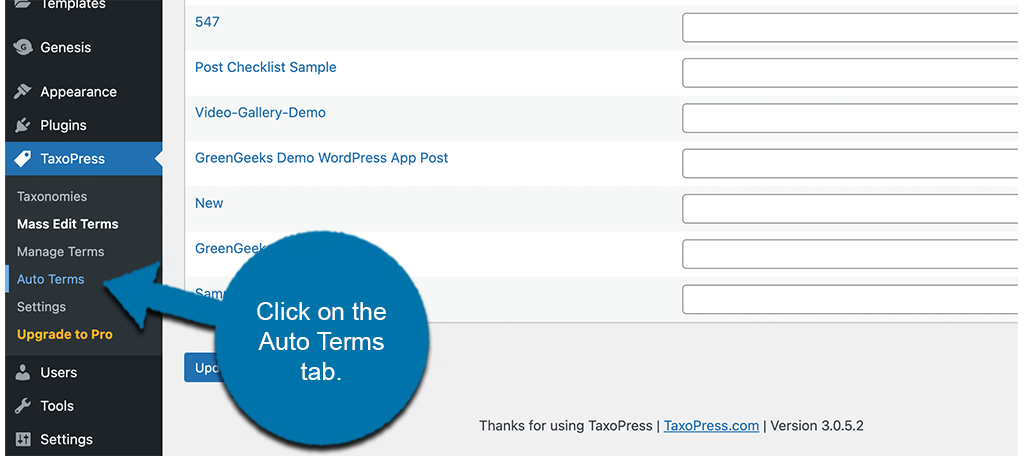
From here, scroll through the available options and configure this how you see fit.
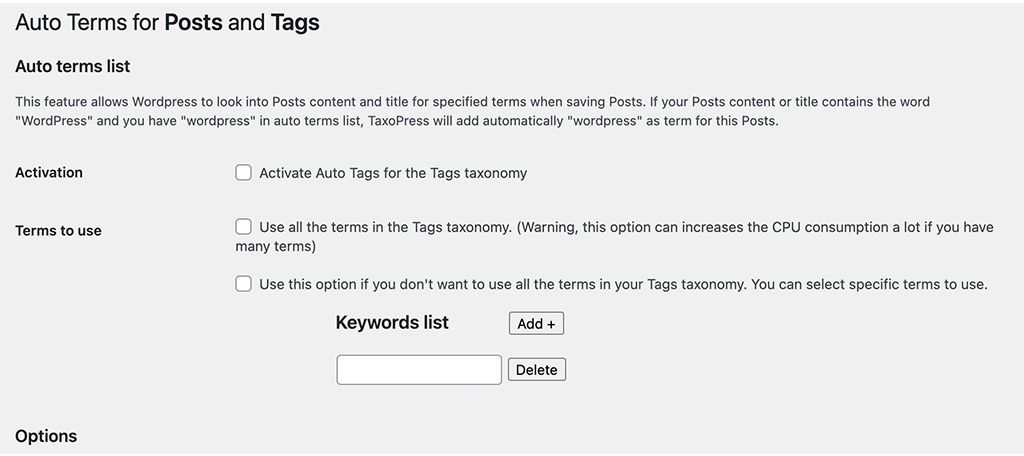
That’s it! You are fully up and running now and should be able to automatically tag posts appropriately as they are published.
Mass Editing Terms
Of the many really great options that are built-in to the TaxoPress plugin, they also give you the ability to mass edit terms. This is a great option if you have a bunch of them on your site and you are looking for a way to quickly edit a lot at once.
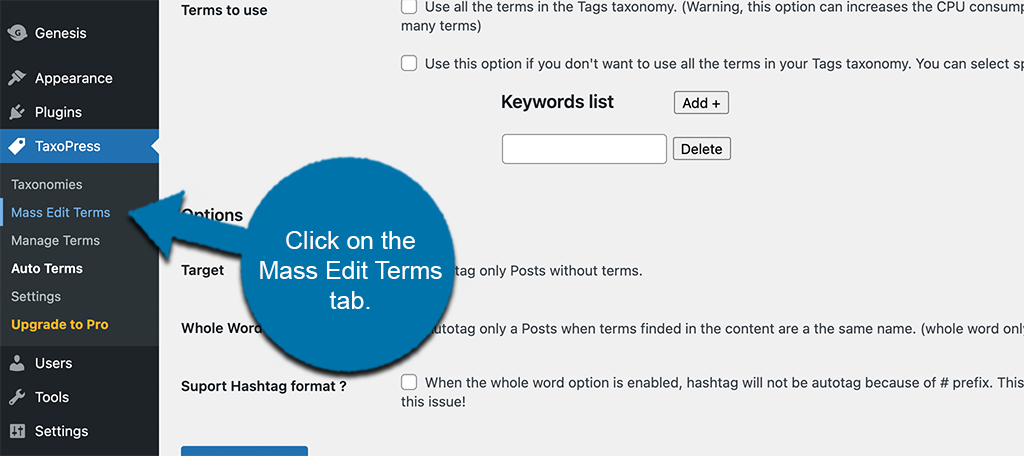
To access this section, click on the “Mass Edit Terms” option that is located on the left side menu area. Again, this will be housed under the main TaxoPress tab.
From here you will be able to mass edit the terms that are on your site.
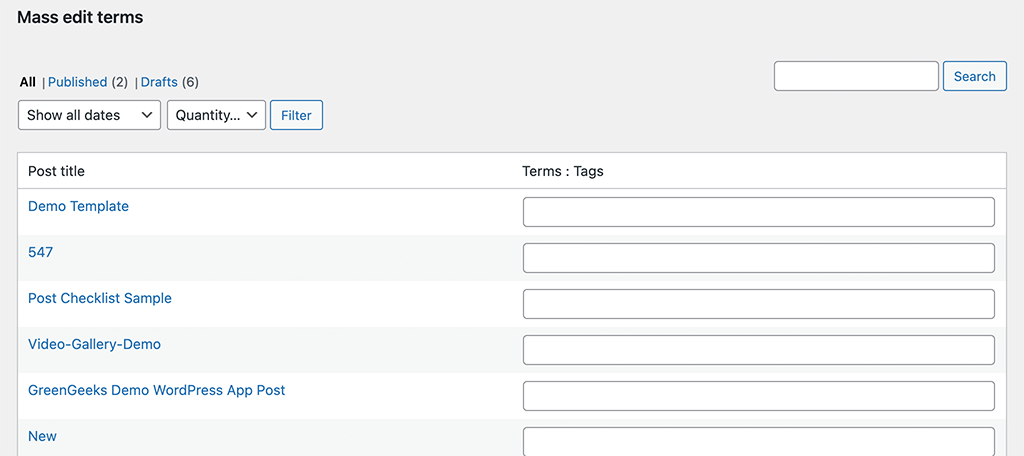
Note: The terms above are sample terms. The list you see will be based on what is on your site.
Final Thoughts
Having the ability to easily automatically tag posts in WordPress is a big deal because it will save a lot of time. Once you get the plugin running, you simply configure it and get your tags laid out properly, the plugin will then do the rest.
Have you ever tried other tag-related plugins for WordPress? Do you prefer to stick with the manual method of adding tags to all your post?
Thanks man, i use this plugin as you say… For now i love it, maybe i create a similar plugin but base on my needs…
So i dont need to create a keyword set for my self… thanks a lot
that’s very helpful, but i’m use amp site.. any solution for my problem?
I’m not entirely sure what your problem is. But if it has anything to do with AMP not tagging posts automatically, I would suggest contacting the plugin’s developer. AMP has a habit of stripping a lot of things in the background so that the site runs faster on mobile devices.