Are you looking for a way to inform your visitors about something on your WordPress website? If so, tooltips are exactly what you are looking for and can help clarify your website’s content. However, there is no way to use tooltips without installing a tooltip plugin or adding a few lines of code.
While this may sound problematic, don’t worry, adding plugins and code to WordPress is easy for beginners. Today, I will demonstrate how to add tooltips with the WordPress Tooltips plugin in WordPress using two different methods.
What Is a Tooltip in WordPress
A tooltip is a small box that appears when you hover over a specific object on your website. The purpose of the tooltip is to inform visitors about what they are hovering over. These objects can include words, images, GIFs, videos, and just about everything else you can put on a WordPress page.
For example, say you add a tooltip to some images on your blog. The tooltip could show the date the picture was taken, the name of the picture, the area the picture was taken, the photographer of the picture, or many more things. The point is to inform the visitor of a fact they were unaware of or to make the point you are trying to make clearer.
Installing WordPress Tooltips Plugin
Without a doubt, adding WordPress plugins to your website is the easiest way to add any feature. The WordPress Tooltips plugin makes adding tooltips easy for both pages and posts.
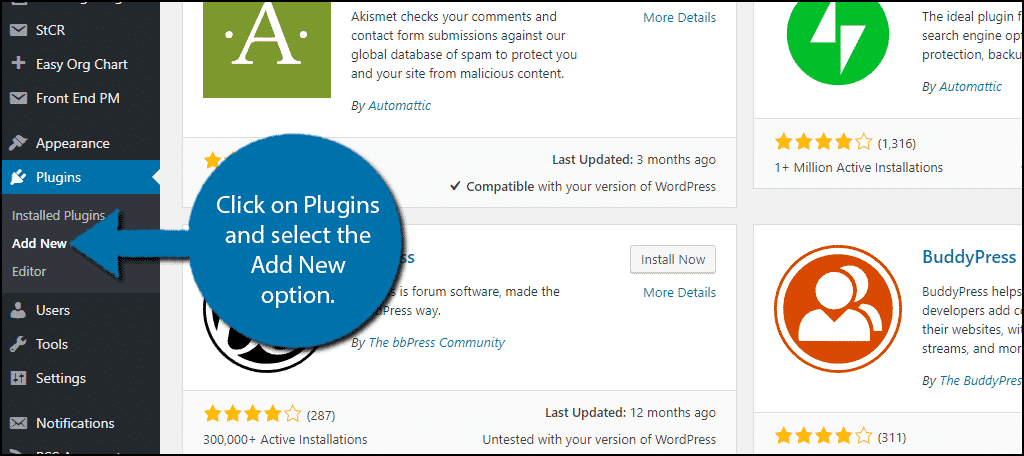
Let’s start by clicking on Plugins and selecting the Add New option on the left-hand admin panel.
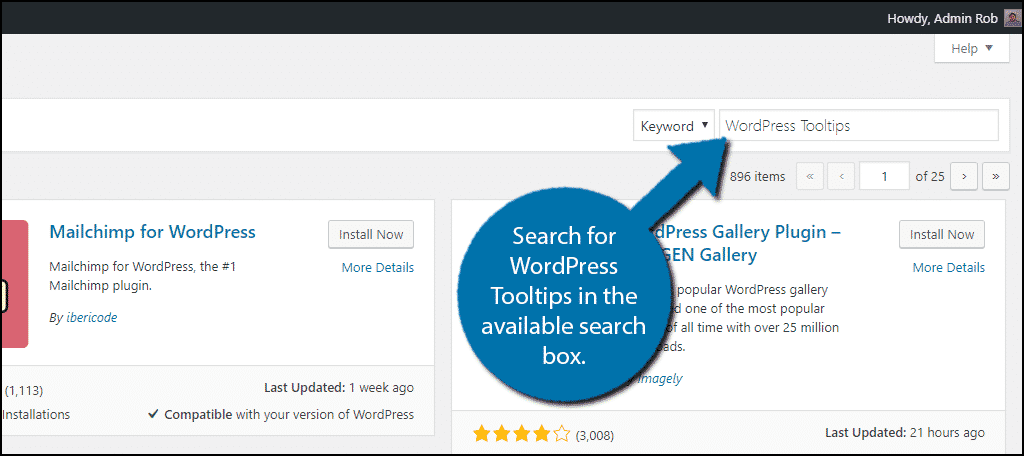
Search for WordPress Tooltips in the available search box. This will pull up additional plugins that you may find helpful.
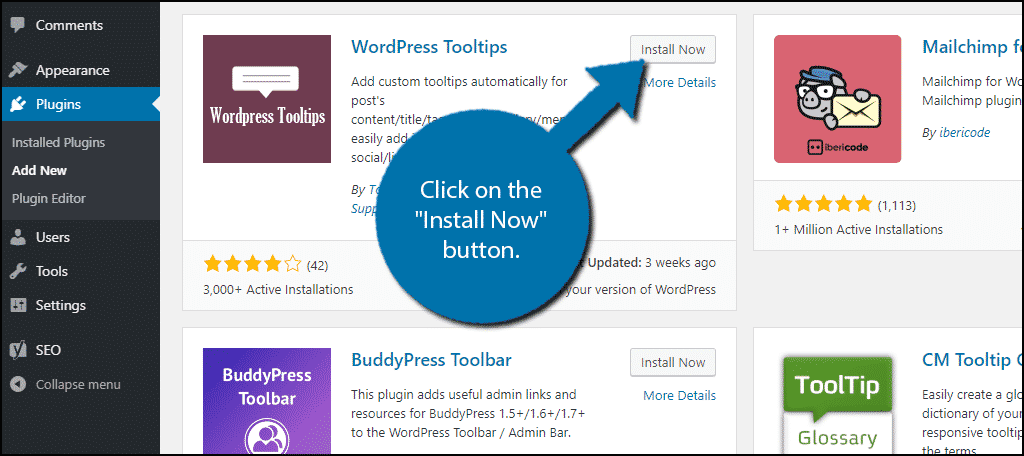
Scroll down until you find the WordPress Tooltips plugin and click on the “Install Now” button and activate the plugin for use.
Method 1: Shortcode
After installing the WordPress Tooltips plugin, you now have access to shortcodes that can be added to any post or page. This is by far the easiest way to add tooltips in WordPress and my preferred method.
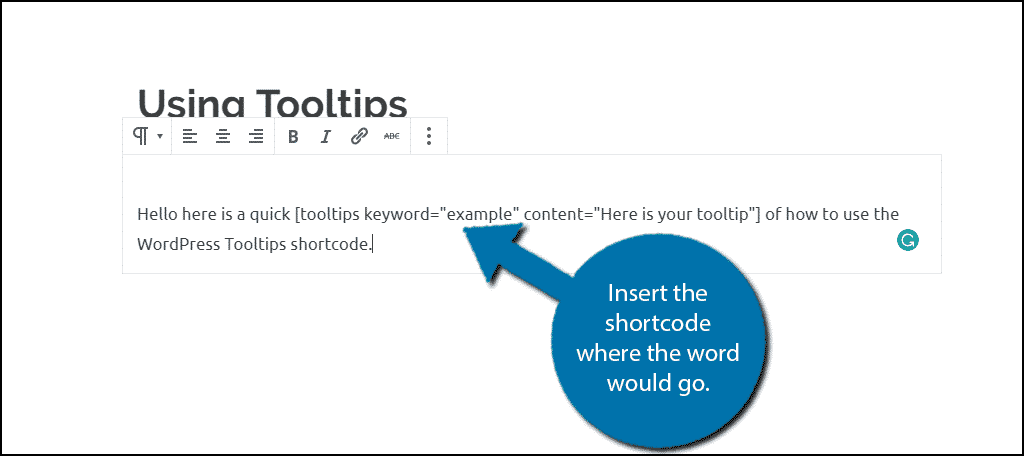
To create a tooltip with words, use the following shortcode:
[tooltips keyword="Phrase Where Tooltip Will Appear" content="The Tooltip Message"]
Here is an example of how the shortcode is used.
Here is the result.

Alternatively, to create a tooltip with an image, use the following shortcode:
[tooltips keyword="Phrase Where Tooltip will appear" content=" "]
"]
In this case an image will appear when you hover over the word, which has a lot of uses.
Congratulations, you have successfully learned how to use WordPress Tooltips shortcodes to add tooltips to your WordPress posts and pages.
Method 2: Adding Multiple Tooltips
Let’s say you want to add a tooltip every time you say “Hello World!” throughout your website. In the last method, you would need to manually add the shortcode to every instance of the phrase “Hello World!”, which takes too long. Instead, this method allows you to add global tooltips to your website.
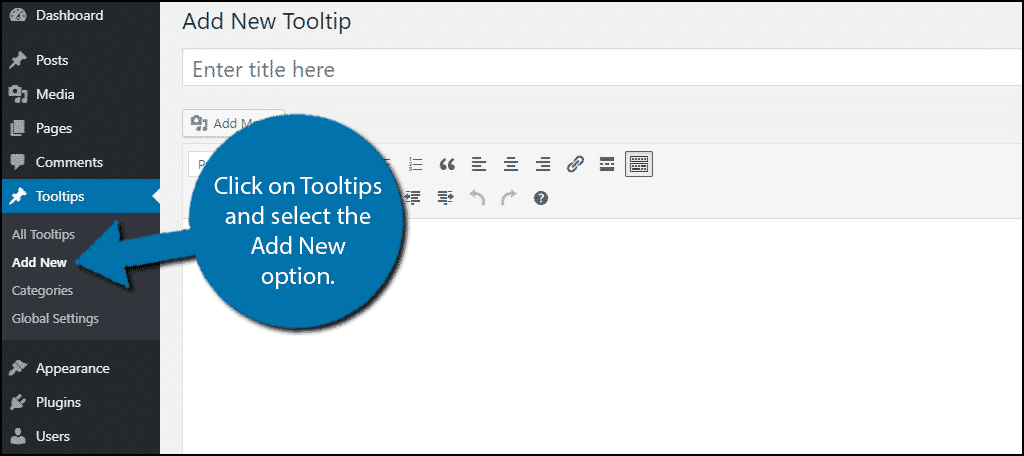
On the left-hand admin panel click on Tooltips and select the Add New option. This will pull up the main settings page.
As you may notice, this plugin utilizes the classic visual and text editors. However, this is fully compatible with the Gutenberg interface on your website’s posts and pages.
The plugin is very straightforward. The title is the word or words you want the tooltip to appear over. What you insert into the editor is what the tooltip will say.
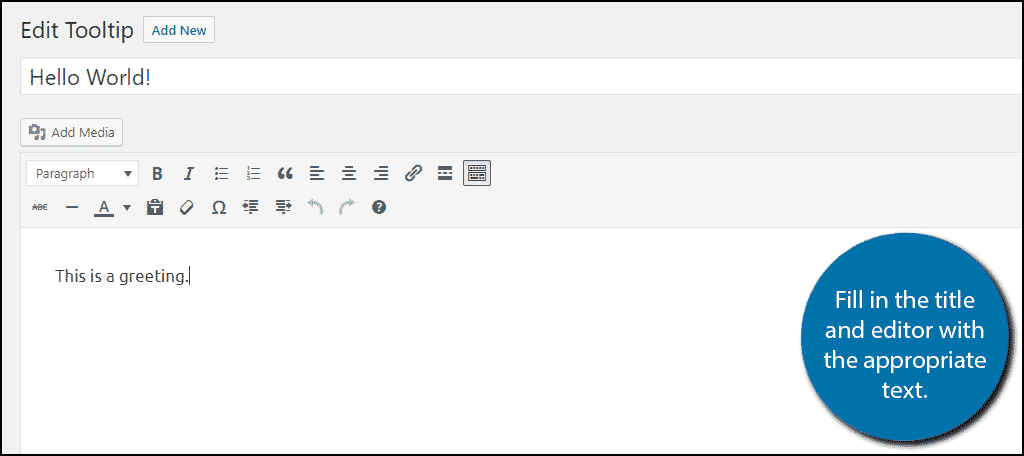
For example, if you want a tooltip for the phrase “Hello World!” to say “This is a greeting”, the title of the tooltip must be “Hello World!” and the editor should have “This is a greeting”.
Fill in the title and editor with the appropriate text. The title spelling needs to be a perfect match to work, although it is not case-sensitive.
By default, the plugin will add the tooltip to every use of the word or phrase in both your posts and pages. For this reason, you need to avoid adding tooltips to very common words.
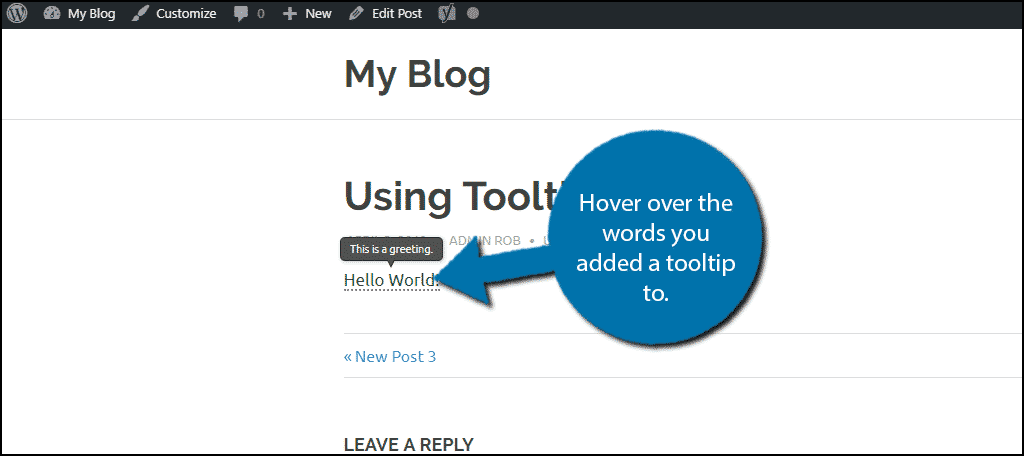
Go to any page or post with the phrase you created to view the results.
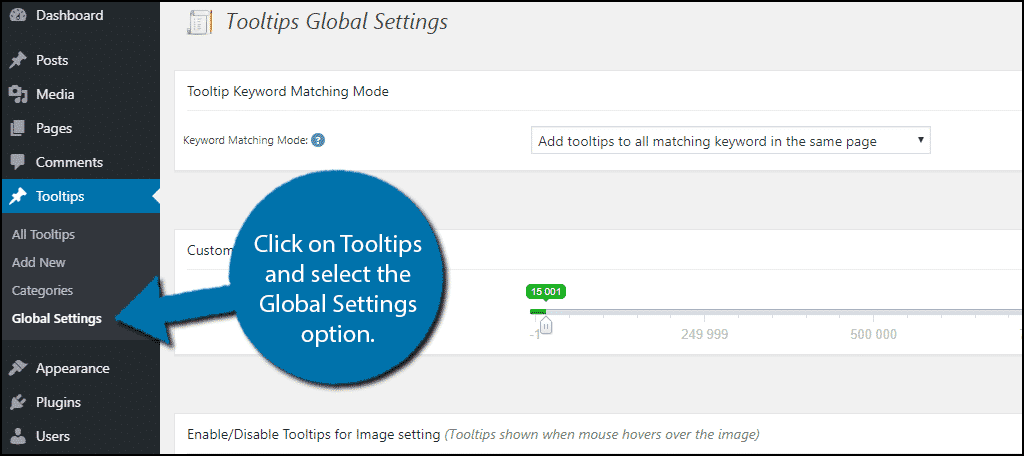
You can change various settings about how your tooltips appear and where they are allowed to appear by tweaking the settings. Click on Tooltips and select the Global Settings option.
Here, you can make the plugin work exactly how you want it too. Congratulations, you have successfully learned how to set up and use the WordPress Tooltips plugin.
Avoid Overuse
Tooltips are a great way to add extra information to your posts and pages, but you need to avoid overusing them. It can be very distracting to readers if every other word has a tooltip. The last thing you want to do is annoy your visitors so using them sparingly is best. The rarer they are, the bigger the impact they will have.
What are you using tooltips for in WordPress? How easy did you find the WordPress Tooltips plugin to use?
I used the first method provided, how do i make the font appear larger on my actual website