If your website has a lot of content, you are probably looking for a way to get it popular again. One way to do this is to change the publish date to the current date. As a result, this older content will appear on the front page or where ever new posts are displayed.
However, WordPress does not allow you to do this, at least by default. But like most things in WordPress, I have found a plugin that can.
Today, I will demonstrate how to use the WP Auto Republish plugin to republish old articles.
Why Old Content Matters
If your website has been around for a few years, I am confident you have put together an impressive amount of content. However, if you have ever taken a moment to check out the number of page visits old content gets, you will be very disappointed.
Older content does not perform as well (there are exceptions) for the majority of websites. This is because WordPress pushes the newest content to the front of your website.
In many cases, old content is still relevant and you can take advantage of it by giving it a new chance at life. And this can be accomplished in two ways:
- Republish the content
- Rewrite the content
Making updated content requires a lot more effort and should be done if the content is severely out of date or does not follow your current formatting preferences. However, if the content is perfectly acceptable to your standards, there’s no harm in republishing it.
How to Use WP Auto Republish
The WP Auto Republish plugin allows you to repurpose content to get it the attention it deserves. It is important to clarify what the term republish actually means.
You are not deleting the post and publishing it a second time.
Instead, you are simply resetting the publish date so that it appears as new content. This will help your content rank better on Google searches as well, after all, Google usually pushes new content first. It will also show the content on your website and update the RSS feed.
Luckily, this plugin is very simple to use, so let’s get started.
Step 1: Installing WP Auto Republish
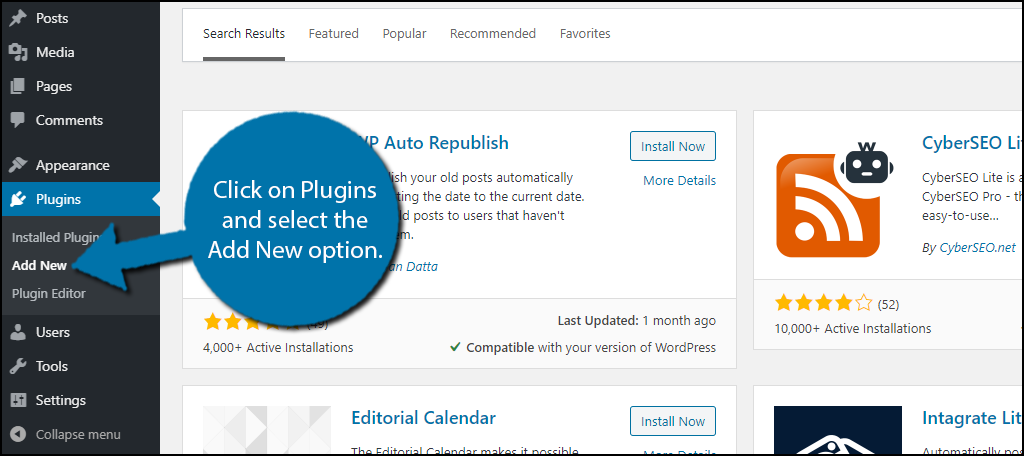
Click on Plugins and select the Add New option on the left-hand admin panel.
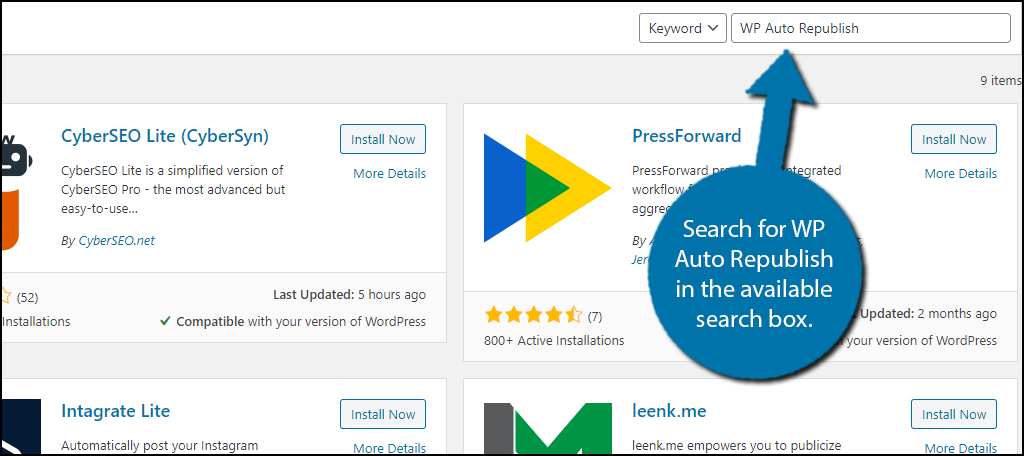
Search for WP Auto Republish in the available search box. This will pull up additional plugins that you may find helpful.
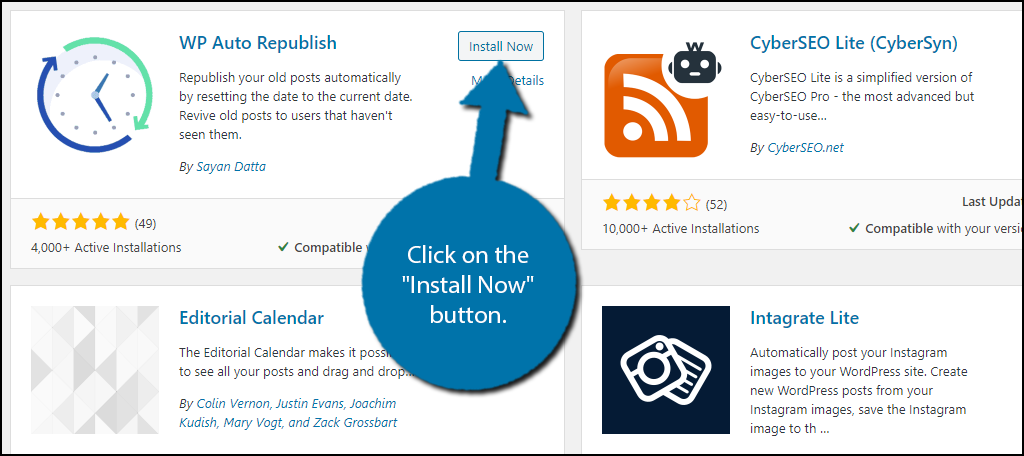
Scroll down until you find the WP Auto Republish plugin. Click on the “Install Now” button and activate the plugin for use.
Step 2: Understanding WP Auto Republish
The plugin is easy to use, but before we actually go into using the plugin, it’s important to understand what this plugin can and cannot do.
The plugin allows you to select how old content should be before it is republished but does not allow you to pick a single piece of content. This means that all of the content of that specific age must be ready to go before the republish date.
Thus, if you plan to do any touchups or formatting changes, they need to happen first.
This plugin is intended for large blogs that have hundreds of posts to choose from. If you do not have a lot of content, you might end up pushing the same content over and over if you do not add new material often.
The plugin allows you to control the exact time and date posts will be republished on a schedule. However, if you end up releasing a lot of content on that day, you could easily coverup the republished content.
Thus, I recommend dedicating a day that you do not normally upload or making sure that you do not release a lot of content at once.
Step 3: WP Auto Republish General Settings
With that out of the way, let’s dive into actually using the plugin.
Note: To actually see this plugin work, you will need multiple published posts.
On the left-hand admin panel, click on WP Auto Republish and select the WP Auto Republish option.
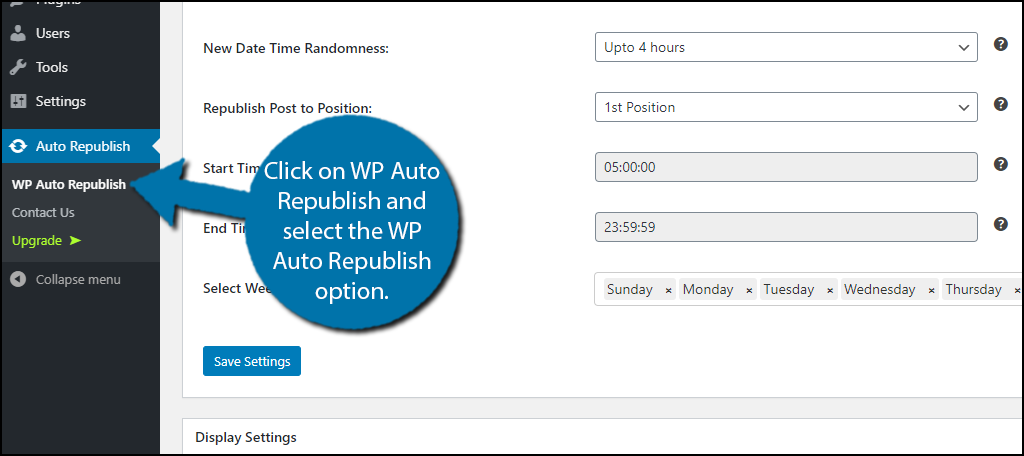
The settings are broken up into 4 tabs. All of them are pretty straight forward. Let’s begin with the General Settings.
You must choose to enable auto republishing. If this switch is not green, the plugin will not work.
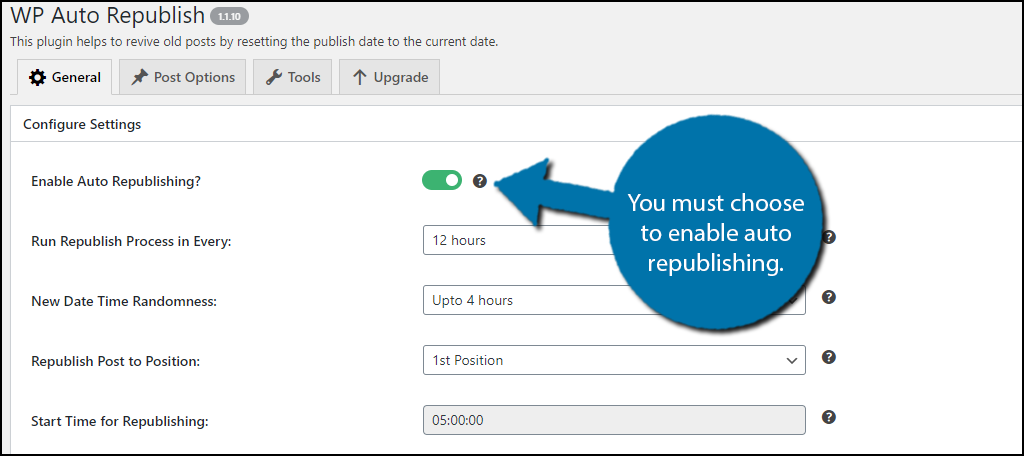
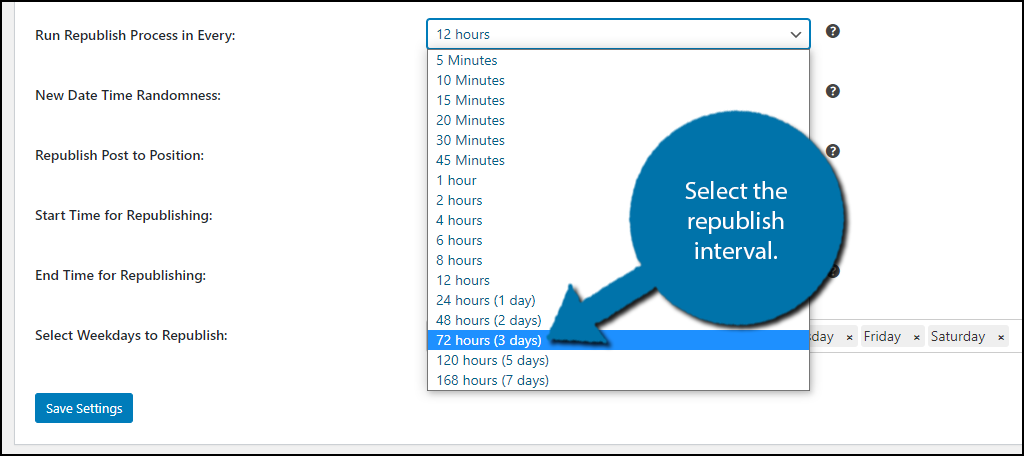
The first option allows you to decide how much time should be between every republish. This is really important because it makes sure you do not flood your website with content. I personally recommend having a few days between republishes, but the choice is yours.
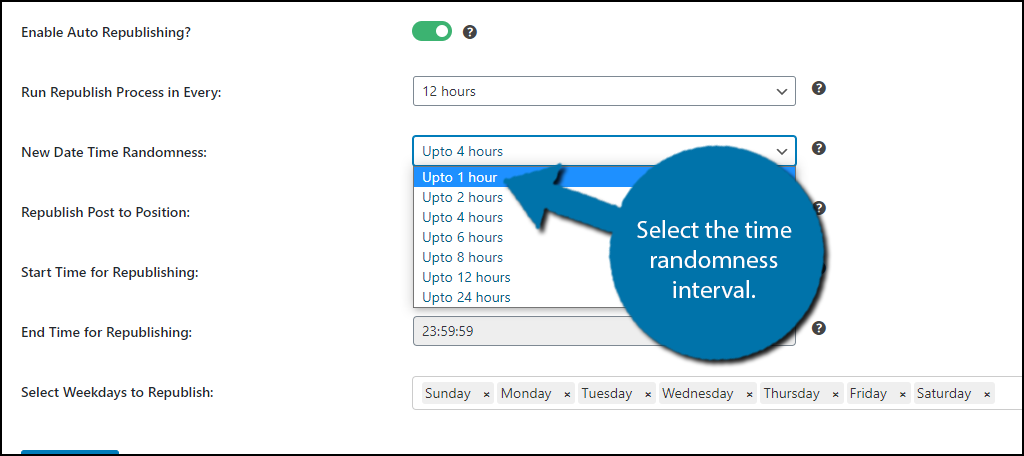
There is a randomness element to add time to the republish interval. Unfortunately, you cannot disable it. This will add the selected time to the minimum republish interval. Select the value that best suits your needs.
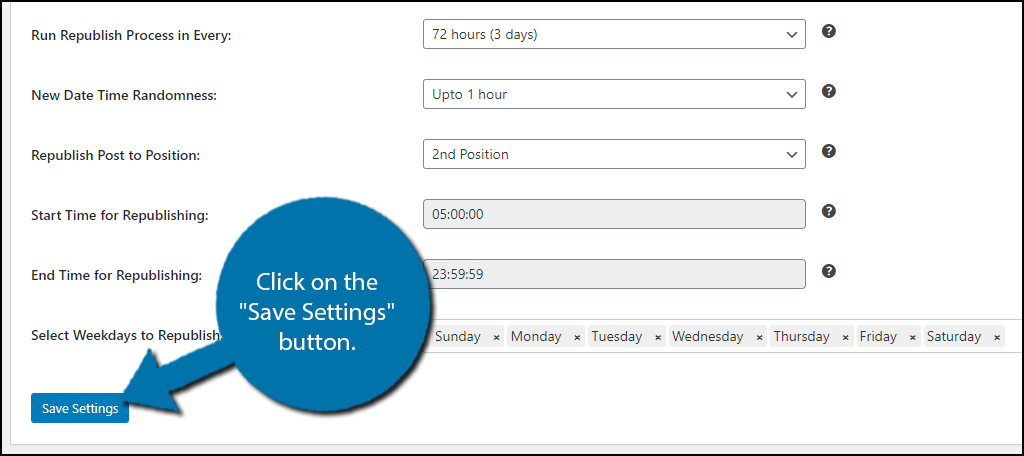
Next, you can select the republished post position. You can only choose between the 1st and 2nd positions. If you have new content planned for that day, I recommend the second position.

Now you can specify a time range republishing content. You can select the time range and the day of the week. When you are done, click on the “Save Settings” button.
There is also the display settings underneath this. This controls if the original publish date is visible and by default it is disabled. I recommend leaving this setting, but you can change it.
Step 4: WP Auto Republish Post Settings
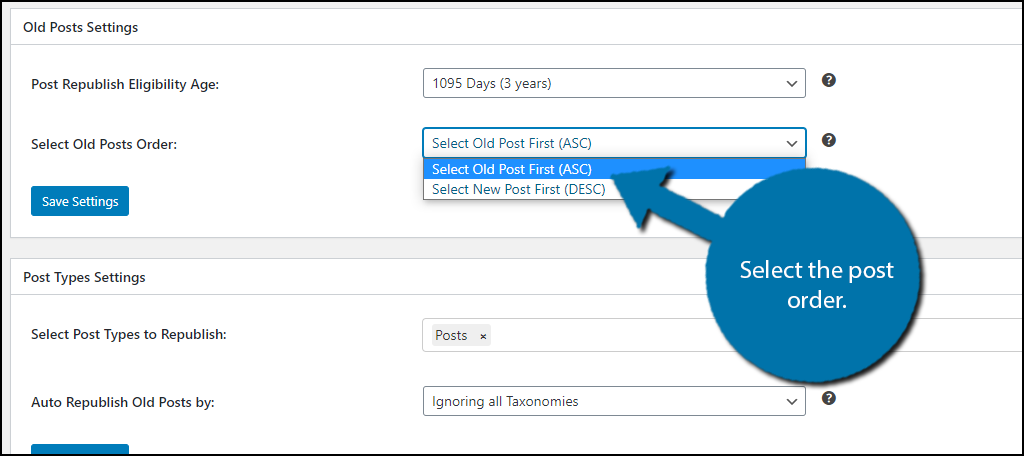
On the Post options tab, you can decide how old content should be for it to be republished and the order in which they are republished. This can range from months to years.
Selecting the post order is not very simple. You have two options, old post or new post first. The best way I can explain it is through an example.
Let’s say you have 3 posts that were published in 2011, 2020, and 2017.
If you picked the first option, old post first, it would be arranged like so:
- 2011
- 2017
- 2020
If you picked the second option, new post first, it would look like this:
- 2020
- 2017
- 2011
And let’s say you want to republish every post that is 3 years old.
The order of posts will change drastically depending on this choice. If you selected the first option, 2011 would be republished followed by 2017. However, in the second option 2017 would be first followed by 2011.
Thus, the order can have some pretty big implications. carefully take a look at your content before you decide.
Finally, you the post types and taxonomies you might want to ignore. This will give you more control over what content gets republished. For example, you can only include posts that have a Marketing tag, or any other tag you might have available.
When you are satisfied with the changes, click on the “Save Settings” button.
The plugin is fully functioning at this point. There are two more tabs, but they can be ignored. The tools tab will just give you the option to remove the plugin data on an uninstall. The Upgrade tab is for going premium.
Congratulations, posts will now be republished based on the settings you chose. If things are not going as expected, check the settings carefully.
Make Sure It’s Still Relevant
While there is plenty of content that can be reused months or even years later, there is much more content that cannot. Try to make sure all of your content follows the same formatting and quality standards.
If not, this content could stand out in the wrong way.
It is especially important to make sure the information is still correct. After all, things do change over time, like SEO practices.
Did you find the plugin easy to use? How old is the content you are republishing?
Hi Robert,
thank you for this great piece of content. just want to know one thing. Will this plugin also change the date shown in the Google search result.
I am waiting for your reply.
Great Article. Very Helpful
Thank you very much I follow your steps from the beginning to the end to set it up. thank you.
Hi Robert,
how can I auto republish posts from a specific category ???
Hello, if you go to the RevivePress dashboard and select “Post” at the top, you’ll see a section on that page for “Select Post Type(s) Taxonomies.” Enter the Categories or tags you want to include or exclude, depending on what you select for “Post Types Taxonomies Filter.”
Hi Robert, Thank you for this greet article and tutorial!
The plugin is great, except on thing, I can’t choose a different articles!
My website has an custom theme for apps, and there’s articles, and software which’s also articles in other way. Now, I can’t set the plugin to auto republish these software articles!
Hello Mohamed, you might need to contact the developer directly through the WordPress.org support forum. Sounds like you have quite a bit going on that the plugin is just not jiving with. Sorry we’re not much help on this one.