
The WordPress platform is constantly evolving to ensure that your website gets the best performance and that any security exploits are fixed. Thus, it is essential as a web developer that you update your WordPress plugins.
And while this is easy to do, most websites have a lot of plugins installed at any given time, which can make the process tedious. On top of this, plugins do not release updates at the same time, thus, it’s something you need to check on a daily basis.
Instead, the best way is to set up your website to update your WordPress plugins automatically.
Here are several ways to accomplish this.
Method 1: Use The Companion Auto Update Plugin
WordPress has a great selection of plugins to choose from that can do just about everything. As such, it should not come as a surprise to learn that there are plugins that can automatically update other plugins.
There are plenty to choose from, but this method will focus on the Companion Auto Update plugin. Another great alternative is the Jetpack plugin.
Step 1: Install Companion Auto Update
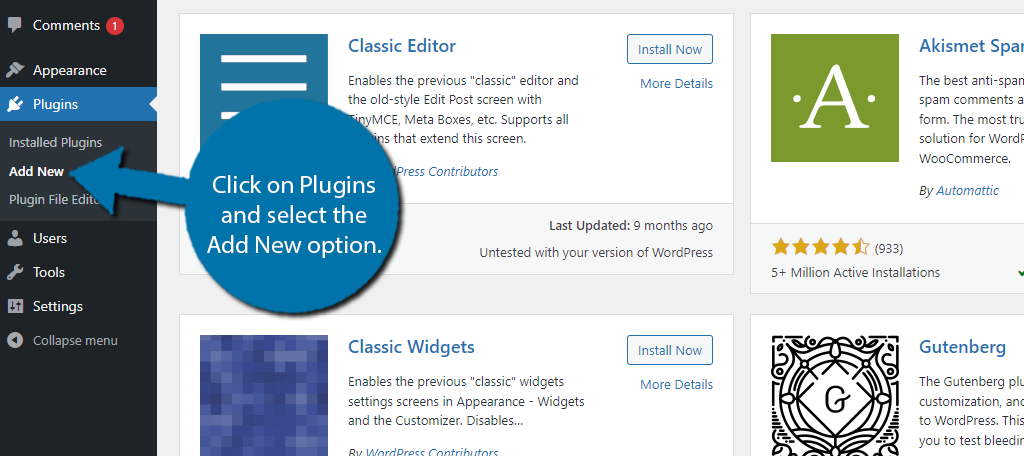
Let’s start by clicking on Plugins and selecting the Add New option on the left-hand admin panel.
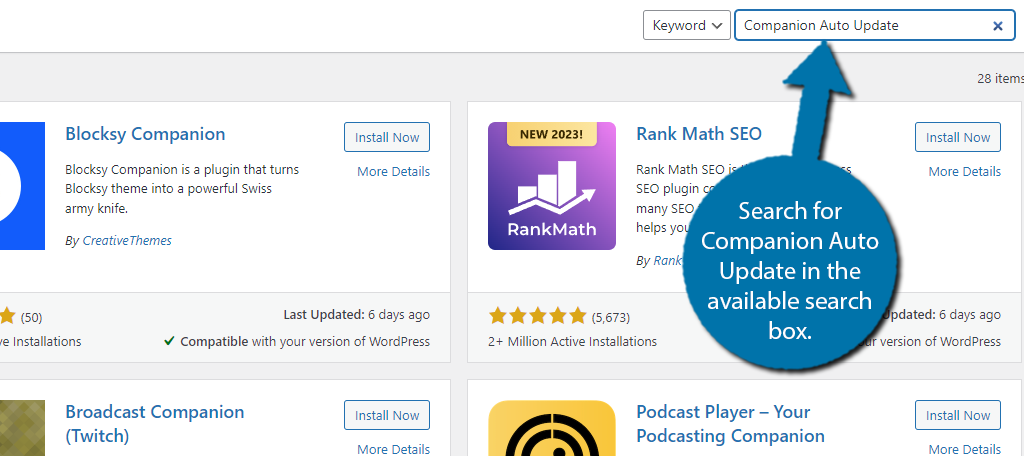
Search for Companion Auto Update in the available search box. This will pull up additional plugins that you may find helpful.
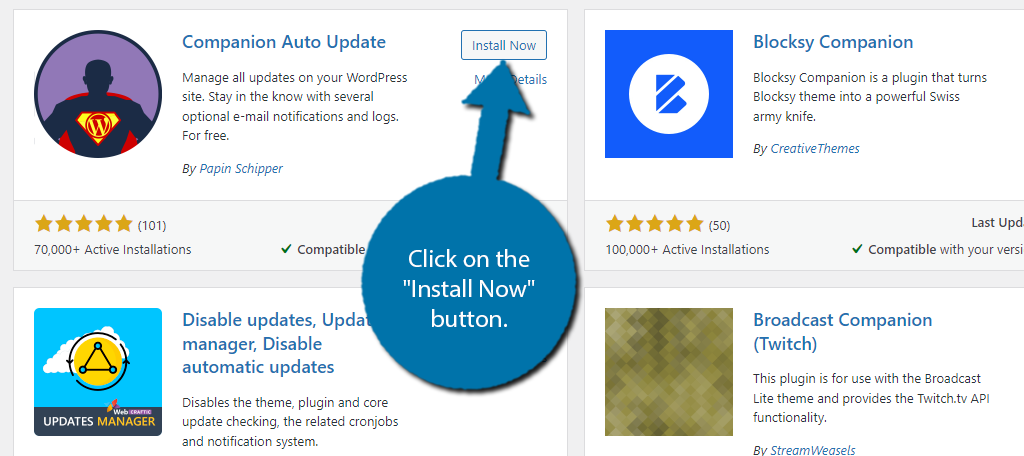
Scroll down until you find the Companion Auto Update plugin and click on the “Install Now” button and activate the plugin for use.
Note: The default settings of the plugin actually enable auto-updates for plugins upon activation. Thus, you don’t actually need the next step. However, there are other settings you can configure or disable, so keep following along.
Step 2: Enable Auto Updates For Plugins
Truth be told, this plugin can actually automate updates for anything in WordPress. This includes core WordPress files, themes, plugins, and other content. Thus, it is extremely versatile, but today we are just focusing on plugins.
On the left-hand admin panel, click on Tools and select the Auto Updater option.
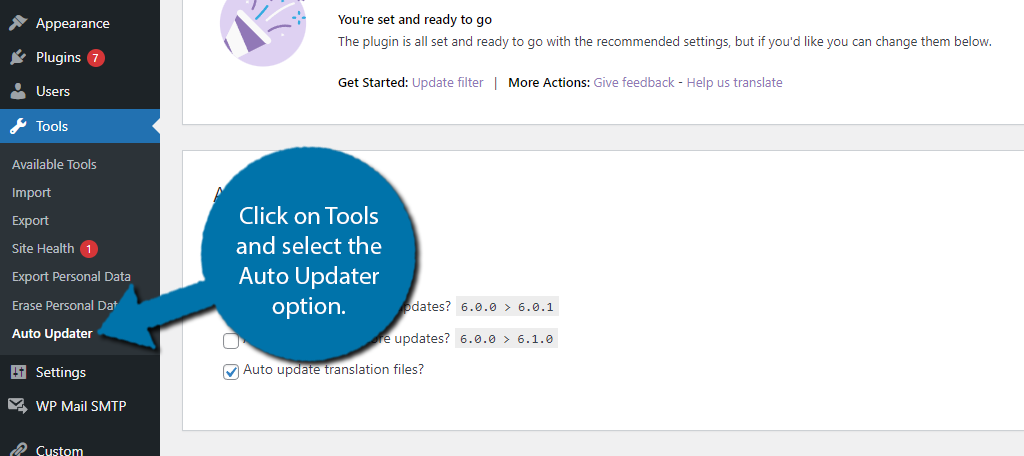
By default, the Companion Auto Update plugin will have four main components of WordPress selected for auto updates. These are:
- Plugins
- Themes
- Minor WordPress core files
- Translation materials
You can select or deselect any element you wish for automatic updates. However, I suggest leaving the selections as-is to provide the best experience for keeping your site functional.
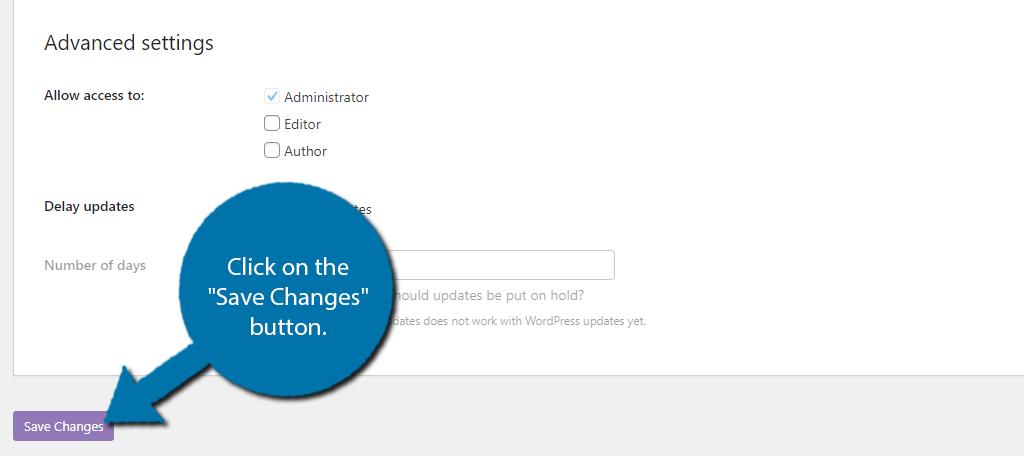
You can also change email notifications upon updating the various elements. However, you want to be careful when setting these options. If you have a lot of plugins and themes, your inbox could be quickly flooded with update messages.
Once you’re done making your selections, click on the “Save Changes” button at the bottom.
Method 2: Using Code to Update All Plugins
Some might think it is a bit odd to install a plugin for the sole purpose of updating plugins. While that is definitely the easiest route, another way to do it is by adding a few lines of code to WordPress to have the same result.
Luckily, adding this code is not difficult and just requires some simple copying and pasting. Thus, anyone can do it.
However, as always, when adding or editing code in WordPress, I strongly recommend creating a backup of your website before proceeding. This can help you recover from any simple mistakes that occur.
Step 1: Access the functions.php File
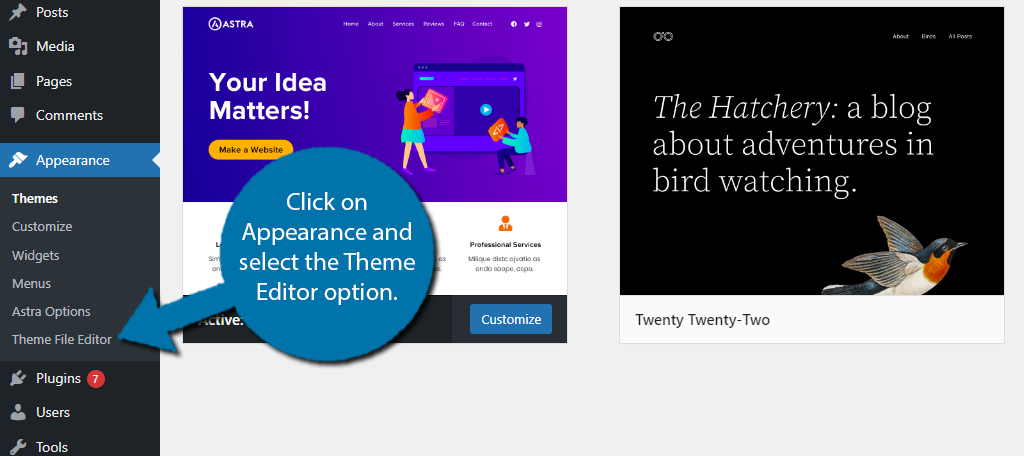
On the left-hand admin panel, click on Appearance and select the Theme Editor option.
In the top right corner, you should see your current WordPress theme. If for some reason this is not the case, use the drop-down menu to select your theme.
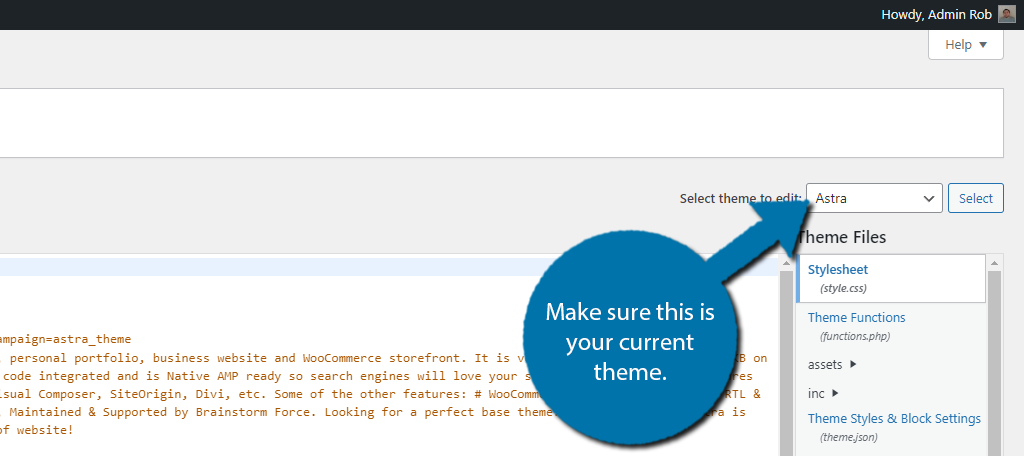
Under this, you will see a list of all of the files that your theme contains. Locate and select the functions.php file from the list on the right.
Step 2: Add Code
Add the following code to the functions.php file:
add_filter( 'auto_update_plugin', '__return_true' );
Click the “Update File” button on the bottom of the page to finish.

This will enable auto-updates for plugins you currently have installed in WordPress. If for any reason you ever change your theme, you will have to repeat this process as the code is stored in the theme files.
Method 3: Using Softaculous to Update Plugins
Softaculous is the go-to system in WordPress for installing applications or an entire CMS on your domain. It can also help you manage those installations. In this case, we can use it to manage your WordPress install to automatically update plugins.
It’s quick and easy, but only an option if your web host supports Softaculous (most do).
Step 1: Access Softaculous
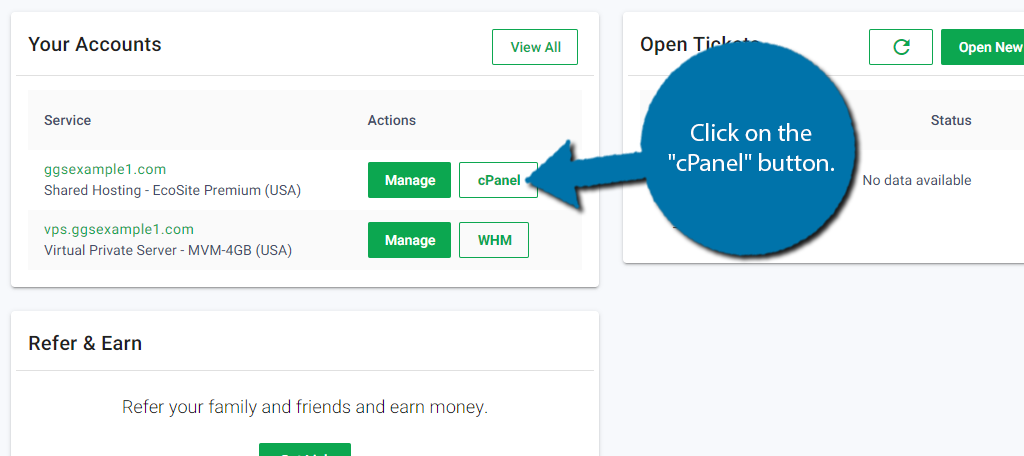
Log into your web hosting account and click on the “cPanel” button.
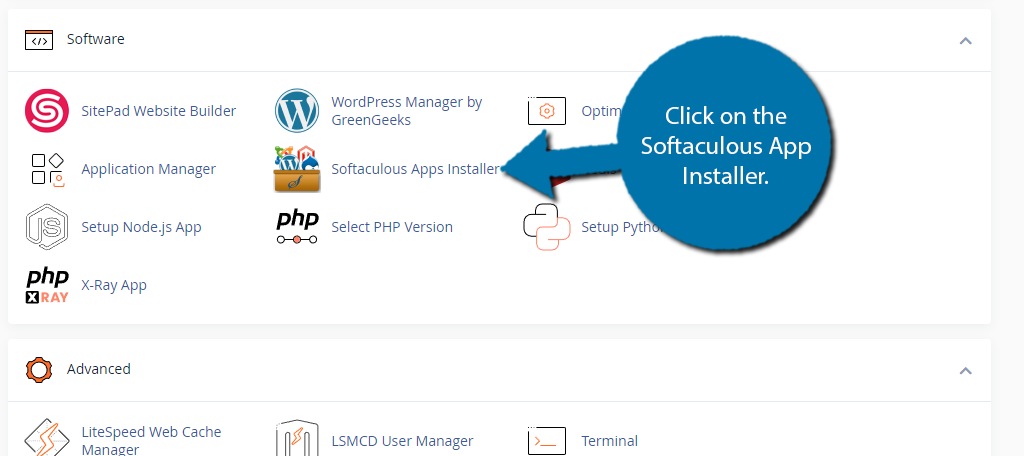
Locate the Software section of the cPanel and click on the Softaculous App Installer.
Step 2: Enable Automatic Updates for Plugins
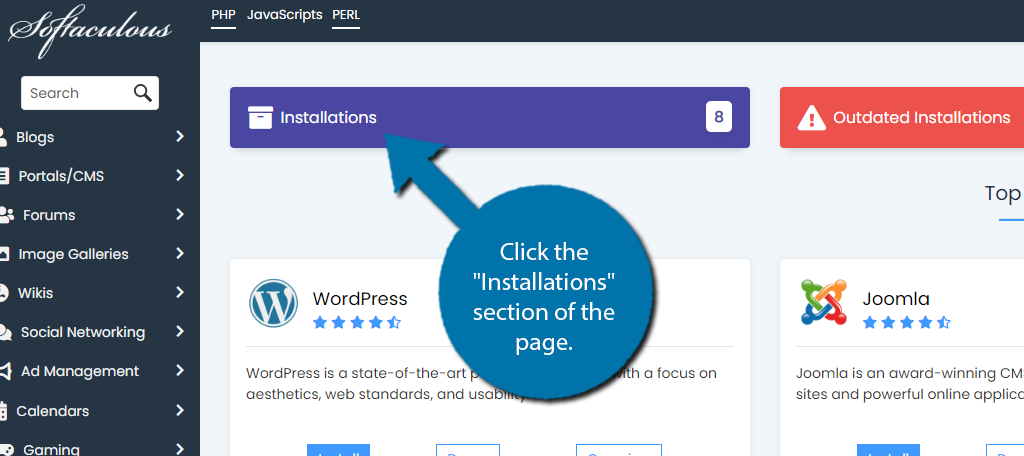
In Softaculous, click the “Installations” section of the page.
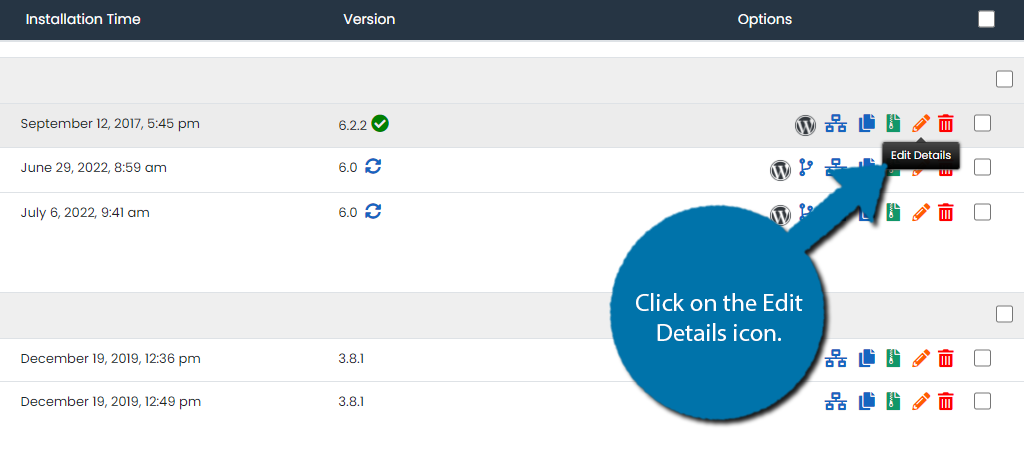
Here you will find a list of all of the installations managed by Softaculous. Locate your WordPress install and click on the Edit Details Icon (the pencil).
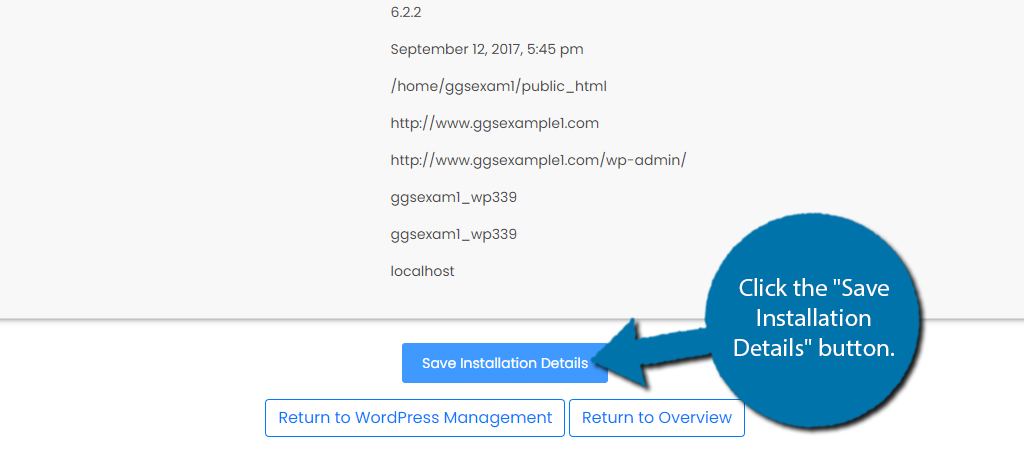
Here you will find all of the details related to your WordPress install. All you actually need to do is check the “Auto Upgrade WordPress Plugins” checkbox.
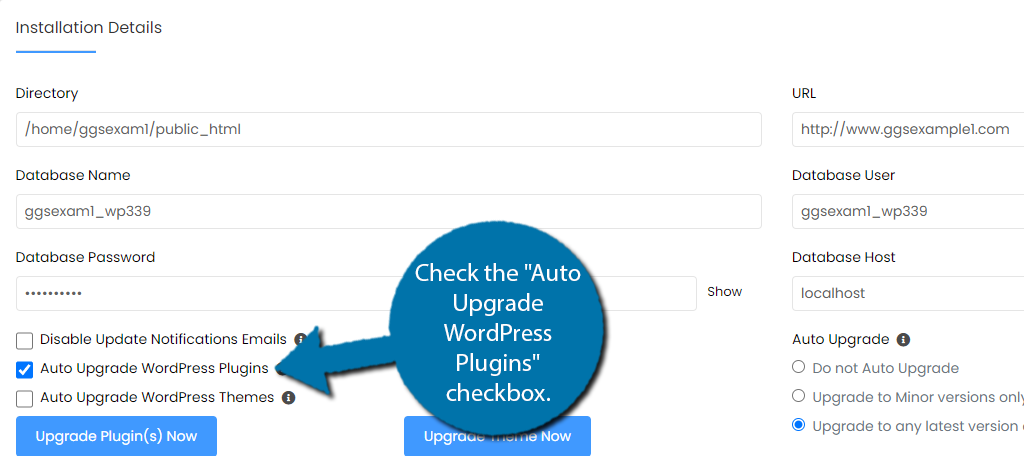
Note: You also have the option for enabling auto-updates for your themes if you desire.
Scroll to the bottom of the page and click the “Save Installation Details” button.
Softaculous will add the necessary coding to WordPress for automatic updates. Congratulations!
Method 4: Using the GreenGeeks Dashboard
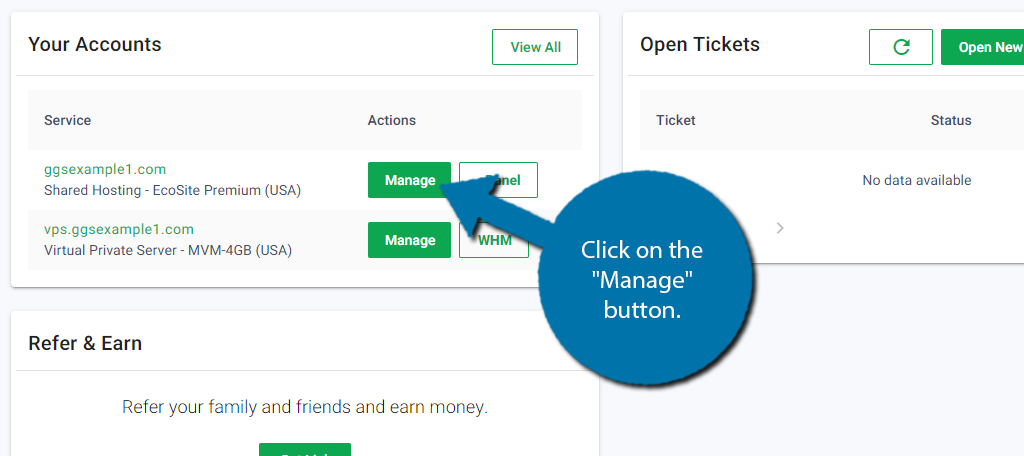
Our customers have access to the easiest method on this list, as you can enable automatic updates directly from your GreenGeeks dashboard. Log into your web hosting account to begin.
Click on the “Manage” button next to the domain name you wish to enable auto updates on.
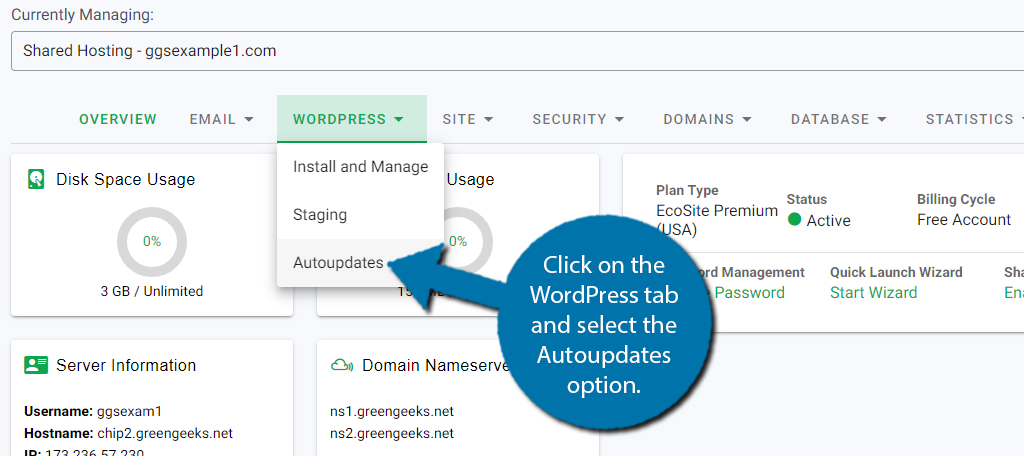
Click on the WordPress tab and select the Autoupdates option.
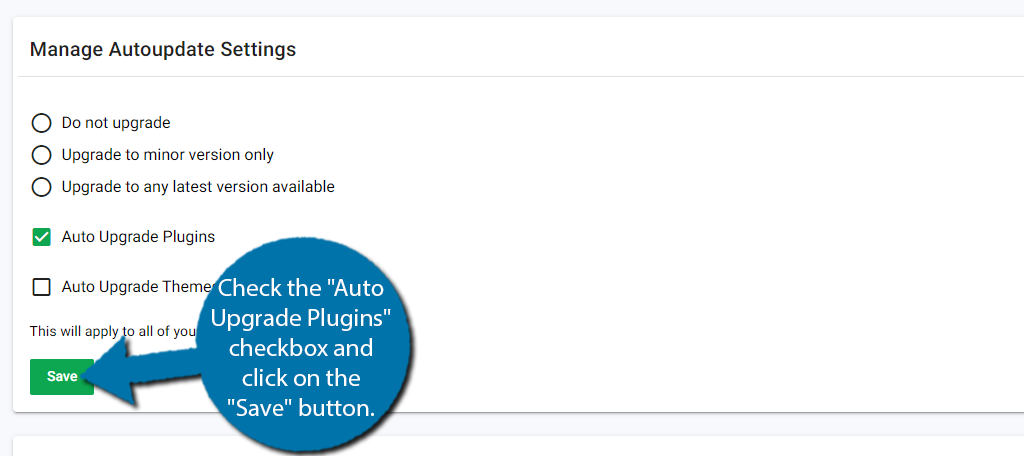
Here you can enable updates for all kinds of content like themes, WordPress core files, and what we are after, plugins. Simply check the “Auto Upgrade Plugins” checkbox and click on the “Save” button.
And that’s it. This will have all of the WordPress plugins you currently have installed receive updates automatically. If you ever want to disable this, just uncheck the box.
Why Update Your WordPress Plugins
A lot of times, publishers will update plugins to fix bugs or programming issues. In some cases, these fixes may solve problems that many of you have with a certain tool.
This is exceptionally helpful if you find a plugin that works perfectly for your needs.
Making sure plugins play nice with others is another reason why developers publish updates. This is especially true when it comes to making sure the coding works perfectly with a new version of WordPress.
You may notice a lot of plugins and themes are updated within 48 hours of a new WordPress version.
If an exploit is discovered in a plugin, the developer will often issue an update after fixing the code. This is to prevent anyone from hacking a website through holes within the code itself.
The last thing a legitimate developer wants is a website exploit because of bad coding elements.
One of the biggest reasons why I keep everything updated is because sometimes developers add new functionality. For example, I remember when Yoast SEO had fewer tools for optimization available than what is provided today.
Update Your WordPress Plugins Today
As you can see, keeping your WordPress plugins up to date is extremely important and WordPress provides several ways to automatically carry out this task. Thus, keeping your website safe and performing optimally.
Automatic updates trivialize maintaining your WordPress website and should not just be limited to your plugins. You can also use these methods to enable auto-updates for your themes and core files.
How much time have you saved by enabling automatic updates for plugins?