Do you want to know how to add a job board in WordPress? Job boards are a great way to share job opportunities with your visitors. Many web developers underestimate the monetary potential a job board can bring. This is known as affiliate marketing and you get paid to advertise these jobs on your website.
Of course, the tricky part is actually adding a job board on your WordPress website which typically requires a lot of coding, but thankfully, there is a plugin for it. Today, I will demonstrate how to add a job board to WordPress using the WP Job Manager plugin.
Why Are Job Boards Successful
Many web developers run their own business, so it should be easy to understand how difficult it can be to find new qualified employees. The more advertisement and marketing you do for the position, the better your odds, but most small businesses do not have that kind of capital. A job board lets employers advertise their job openings, for a fee, from anywhere in the world.
The more popular the job board, the higher the fees you can charge. If more people are viewing a page, that means positions will likely be filled faster than on a less popular job board. This is great for the employers and great for the website that runs the job board.
Like most things, don’t expect to make a revenue from this immediately. You need to make your website’s job board popular and you will also need to purchase an add-on for the WP Job Manager plugin.
How to Add a Job Board in WordPress
Today, I will demonstrate how to add a job board to WordPress using the WP Job Manager plugin. This plugin has over 100,000 active installs and makes creating a job board in WordPress easy. The plugin is free to use, but if you want to set up monetization, you will need to purchase the add-on. However, it is more important to establish your website as a good place to post jobs first.
Installing WP Job Manager
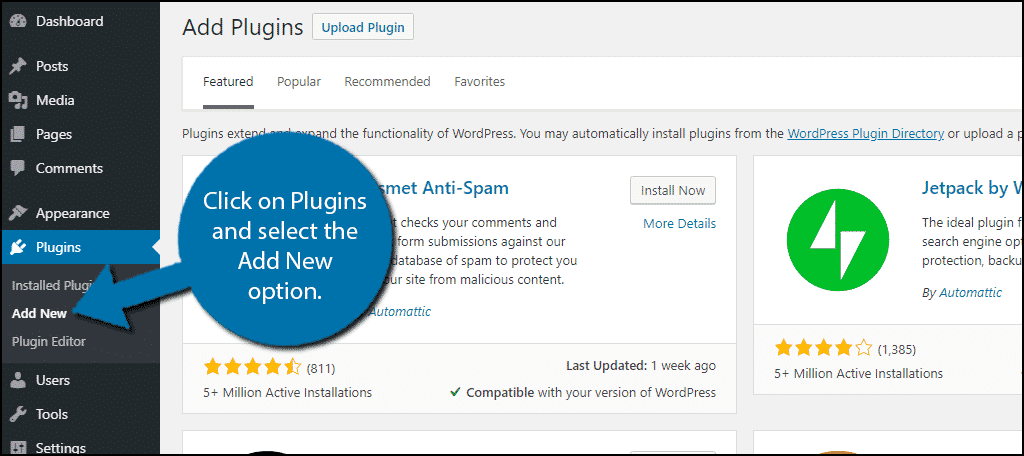
Let’s start by clicking on Plugins and selecting the Add New option on the left-hand admin panel.
Search for WP Job Manager in the available search box. This will pull up additional plugins that you may find helpful.
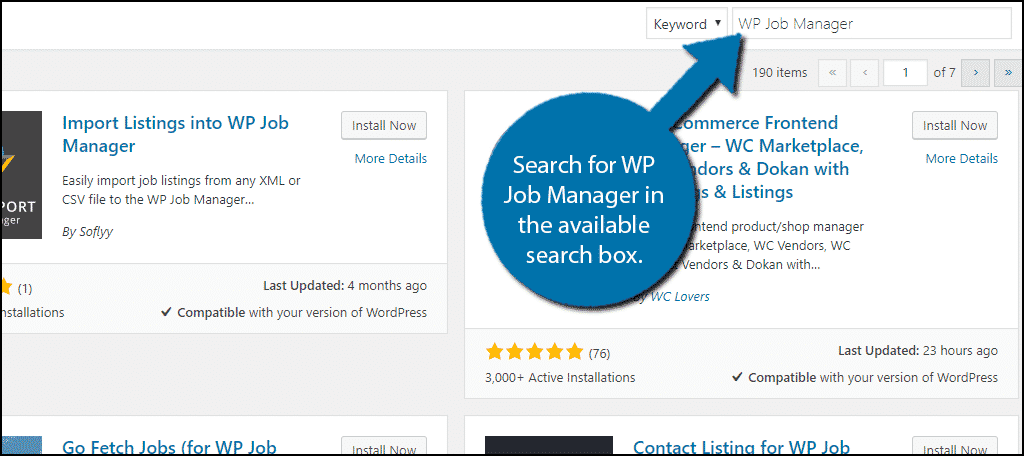
Scroll down until you find the WP Job Manager plugin and click on the “Install Now” button and activate the plugin for use.

Setting Up WP Job Manager Pages
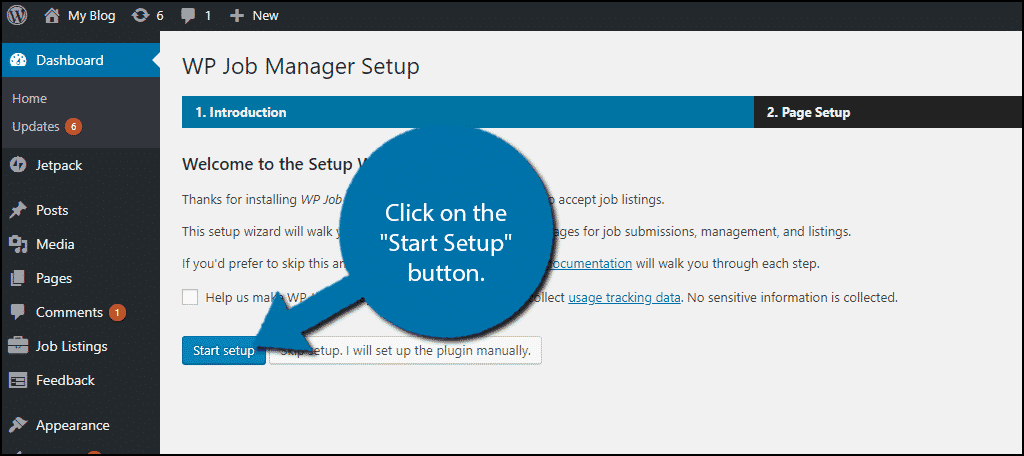
Once the plugin has been activated you will have two options: follow the setup tutorial provided by the plugin or manually set up the plugin. I always recommend to follow the plugin’s tutorial when available, but if you want to do it yourself I will explain how to set it up manually.
If you choose to follow the plugin’s tutorial, click on the “Start Setup” button and follow the directions. The plugin will generate the three pages you need with the shortcodes in place. This is much quicker than doing it yourself, but it is a quick process either way.
This plugin utilizes shortcodes to work. All you need to do is create three new pages with three unique shortcodes. Nothing else is required on the page other than a title and shortcode.
The first page will be the actual job board where visitors go to view the jobs. Simply place the [jobs] shortcode and publish the page.

The second page is the job submission page. Place the [submit_job_form] shortcode on the page and publish it.
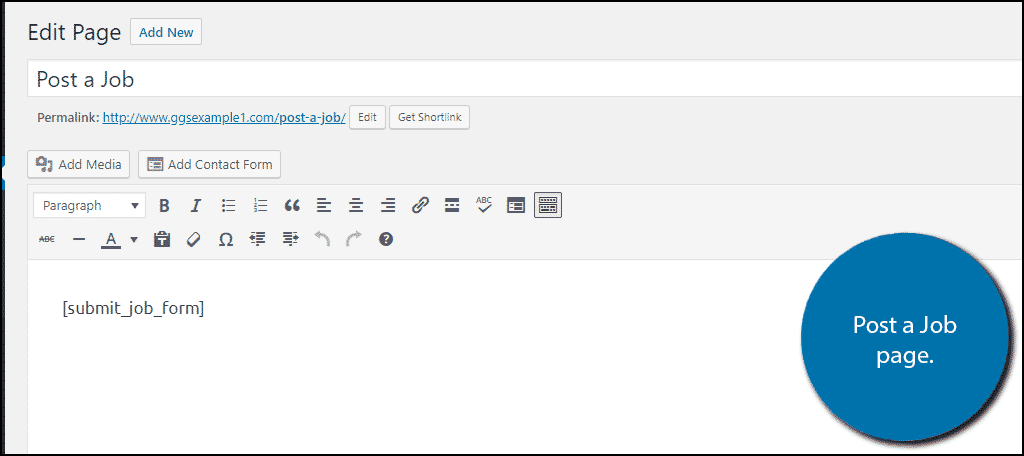
The last page is how users can manage their posted jobs on the board. Place the [job_dashboard] shortcode on the page and publish it.

Now that your pages are set up, it’s time to get the general settings just right.
Adjusting the WP Job Manager Settings
This plugin has a lot of settings for you to customize. On the left-hand admin panel, click on Job Listings and select the Settings option. This will open the main settings page.

There are six tabs at the top of the page. General, Job Listings, Job Submission, reCAPTCHA, Pages, and Email Notification. Each of these tabs has important settings that can help you tailor the plugin to your website’s needs. Go through each tab carefully and pick the settings that work best for you.

Remember you can change these settings at any time. Now that the pages are created and the settings are customized, it’s time to manage your job board.
Using WP Job Manager
Once the pages go live, your users will be able to add, view, and manage job posting on your website. When a user creates a new job listing, it will need to be approved by an admin.
Unfortunately, the Internet is not always a nice place and you need to watch your users. Users will post jobs that are not real, spam ads, or post illegal jobs, which can potentially get you into trouble. You need to actively monitor your job board and remove these false jobs and ads.
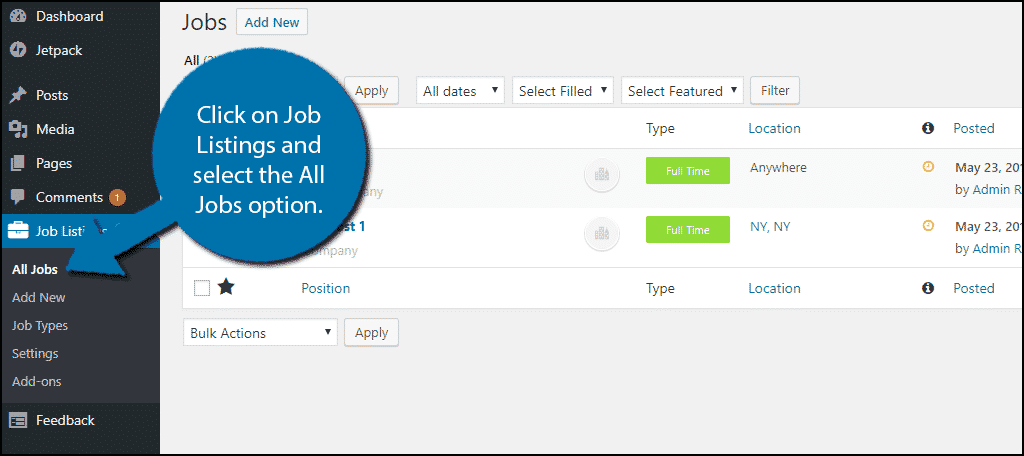
On the left-hand admin panel, click on Job Listings and select the All Jobs option.
Administrator accounts have the privilege to edit and delete any job post. Check each job post carefully and decide to Approve or Delete the job posting.

Congratulations, you have successfully set up a job board on your WordPress website. It will require you to spend more time monitoring the job ads created. As it gets even more popular, it may require an entire team dedicated to it.
Make Your Job Search Respectable
What makes a successful job board? Respect. Employers do not want to post on every single job board, especially when many are monetized. They want to pick the best ones that help them find qualified employees fast. To become a respectable job board you must make sure that there are no fake job posts or illegal job posts on your website. Every view they get is one view taken away from other employers.
Why do you want to create a job board? How easy do you find the plugin to use?