Are you trying to add tables in WordPress? Before the Gutenberg editor, it was a difficult task to do without a plugin or HTML knowledge. However, Gutenberg added a built-in functionality to add tables easily and effortlessly.
It allows you to create basic tables directly inside the editor within a few clicks.
While this was a highly requested feature, it is still very basic compared to what can be done with a table plugin.
Today, I will demonstrate how to add tables with TablePress in WordPress.
Why Use Tables In WordPress
Tables are a series of columns and rows that allow you to organize data in an easy to read format. In many cases, they save you time from writing full sentences and save you space on the page.
If you find yourself in need to display a lot of data, tables are your best friend.
On top of saving time and space, they make any page they are on look more professional. This can be extremely helpful when you are trying to sell products. This is because visitors are more likely to buy from a professional website.
One of the biggest misconceptions with tables is that they are solely used for numerical data, but that isn’t true. You can place words and images in the boxes as well. Tables can be used very creatively in the right hands.
Installing TablePress
TablePress is an extremely popular plugin with over 800,000 active installs. The plugin allows you to create tables and then embed them on any post or page.
This has an advantage over the built-in feature because you can easily import a table into as many posts or pages as necessary without having to create them every time. It also has a host of customization options the default table tool lacks.
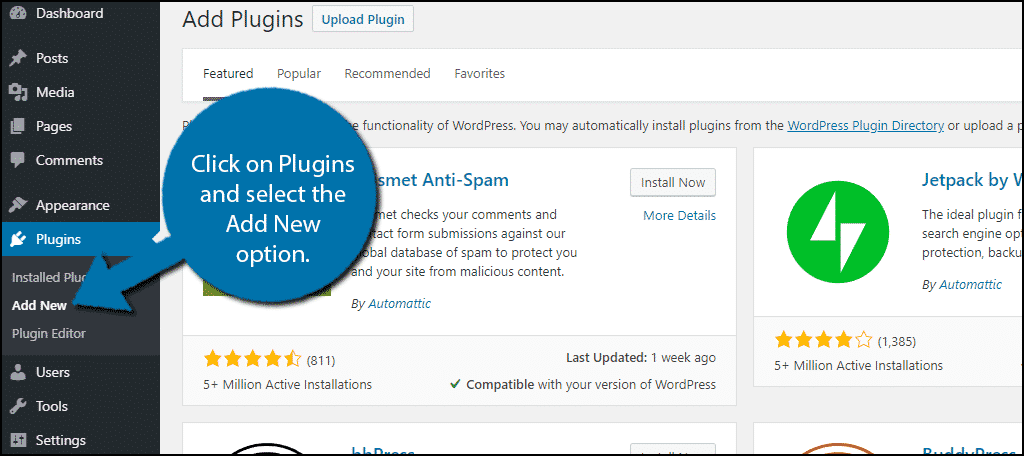
To start, click on Plugins and select the Add New option on the left-hand admin panel.
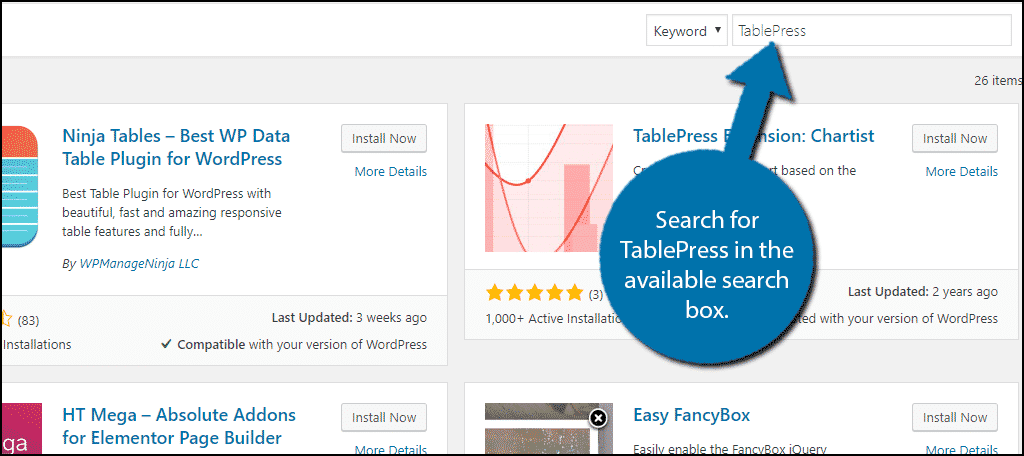
Search for TablePress in the available search box. This will pull up additional plugins that you may find helpful.
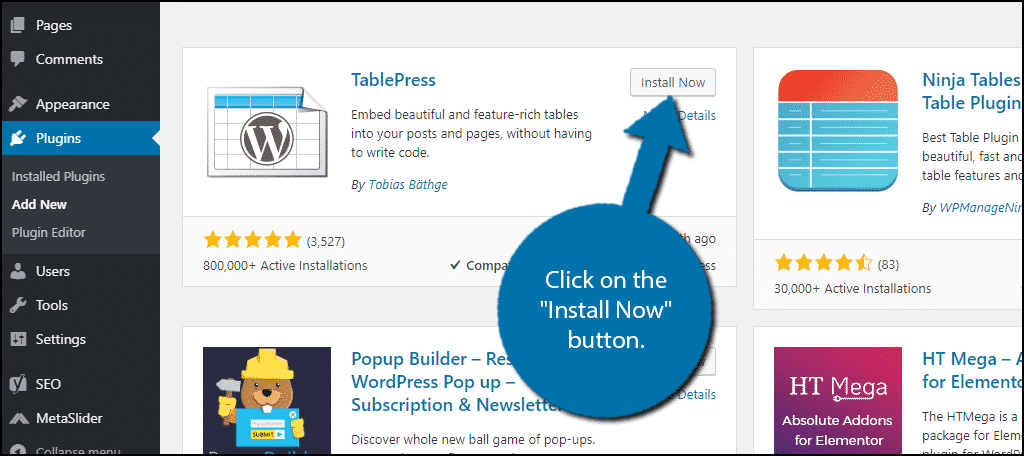
Scroll down until you find the TablePress plugin and click on the “Install Now” button and activate the plugin for use.
Creating A Table
TablePress makes it quick and easy to create a table in WordPress. The tables you create are stored on the plugin’s page and can be edited at any time. To use a table you create, you will need to use a shortcode.
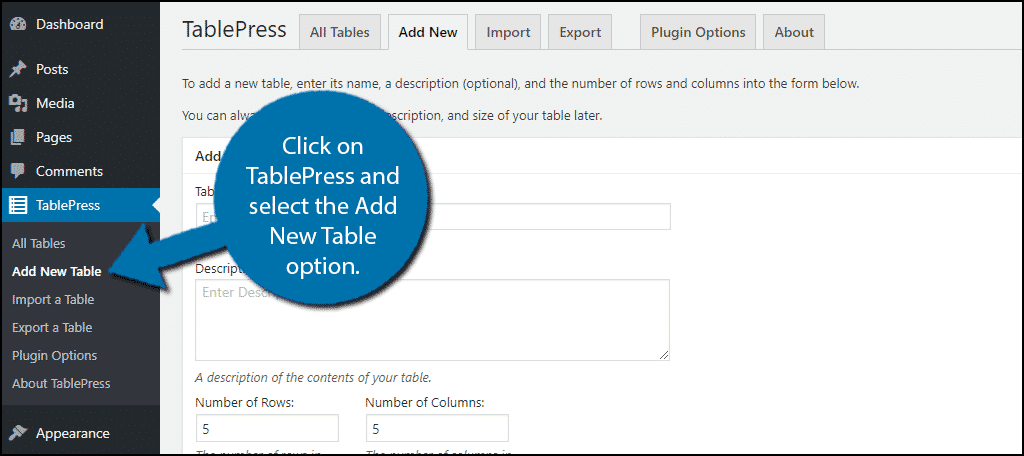
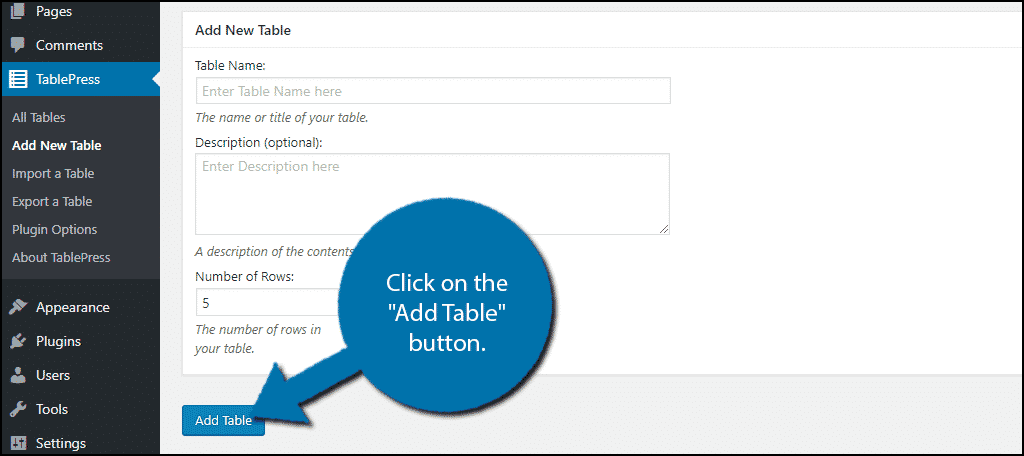
On the left-hand admin panel click on TablePress and select the Add New Table option.
Here you can name your table, add a description and select the number of rows and columns. All of this information can be edited at a later point if you need to make a change. Enter the information and click on the “Add Table” button.
You will now be able to actually edit the table.
Editing A Table
The very first option is the Table ID. This will not affect how the table looks, but it does affect how it is placed. The Table ID is used in the shortcode.
For example, if your Table ID was 2, the shortcode would look like this:
[ht_message mstyle=”info” title=”” show_icon=”” id=”” class=”” style=”” ][table id=2 /][/ht_message]
Thus, the Table ID needs to be unique.
Underneath this, you will see the table name and description that you entered before. Now it is time to actually enter the table’s content.
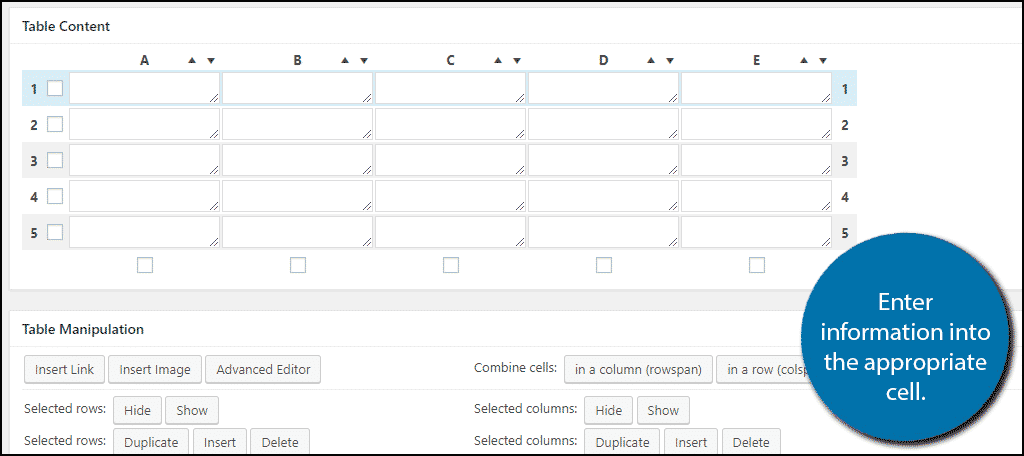
Here you can directly enter any text into the exact box. However, if you look underneath, you will find a Table Manipulations section.
Here you can customize your table in almost any way. For instance, you will find an insert link and image buttons. This works by clicking on the button and then clicking on the cell you wish to add them to.
Note: If you are adding an image, it is important that it is not too big. For example, let’s say you were making a comparison table which included just checks and X’s. You would want to make sure the check and X images are properly sized or else the table could end up very large.
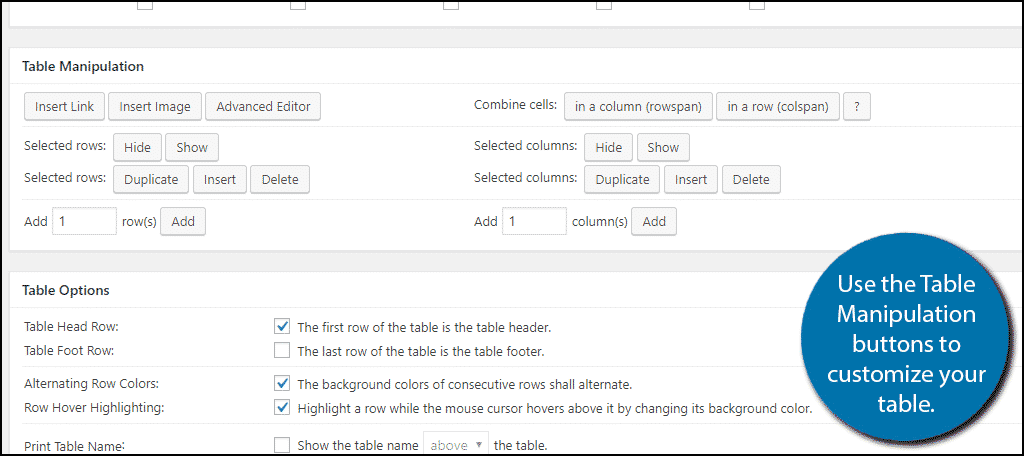
You can also duplicate any row or column by pressing the respective button.
At the bottom of this section, you can also add more rows and columns as necessary.
There are two more sections, Table Options and Features of the DataTables JavaScript library. The default settings should be fine for the majority of websites, but feel free to change them for your needs.
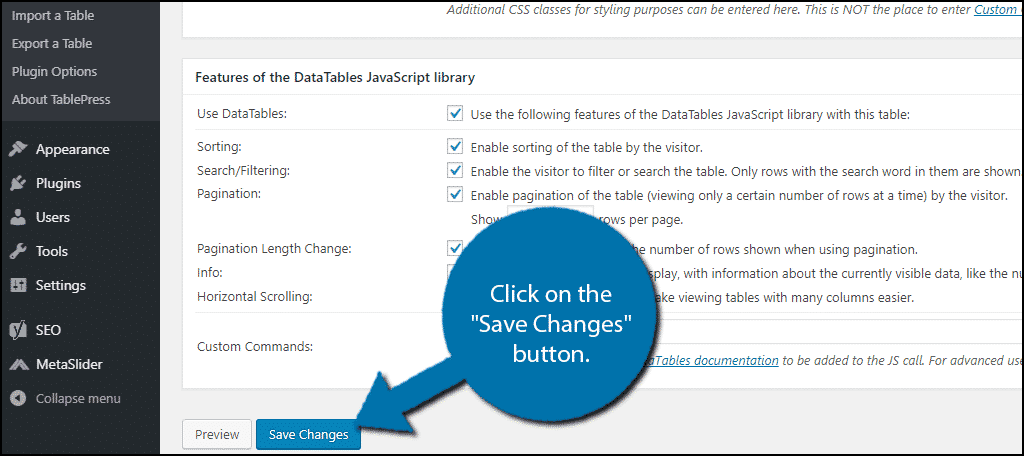
Once you are done and have reviewed all of the changes you have made, click on the “Save Changes” button at the bottom.
Now you need to add your table.
Adding A Table
Go to any existing post/page or create a new one. Simply place the shortcode in the location where you want the table to appear.
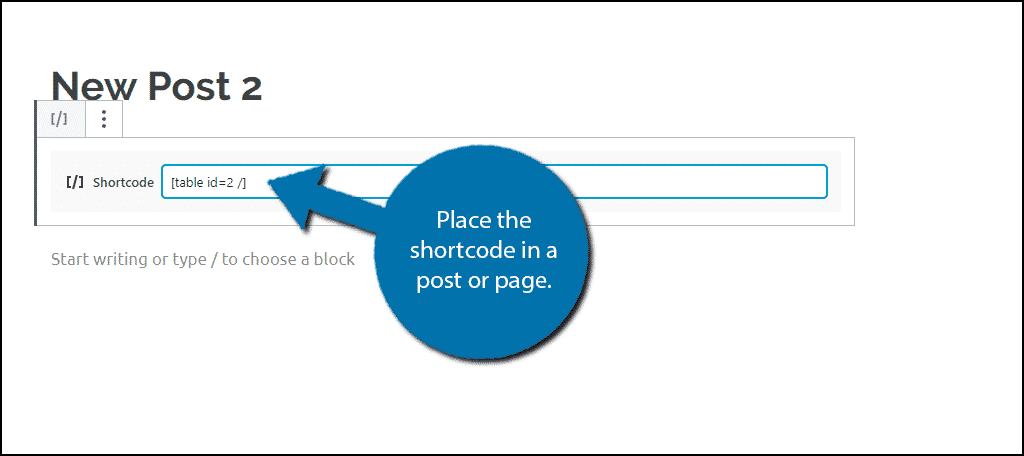
Remember the shortcode will look similar to this:
[ht_message mstyle=”info” title=”” show_icon=”” id=”” class=”” style=”” ][table id=2 /][/ht_message]
The only difference will be the number used. You can now view the table on your website or by using the “Preview” button.
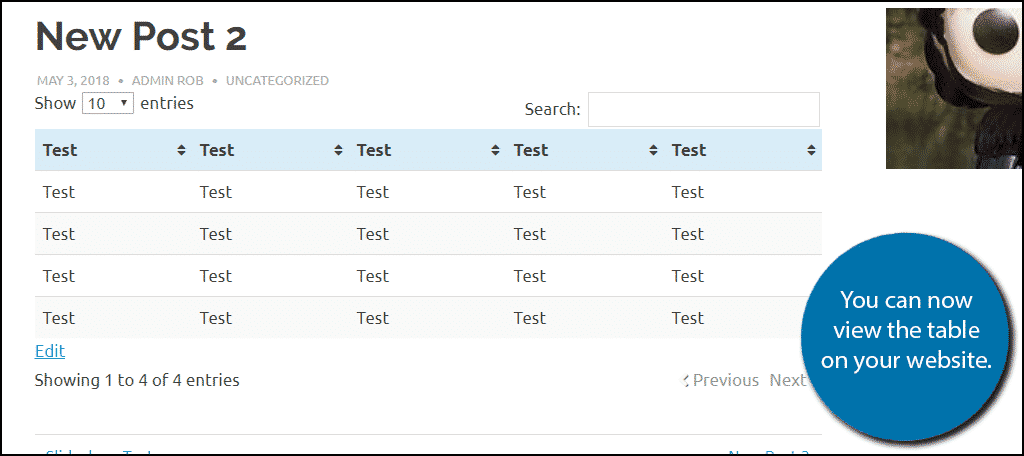
Congratulations, you have successfully created and added a table in WordPress using TablePress.
Present Information Professionally
No matter what type of website you run, organization is important to both developers and visitors. Tables create an easy way to display and read information. It is perfect for product and service comparisons.
Most importantly, it looks great. For many people, a table looks professional and can easily be the highlight of a page. There is a reason that software like Excel and Google Sheets is so popular.
Because they work.
Whenever you need to display information on your website, it should always be in a format that makes it easy to read. And tables are a great tool to use.
How easy did you find TablePress in WordPress to use? Why do you need to add a table in WordPress?