CBD and cannabis is really starting to catch fire online. With all the new laws being passed regarding making some if it legal, more and more online sellers are starting to pop up. If you are looking for a way to show your local dispensary online, then this tutorial is for you.
While you still can’t legally sell cannabis online (more often than not), you can sell CBD oil in most states. That being said, you can definitely list your entire local dispensary on the Internet without any legal issues if you live in a place that allows it.
Remember, when listing the dispensary online, you want to list other things like available edibles, topicals, and related items that buyers in your area may be interested in.
There are certain WordPress themes that can help you handle this. I will show you a good one after the tutorial. However, there is also a solid plugin that will allow you to easily add your local business.
Today, I am going to show you how to use the plugin to build your local dispensary online so that customers know what you have to sell.
There is no need to learn code, or try and build out a page using the block editor from scratch. You do want to try to pair this plugin with a cannabis theme to present the best outlook possible, though.
Let’s take a look at the plugin that is going to help you build your online dispensary.
WP Dispensary

WP Dispensary is a marijuana plugin for WordPress that will allow you to build an entire local dispensary on your website. The plugin is lightweight but powerful and gives you all the tools imaginable to achieve this.
This plugin gives you a stylish and easy way to manage product menus and lets patients place orders directly through their own portal. So, you can show everything you want on your site while offering your customer a simple way to access and purchase as well.
Note: Online ordering laws vary from state to state. If you choose to use this plugin, make sure you know how you can use it legally when it comes to online orders.
WP Dispensary is packed with features that will help highlight and showcase a local dispensary. Some of the most attractive features include:
- Define Brand Style
- Choose Colors
- Multiple Fonts
- Layout Styles
- Multiple Add-ons
Basically, this plugin gives you everything you need to layout and design a fantastic website for a local dispensary.
When the plugin is installed, a new page and menu item is automatically created for you. it is pre-populated with the associated shortcode [wpd_menu]. This will display your dispensary according to how you have built it in the back end of your website.
It also integrates a weed widget that is made available in your widgets area. Or, you can use the available shortcode in the widgets area as well.
There are also a number of add-ons you can use to build your local dispensary up even more. Finally, the plugin is fully compatible with WooCommerce. If you need this ability, you have it ready to roll.
All of this and much more makes this marijuana widget one of the best
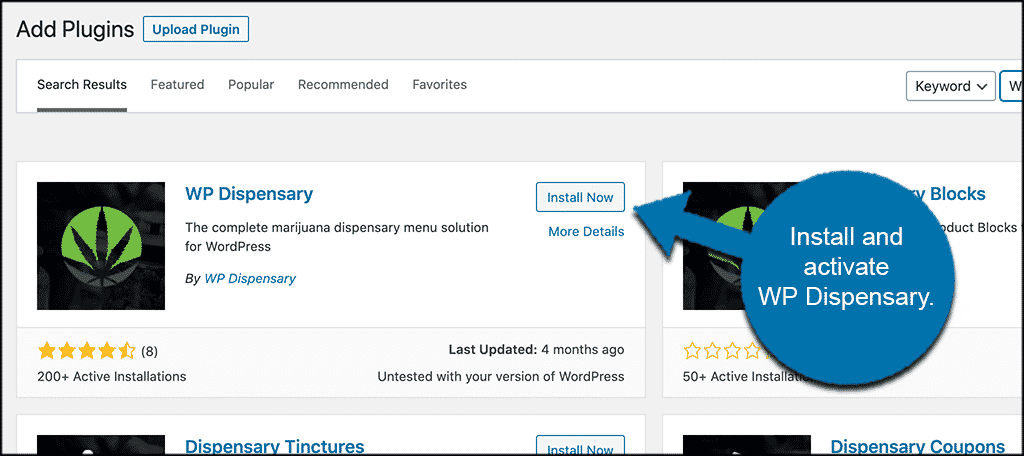
Install and Activate Plugin
Note: There is a pro version of the plugin available. You are more than welcome to take a look at it. However, this tutorial is based on the free version of the WP Dispensary plugin.
In order to build a local dispensary on the Internet and show it, you first need to install and activate the plugin. You can do this by going to the Plugins page of your WordPress admin dashboard.
Simply type the plugin name into the search field and find it by name. Install and activate it directly from there.
Once the plugin has been installed and activated, you want to access the main settings and configuration page. You can do this by clicking on WP Dispensary > Settings.
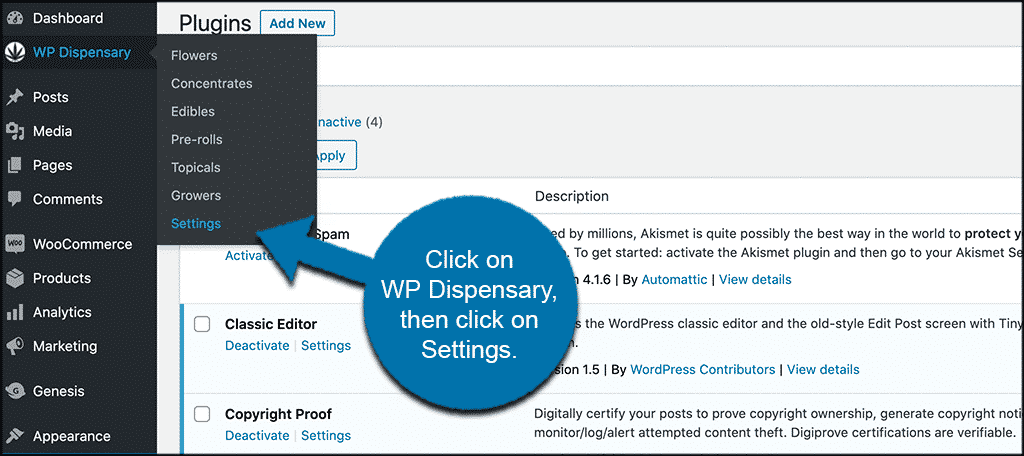
You will find this option available in the left menu area of your dashboard. it will appear once the plugin has been installed and activated.
Let’s set the plugin up together so you can start building your dispensary.
Settings for WP Dispensary
At this point, you should be on the main settings page for the plugin. You will see there are simply two main tabs to go over. These tabs are called “Display” and “General.” Let’s go over them together.
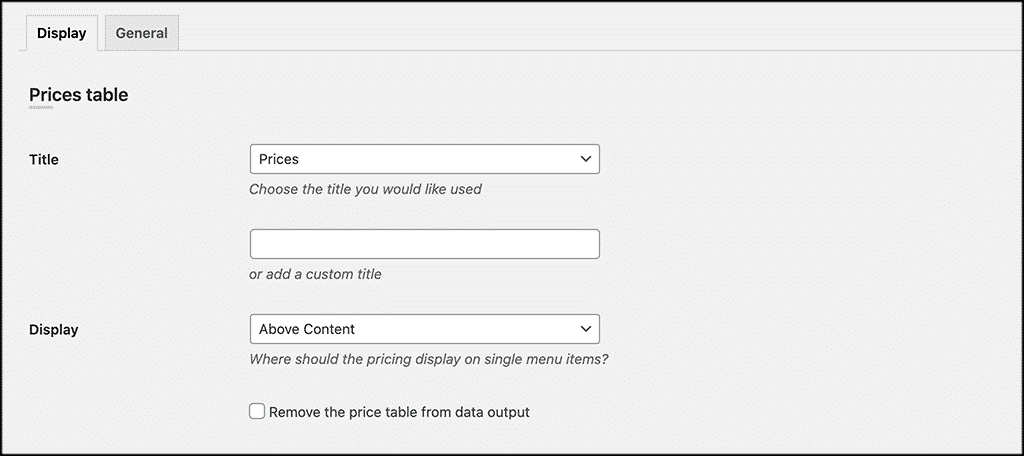
Display
The display section is where you will set how the display tables look on the front end of your site. First up, you have the “Prices Table.” Go ahead and set that how you choose.
Now scroll down some and set the “Compounds Table” how you would like.
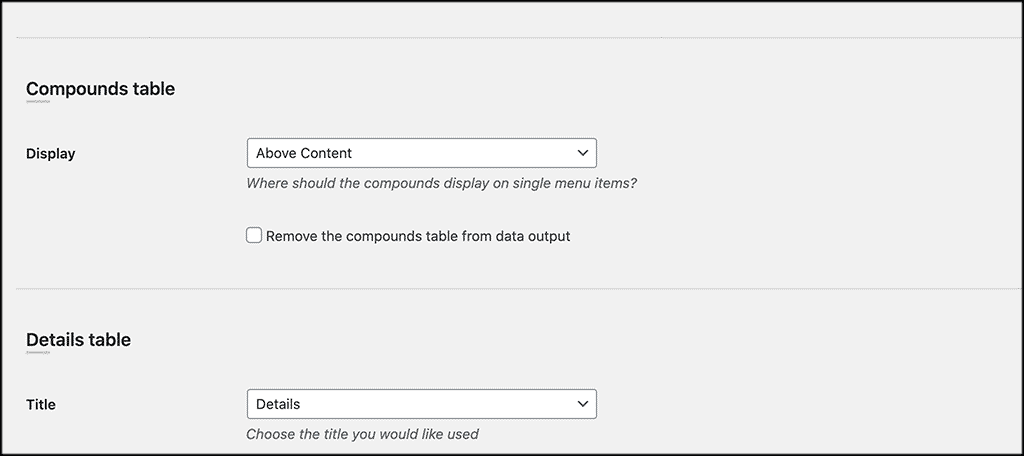
Finally, you can scroll to the bottom and set the “Details Table” how you prefer as well.
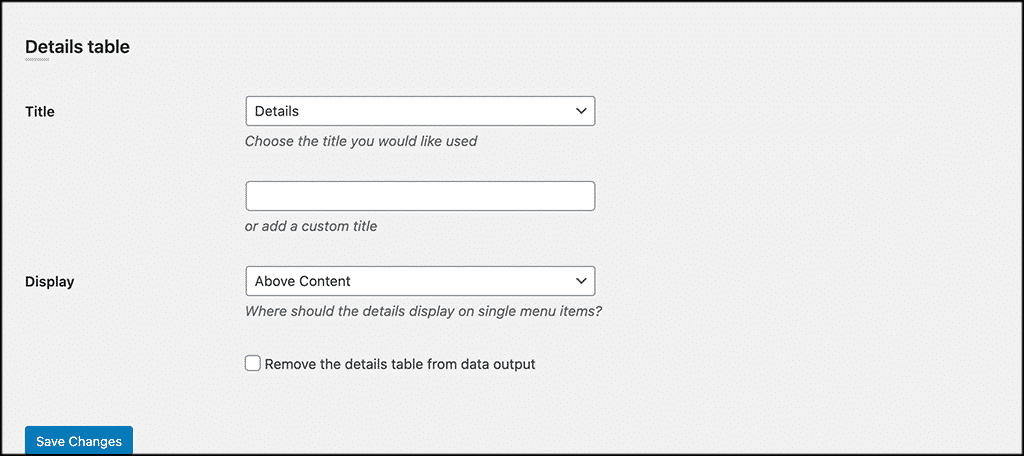
Once you are finished, go ahead and click on the “Save Changes” button and you are ready to move on.
General
Under the general tab, there is only one simple selection to make. Choose the currency you want used to display prices online.
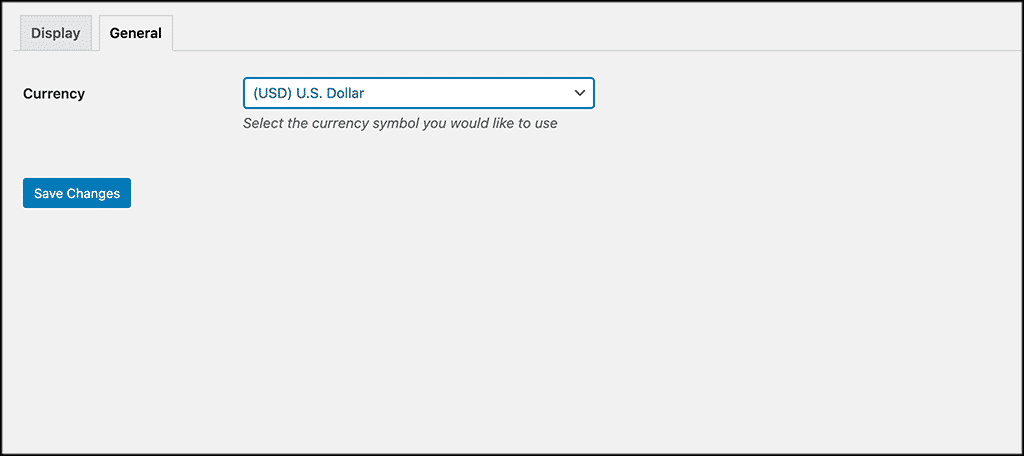
That’s it. At this point, the local dispensary plugin is set up and you are ready to add items and build it out.
Adding Different Dispensary Items
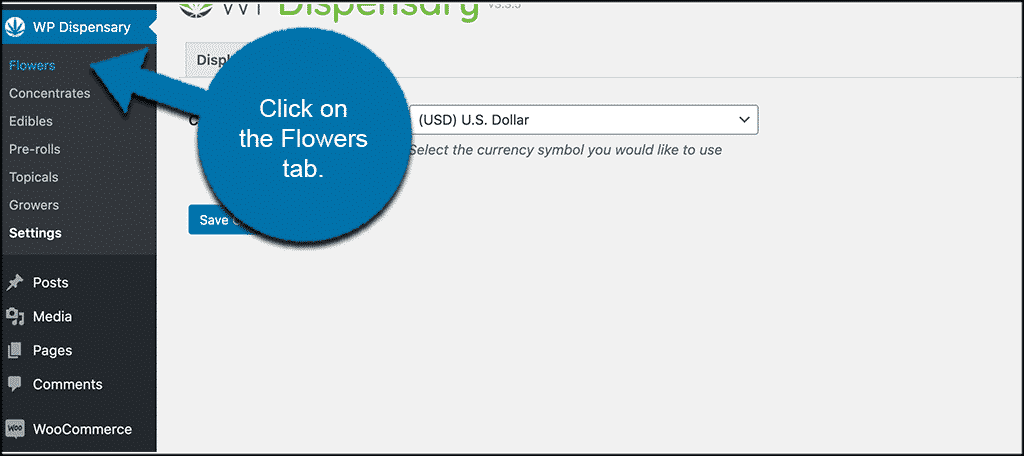
The WP Dispensary plugin gives you the ability to add a lot of different things to your website. If you look under the WP Dispensary icon in the left menu, you will see a list of everything you can add. These include:
- Flowers
- Concentrates
- Edibles
- Pre-rolls
- Topicals
- Growers
Let’s look at how to add an item to your dispensary. In this case, we are going to add a new flower to the local dispensary.
Note: Adding any item is the exact same process with the same layout options. The plugin simply categorizes it and lays it out properly for you once added.
Add Item
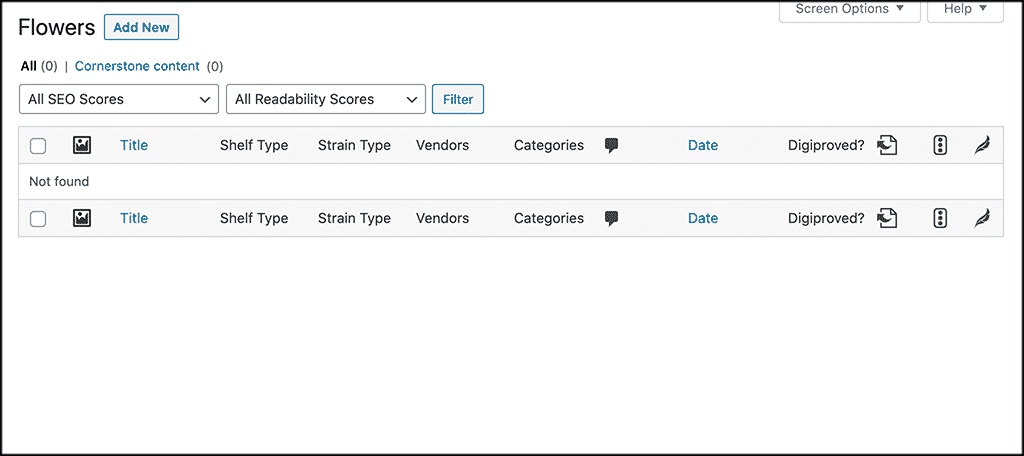
To add a “Flower” to your dispensary, simply click on the flower link located under the WP Dispensary menu item.
Now click on the “Add New” button on the page. A WordPress editing screen will open up.
Notice the editor is exactly like a regular WordPress editor. You are going to name your flower and then put in any information you want to for said flower.
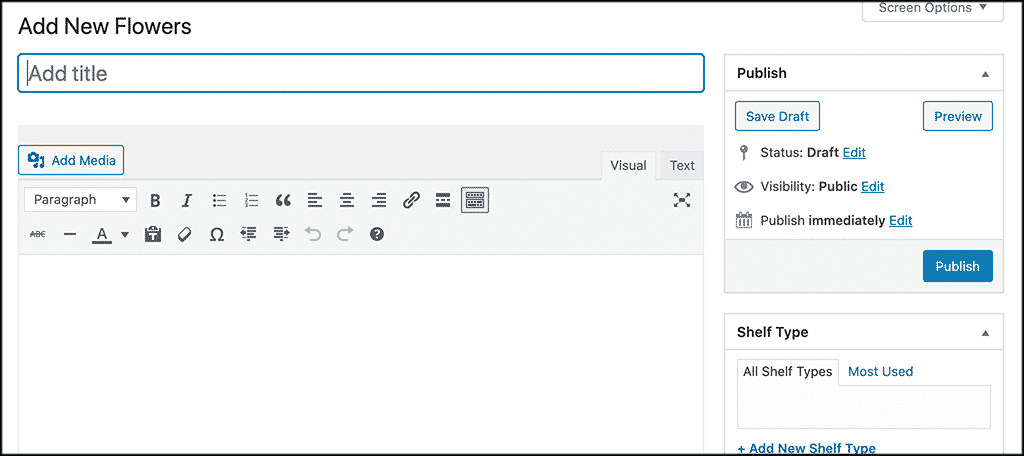
Now, here is where it gets interesting. You can add a ton of other relevant data to each flower post you make. You can also add all of this relevant data to any other post type you make with the dispensary.
As I stated above, the process is exactly the same.
Scroll down some and you see that you can add flower pricing info and compound details.
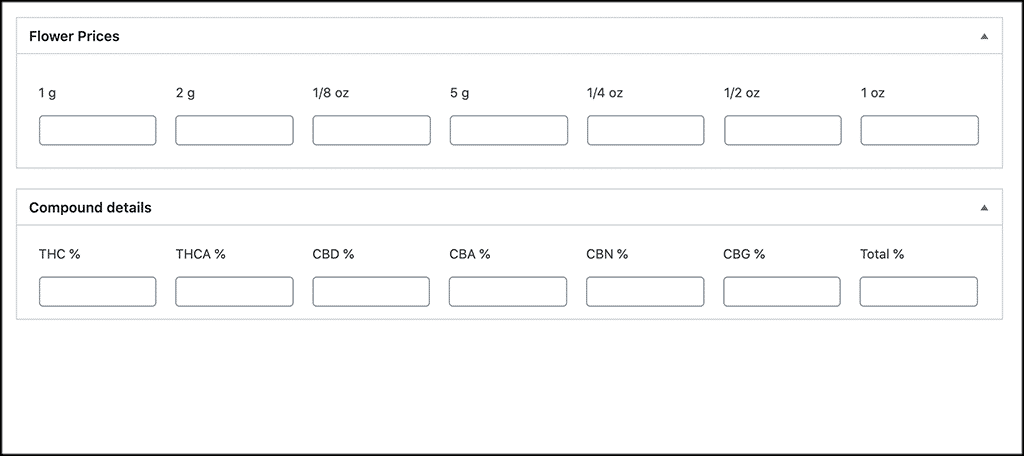
Go ahead and enter that information as you see fit.
Add Other Relevant Information
Finally, you can also add a lot of other specific info using the available weed widgets on the right. The info you can add includes:
- Strain Type
- Vendors
- Aromas
- Flavors
- Effects
- Symptoms
- Conditions
- Categories
Simply open items up and add those on the fly how you want. Once you add something, it will be made available for future use as well.
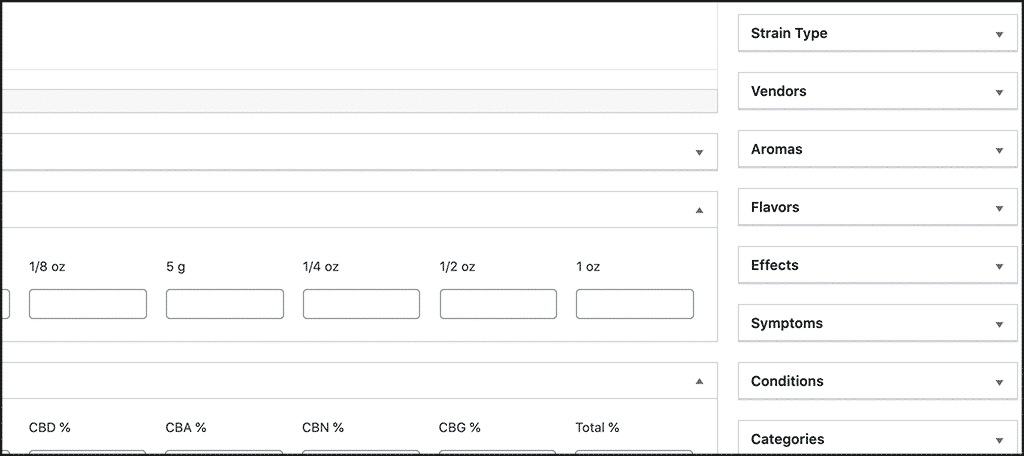
Note: The extras you add will be based on the type of info you are adding to your local online dispensary.
That’s it! You have successfully added a new item to the dispensary and the plugin will show it automatically. You can repeat this process over and over as many times as needed and add as many items as you want to the dispensary.
Possible Themes
Just wanted to throw in a quick note about possible themes for this type of project. WordPress actually has quite a few cannabis-related themes that would work well to build your online dispensary around. if you are interested in a couple, then check out GreenGrow or MediGreen.
Both will provide you with a ton of options as it relates to this specific niche.
Final Thoughts
Adding a local dispensary to your website is not difficult. All you need is the right information and the right tools. it is important to remember that online selling and online display laws vary from area to area. Please make sure you are within your legal rights where you are.
I hope this tutorial has been able to show you how easy it is to add a local dispensary to your website. Now your clients and other interested parties can see everything you have and get pricing for items as well.
Have you added a local dispensary to your website in a more manual way? Did you find that using this plugin made the process much easier?
What a great read – I’ll be sharing with my wife. This is appreciated!