
WordPress provides users a lot of tools to create content with, but its table block just doesn’t cut it for a lot of websites. The good news is that the WP Table Builder plugin is a free tool that can fix that.
With it, you can create tables that contain any type of content and they can be shaped however you need them to be. All of it is done with a custom table editor you can access on your website. Overall, it’s easy to use, but extremely effective.
Today, I will demonstrate how to create any kind of table with the WP Table Builder plugin.
This plugin is for:
WordPress 5.9
Plugin: WP Table Builder v1.3.17
Why Use A Table Builder in WordPress?
Tables are powerful tools for websites to take advantage of. They allow you to place a lot of information into a small space, but still manage to keep it easy to understand. And a lot of websites take advantage of them for different reasons.
One of the most common uses for tables is to display product information. In them, you can list the height, width, price, descriptions, warranty, and anything else you can imagine. In fact, it’s pretty rare to see an online shop that doesn’t use a table.
That said, tables are not just used for eCommerce sites. Blogs often take advantage of them to highlight statistics, upcoming events, and all kinds of information.
They really are a versatile tool that everyone can utilize.
Unfortunately, if you want fancier items like ratings and such, that just isn’t going to happen with the default table block in Gutenberg.
Instead, you need to use a table builder. As the name implies, this is a tool that allows you to build a table any way you want. As a result, they are far more versatile than the default table block in WordPress.
How to Use WP Table Builder
Step 1: Install WP Table Builder
WP Table Builder utilizes a drag-and-drop interface that makes it the perfect tool for beginners. With it, you can add a variety of content types to the table. These include text, star ratings, buttons, and much more.
Since the plugin is so easy to use, it won’t take very long to master it, so let’s get started.
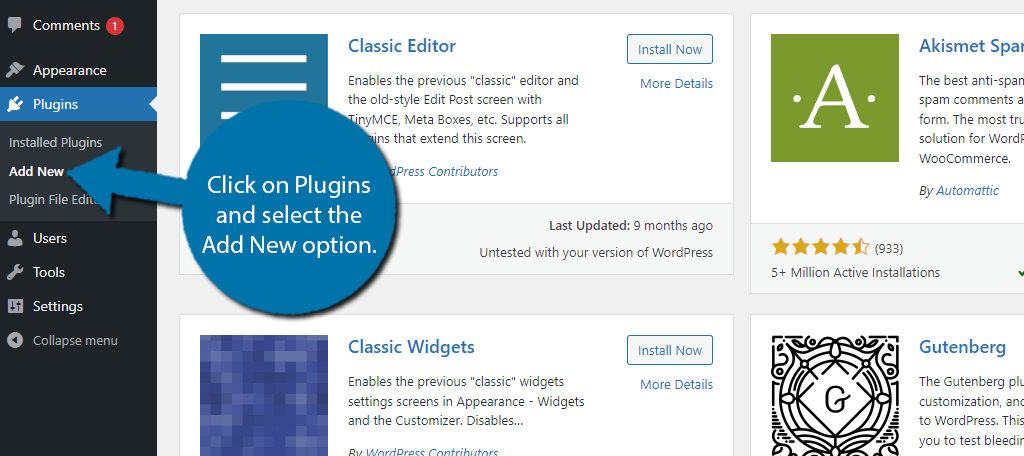
Click on Plugins and select the Add New option on the left-hand admin panel.
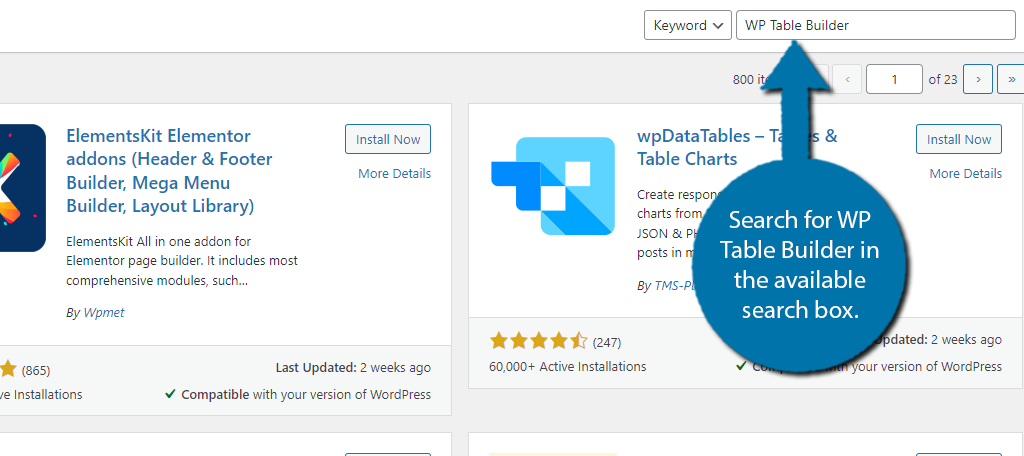
Search for WP Table Builder in the available search box. This will pull up additional plugins that you may find helpful.
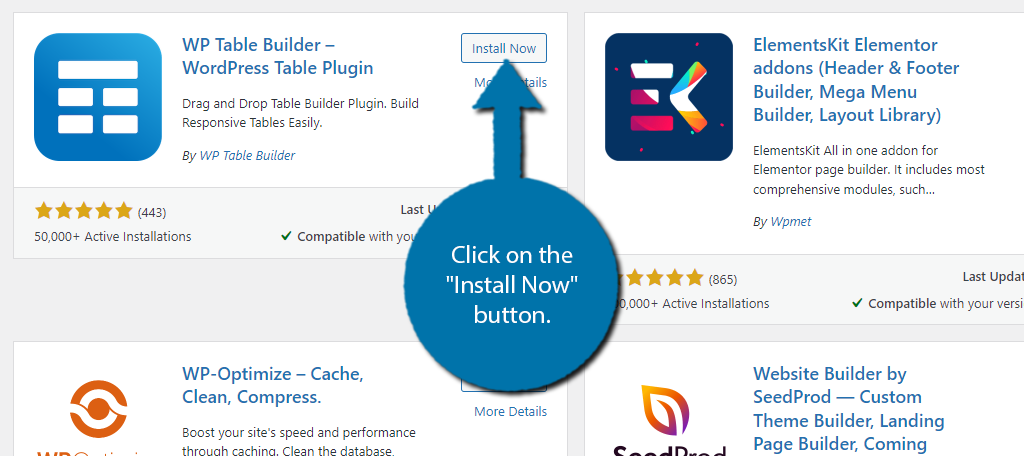
Scroll down until you find the WP Table Builder plugin and click on the “Install Now” button and activate the plugin for use.
Upon Activation, you will be asked to subscribe for new updates via a newsletter. Feel free to accept or skip this. It will have no impact on using the plugin.
After this, you will be greeted by a welcome video. This video will actually show you how to use the plugin, and it does a really good job. So, be sure to watch it.
Step 2: Create A New Table
Creating tables in WordPress is pretty easy. While there is a settings section, there isn’t much you can do there besides select which user roles can use the plugin and add some custom code. Thus, let’s just jump into creating a table.
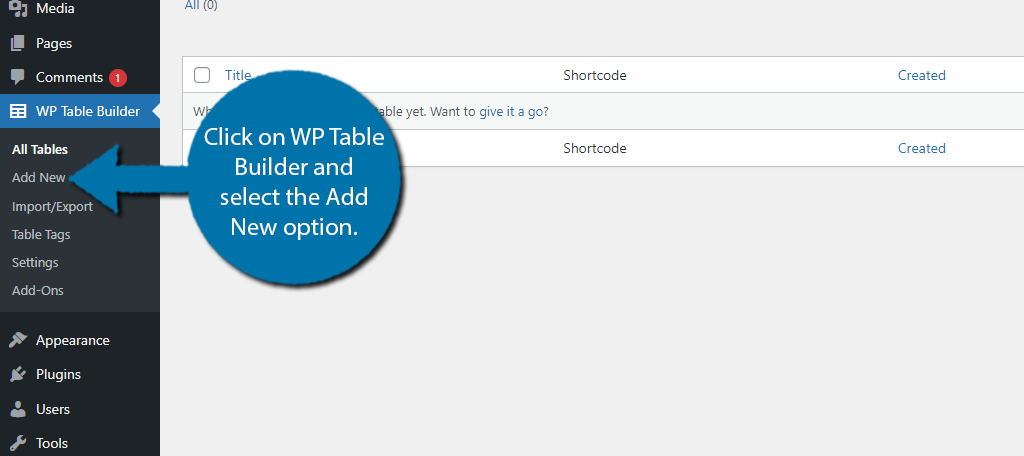
On the left-hand admin panel, click on WP Table Builder and select the Add New option.
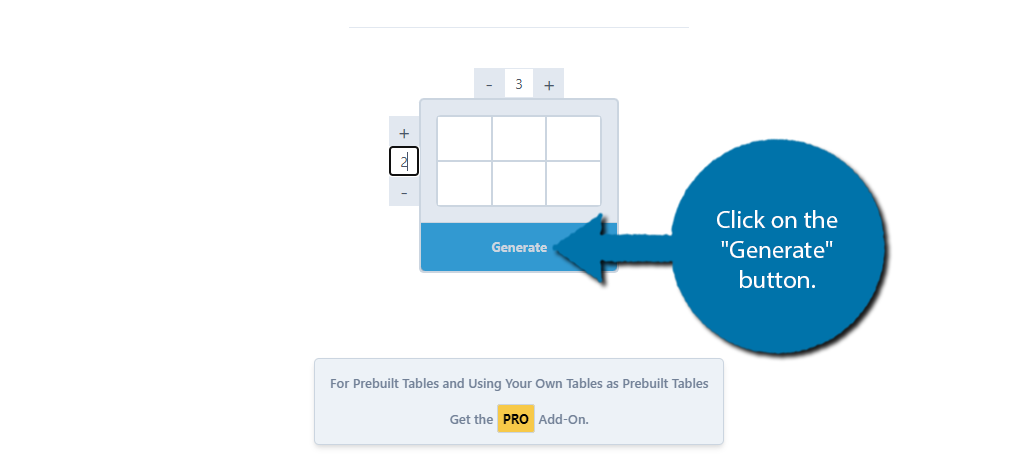
This will take you to the table editor in WordPress. If you click the big “+” in the middle of the screen, you will unveil some options to create a new table.
Simply enter the number of rows and columns you will need. Then, click on the “Generate” button.
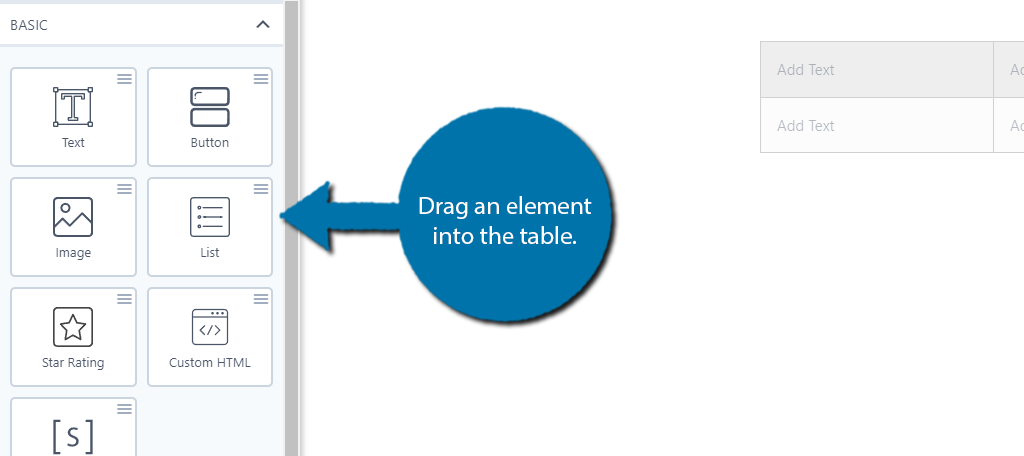
The table will then appear in the editor. By default, each option uses a text field. You can replace it with another type of content or combine it. Yes, that’s right, you are not restricted to a single type. You can add an image and text, or any other combination.
You can see all of the options on the left-hand side. To use them, simply drag them to the desired location.
Take note that there is a pro section with additional options. So, if you like what you see, consider upgrading. When you add an element to the table, you will see a series of options on the left-hand side. Each element is different, so be sure to go through the settings carefully.
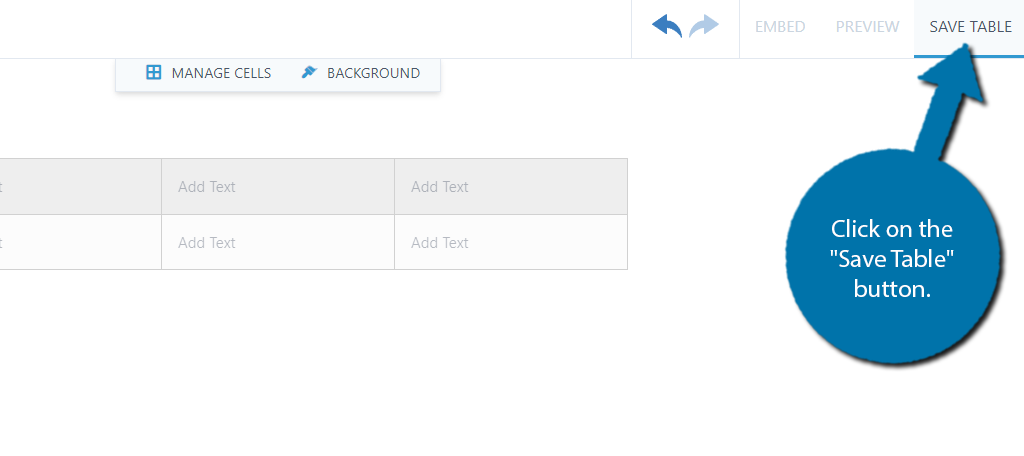
When you are satisfied with the table, click on the “Save Table” button in the top right.
To leave the editor, click on the “X” next to the save option.
Step 3: Add the Table in WordPress
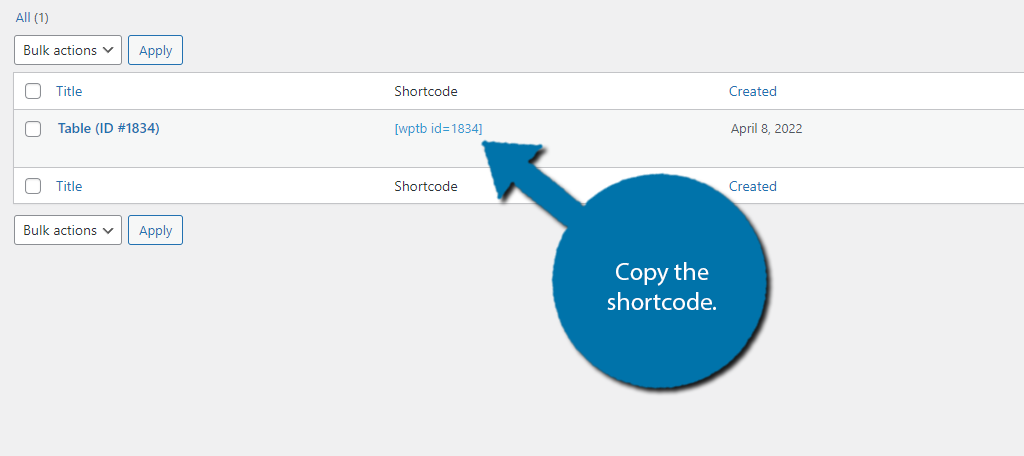
When you save a table, it is stored in a different area. This is where you can obtain the shortcode necessary to place it.
Click on the All Tables option. Here you can see all of the tables you have created. There is a shortcodes column on this page. All you need to do is simply copy the shortcode.
At this point, you just need to paste the shortcode into a shortcode block in a page or post. After that, the table will be in place.
Congratulations!
However, there is one more thing I want to cover.
Step 4: Importing & Exporting Tables
One of the most useful features of this plugin is its ability to export and import tables. And yes, this is fully compatible with Microsoft Excel. Thus, if you are a really big Excel fan, you can actually create everything in Excel and import it into WordPress.
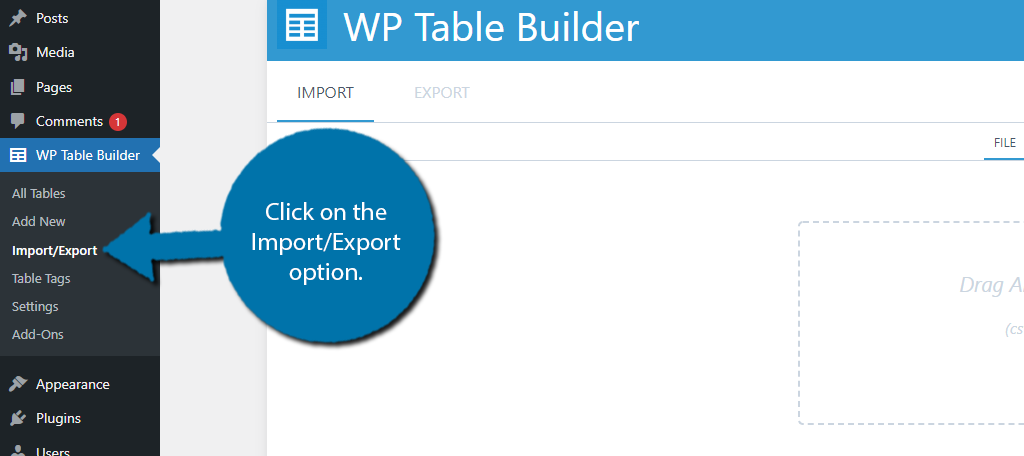
Click on the Import/Export option.
The section is divided into two tabs. One for imports and another for exports. For imports, simply select the file from your computer and it will be available for use.
For exports, select the table and it will appear as a file in your computer’s downloads folder.
This can be a huge advantage, especially for those very familiar with Excel. It’s also worth pointing out that this makes it easy to share tables between websites.
Don’t Overuse Tables
One of the biggest mistakes beginners make is overusing tables. While tables can be a great asset to content, they are not always appropriate, especially when they are smaller.
Normally a table should be used when there is a lot of information to share. Yet, some websites use very small tables to share a fact or two. If this is the only use of a table, that’s fine, but sometimes websites go a little table happy.
And when a visitor sees table after table, they tend not to pay attention anymore. It devalues the content itself.
Thus, you need to avoid overusing them.
Build A Table in WordPress Today
The requirements for high-end content are continuously increasing, and the default table block just doesn’t cut it for many websites today. That’s why you may need to use table plugins to expand your options in WordPress.
WP Table Builder is just one of many excellent plugins that can help you build engaging tables. With an impressive amount of customization, this plugin really stands at the top of WordPress and can be a great addition to any website that uses tables.
It’s easy to use, highly customizable, and free. It really doesn’t get any better than that.
What kind of tables do you create in WordPress? What’s your favorite feature in WP Table Builder?
