
Are you looking for a way to perform database tasks from your WordPress website? If so, you should give the WP Data Access plugin a try. This tool allows you to carry out database-related tasks directly in WordPress, and it’s free.
Even more important, it’s really easy to use. You won’t need any coding knowledge to use this plugin, which makes it easier than normal. Thus, it’s the perfect tool for beginners and experts alike.
Today, I will demonstrate how to use the WP Data Access plugin in WordPress.
This plugin is for:
WordPress 5.9
Plugin: WP Data Access v5.1.6
Do I Ever Need to Access My WordPress Database?
Truthfully, some websites may never actually need to directly access their database. Instead, just using the built-in tools in WordPress and installing plugins will get the job done for most websites.
However, there are many instances where using the database is necessary, or at least the best option.
And in those instances, accessing the database can be intimidating. While they are not overly complex, they are complex enough to scare beginners. Especially when you consider the damage you can do to a website.
For those unaware, the database in WordPress is the equivalent of a brain in a human. It stores all of the data for your website. Pages, posts, themes, plugins, user data, and everything else you can imagine.
It’s all in one place.
Sometimes directly accessing these files is necessary to add specific features to your website. Normally, this means you need to log into your cPanel, or in other words, leave your WordPress website.
Instead, this plugin gives you access to everything from your admin screen. Thus, it saves time and is more user-friendly.
How to Use WP Data Access
Step 1: Install WP Data Access
The WP Data Access plugins will add a database viewer directly to your WordPress site. This means you won’t ever have to leave the website to carry out database-related tasks. This includes editing and deleting tables.
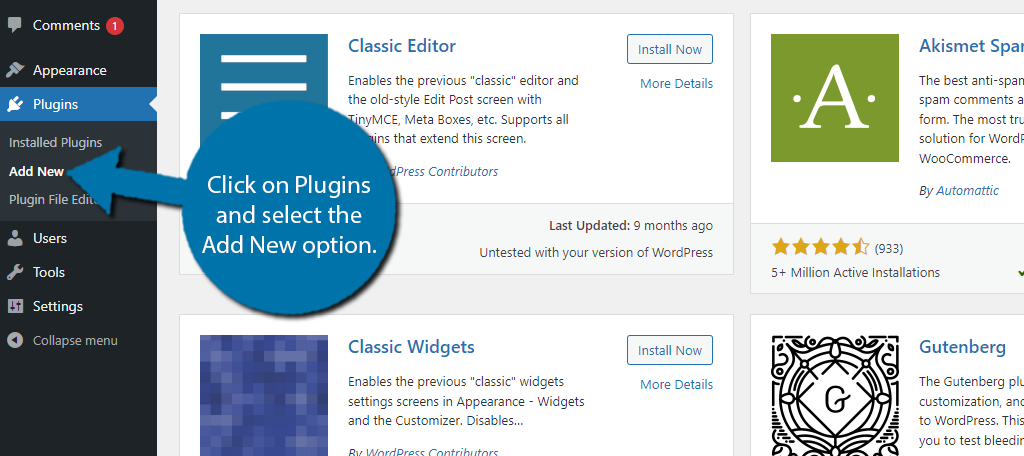
Let’s start by clicking on Plugins and selecting the Add New option on the left-hand admin panel.
Search for WP Data Access in the available search box. This will pull up additional plugins that you may find helpful.

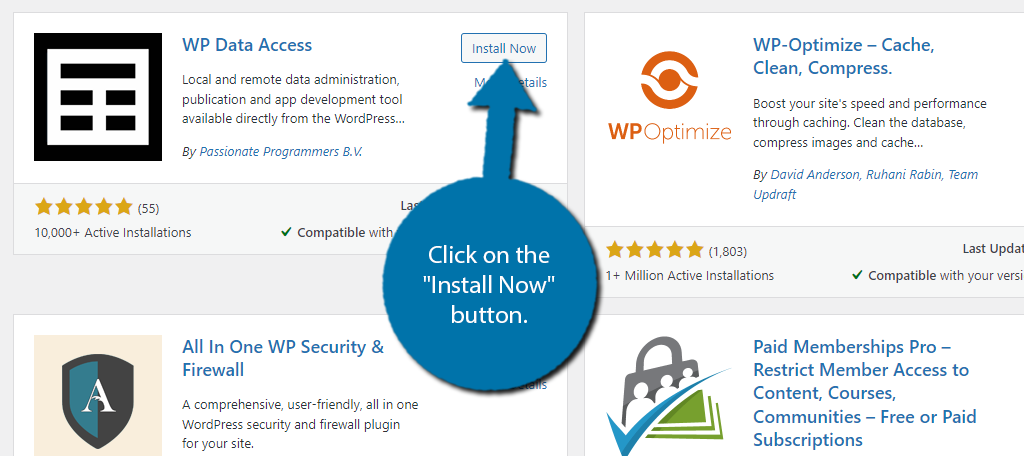
Scroll down until you find the WP Data Access plugin and click on the “Install Now” button and activate the plugin for use.
Upon activations, you will see a prompt asking if you would like to receive messages about new updates to the plugin. Feel free to skip or accept this, it will not have an impact on the plugin.
Step 2: Configure the Plugin
While this plugin is easy to use, I will say it has a lot of options to configure. They are split up into 10 different tabs, so, I am not exaggerating when I say there is a lot of settings to configure.
However, it still shouldn’t take that long.
The majority of them are simply choosing the option that applies to your website or checking a box. As you can imagine, there are way too many options for me to go into detail, thus I will give a brief overview of each tab.
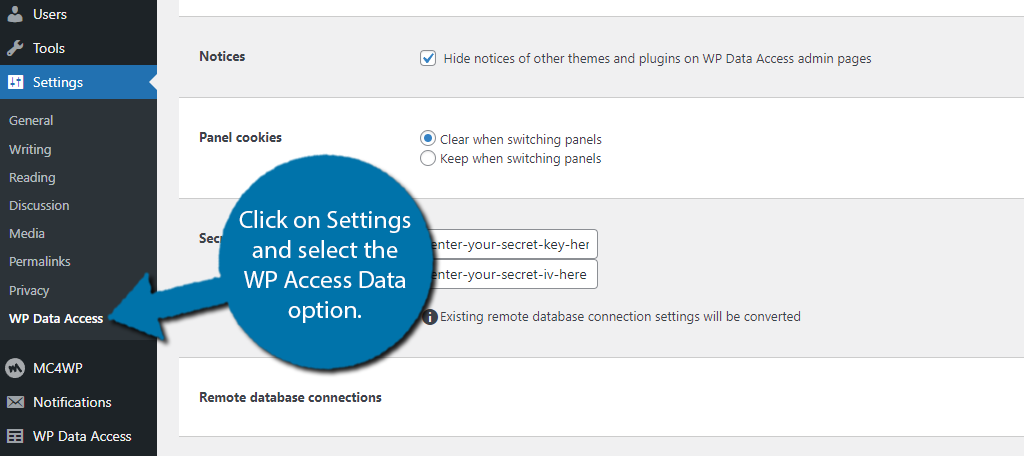
On the left-hand admin panel click on Settings and select the WP Access Data option.
Note: I want to stress that outside of making sure you are accessing the correct database and ensuring that the proper users have access to the plugin, most of the default settings are fine. You probably won’t need to change it.
And unless you really know a lot about databases, you probably won’t know which options will benefit you or not.
Plugin Settings
You will start off in the Plugin tab. This section is dedicated to the plugin itself and not the database.
Here, you will find options like the navigation method you will use, hiding notifications, enabling shortcode usage in posts and pages, date & time format, and much more.
The settings here are quite basic, and for the most part, probably don’t need to be changed.
Back-end
The Back-end tab is where things get a little more complex.
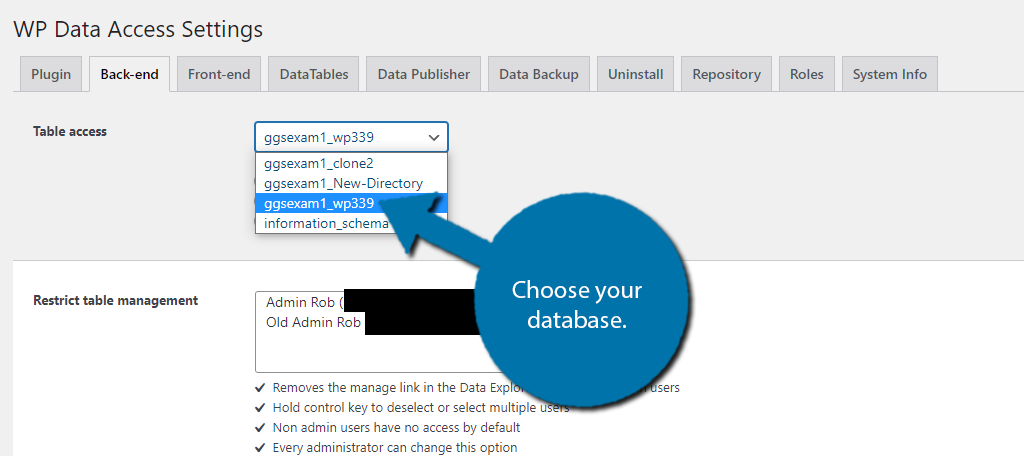
Firstly, you need to make sure you select the right directory. While not everyone will have multiple directories, it is pretty common. If you are not positive which one is your WordPress directory, you will need to manually check this.
To do this, just log into your cPanel and manage databases with phpMyAdmin. Confirm where all of your files are located.
You can choose the database by selecting it in the Table Access section.
The other options in this section will allow you to customize who can use this plugin, which by default are only Admin accounts. You can also edit what is editable like reading, insert, and delete data in the database itself.
Again, you probably don’t need to change anything, but you really need to make sure you are in the right directory.
Front-end
The front-end is a lot simpler. Here, you can select which database you are using. It’s no different than the previous section, but more importantly, here you can choose what tables will be viewable.
By default, it’s all of them. Again, you probably don’t need to change the settings. However, it can be annoying if you can’t find what you want quickly, thus, choosing what you need can be a big time saver.
That said, you actually need to know what you want to see, which can be tricky for beginners.
DataTables & Data Publishing
I’m going to combine these two tabs because they are short and go together.
The Datatables section allows you to configure the jQuery settings. If you don’t know what this is, don’t change the settings. You can also find the language section here.
In the Data Publishing tab, you can select to either use a code editor or text editor with JSON validation. I might sound like a broken record at this point, but the default options are fine if you don’t know what this means.
You can also select which user roles have publishing access.
Data Backup
One of the most useful features of this plugin is the backup you can create. You can choose a folder to store the backup, but I don’t recommend this. If something happens to the server your website is on, not only did you lose the data, but also the backup.
Instead, take advantage of the Dropbox option to backup your website. Depending on the size of your files, you may need to buy a plan, but it is worth it. That said, a free account may be enough for some sites.
Well, as long as you’re just backing up the content.
The Rest of the Settings
You now only have four tabs left. The first of them is the Uninstall tab. As the name suggests, this is how to uninstall the plugin. You can choose to have it delete any tables you created with the plugin. Or, you can leave them be – the choice is yours.
The Repository shows you what is enabled and the number of backups kept.
The Roles tab is all about User Roles. It allows you to enable role management where you can configure each role and even add your own custom user roles.
Finally, the System Info just provides plugin-specific information that most users will not need.
That covers all of the settings.
Step 3: Using the Database View In WordPress
At this point, all that’s left is to actually use the Database view on your site.
I want to emphasize that I am showing you how to use the plugin. I am not telling you what changes you should or shouldn’t make. This is all website specific.
First, click on the WP Data Access option.
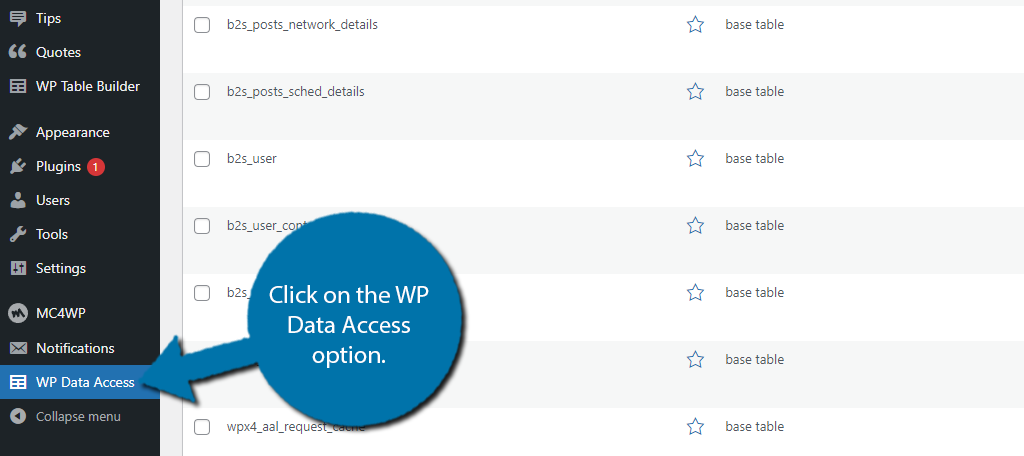
Here you can view all of the tables within your database similar to posts and pages. You can even apply bulk actions in the same fashion. If you hover over the table, you will see a Manage and Explore option.
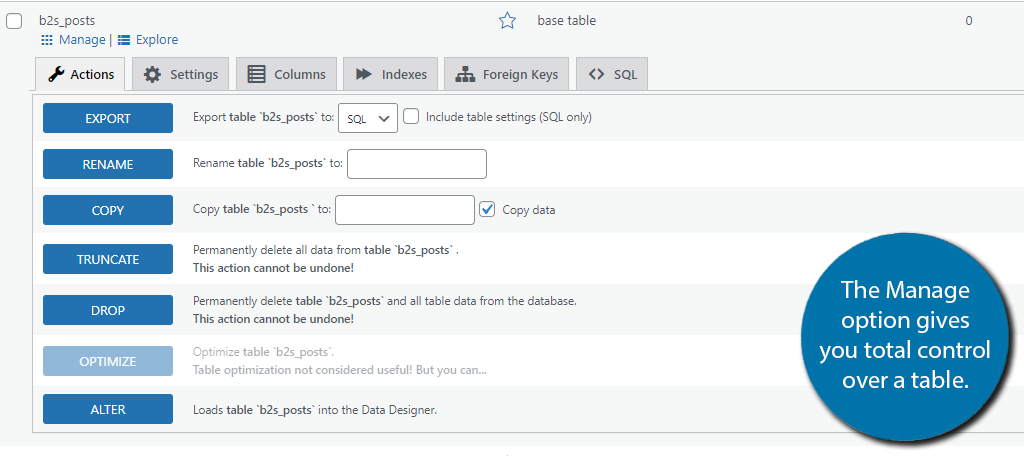
The Manage option allows you to take actions like exporting, renaming, copying, truncate, drop, and more. It essentially gives you full control over that piece of data. Most importantly is the Alter option.
This is how you actually edit a table.
The Explore option will show you detailed information about that table and where it is used. In some cases, tables will not produce any results when explored.
That’s it. You can edit or manage any table within the database using this plugin.
Make Database Management Easy Today
Database management can be very difficult or easy depending on what you are trying to accomplish. In either case, this plugin will help you tremendously with the added bonus of allowing you to do it directly from your website.
Just be careful. Making changes to your database can cause serious problems if done carelessly. Always be sure about the end result.
Why did you need to access your database? Did you find the plugin helpful?
