If you run a business, I am willing to bet you want to get paid, which means you are going to need an invoice system. Luckily, it’s easy to set up an invoice system in WordPress if you use a plugin.
In this case, that plugin is GetPaid.
This plugin handles everything from creating Buy Now buttons to accepting payments (PayPal, Stripe, and about a dozen other payment gateways). It is also compatible with a variety of form plugins.
Today, I will demonstrate how to set up an invoice system in WordPress with the GetPaid plugin.
This plugin is for:
WordPress 5.9
Plugin: Payment forms, Buy now buttons and Invoicing System | GetPaid v2.6.11
What Is An Invoice System?
A lot of people have heard of an invoice system, but not many know what it actually is.
In its simplest terms, an invoice system is one in which the seller provides an invoice (a document stating the price and quantity of the purchased goods) to the buyer. The buyer will then pay the seller and file the invoice away for tax purposes.
Now, in reality, these systems can be very complex as there can be a lot of moving parts and businesses may deal with a variety of suppliers. This is exactly why they need to have an invoice system in place to handle everything.
Some of these systems can even create and manage a business’s tax returns as they do contain all of the necessary information. In most circumstances, sellers are required to produce an invoice as they are essential for tax purposes.
It is also important to point out that invoices themselves are legally enforceable documents, which ensure the seller gets paid.
The good news is that with the right invoice plugin, these are easy to set up in WordPress, so let’s get started.
How to Set Up An Invoice System In WordPress With GetPaid
Step 1: Install GetPaid
GetPaid is an invoice payment system that can be used for subscriptions, digital products (eBooks), tangible goods, and fundraisers & crowdfunding. It also features some analytical tools to help you see how your business is doing.
Nothing is complicated to set up, but it can be difficult when combining it with another plugin.
The good news is that the plugin provides all of the information you need, you just need to find it in the directory. I won’t be covering this because it’s entirely dependent on the plugin you want GetPaid to work with, but it really just boils down to copying and pasting code.
Let’s start by clicking on Plugins and selecting the Add New option on the left-hand admin panel.

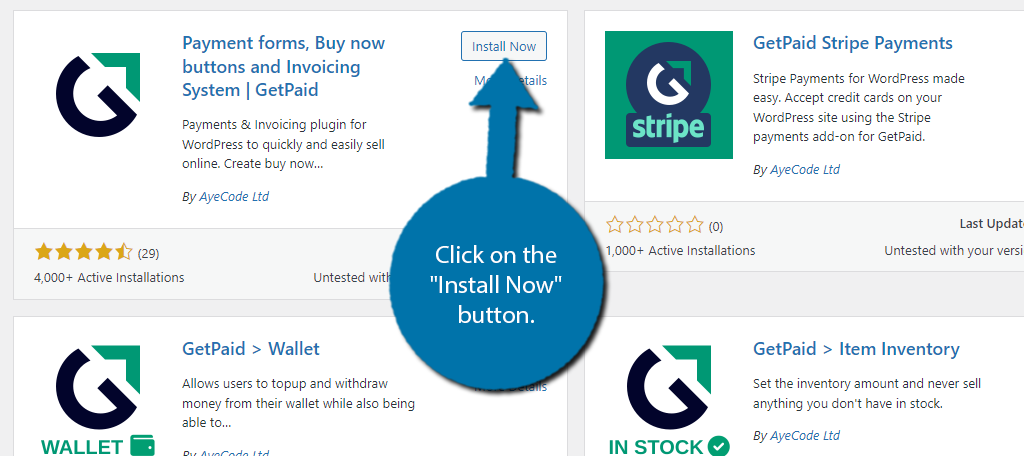
Search for GetPaid in the available search box. This will pull up additional plugins that you may find helpful.
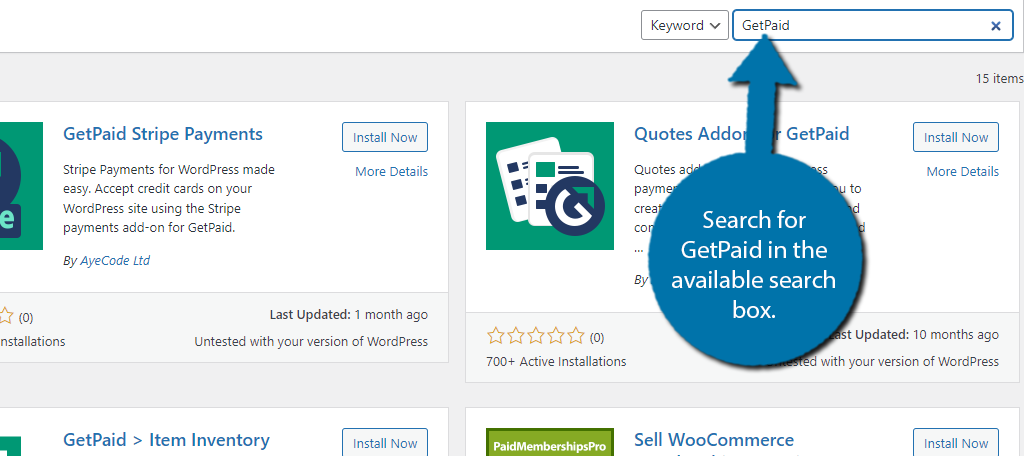
Scroll down until you find the GetPaid plugin and click on the “Install Now” button and activate the plugin for use. Just keep in mind that the full name of the plugin is “Payment forms, Buy now buttons and Invoicing System | GetPaid.”
As you’ll see, GetPaid has a lot of useful tools available in WordPress. You want to make sure you’re using the right plugin for this tutorial.
Step 2: Setup Wizard
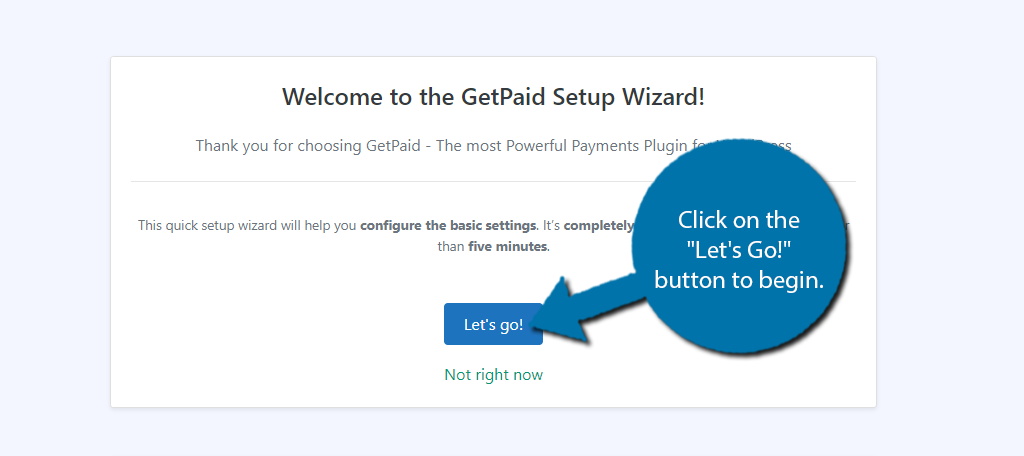
Upon activation, you will be prompted to begin the setup wizard. While this is optional, it is the easiest way to set up the plugin, so let’s do it. Either way, we will be going through the settings afterward, so don’t worry too much.
Click on the “Let’s Go!” button to begin.
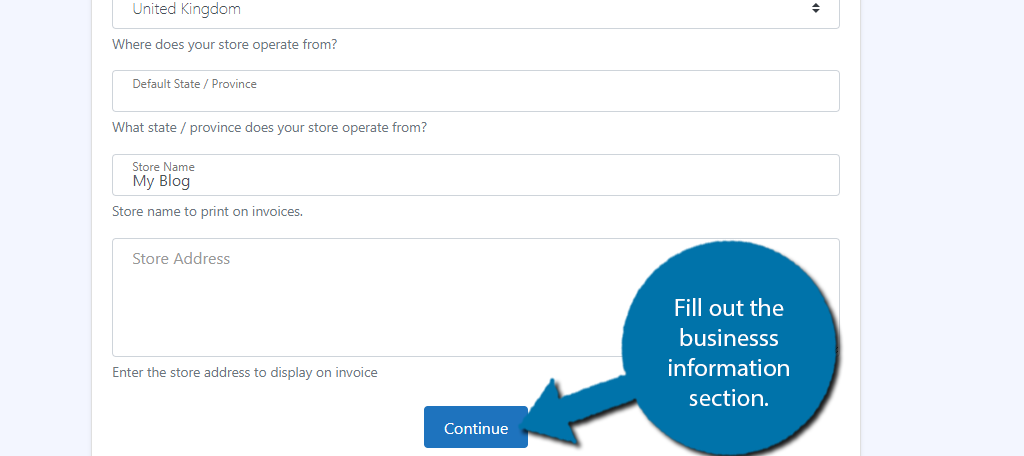
First, you need to fill out the business details. This includes things like where you are located and the store name. Enter all of the necessary information and click on the “Continue” button.
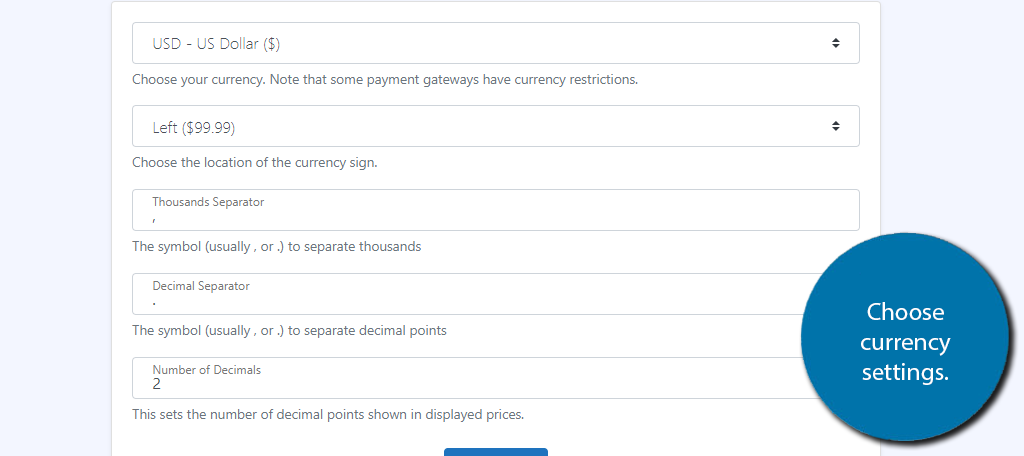
Next, you need to decide what currency your store will be based in and how it will appear. Just select the settings that best suit your website and continue on.
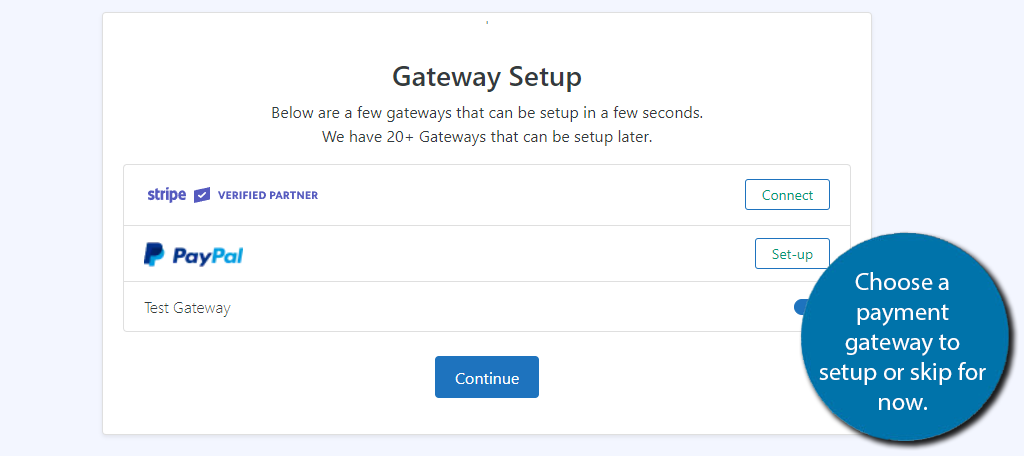
Now, you need to set up a payment gateway. While the plugin features support for over 20 of them, to keep the setup wizard simple, you will only see PayPal and Stripe here. You can set up the rest later, so feel free to skip this step for now.
Following this, the plugin will recommend some other plugins you may find useful. Feel free to skip this. After this, you are done, and you will see a short introduction video to help you use the plugin.
I recommend watching it since it is only 3 minutes.
Step 3: Settings
The setup wizard is designed to quickly get you started, but there is a full settings section and you should take a minute to go through it.
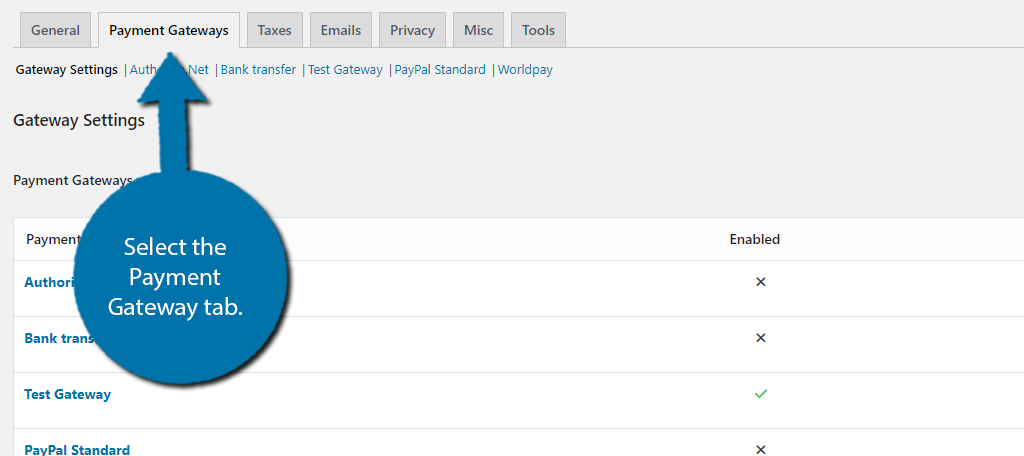
For example, this is where you will find the full payment gateway section that features over 20 different options.
You need to make sure the ones you use are connected otherwise you cannot get paid. You can find these in the Payment Gateways tab.
Now you may notice that there are not 20+ options like I just said. Well, that’s because you need to add them, and no, they are not free. You can do this by clicking on the “Add Payment Methods” button.
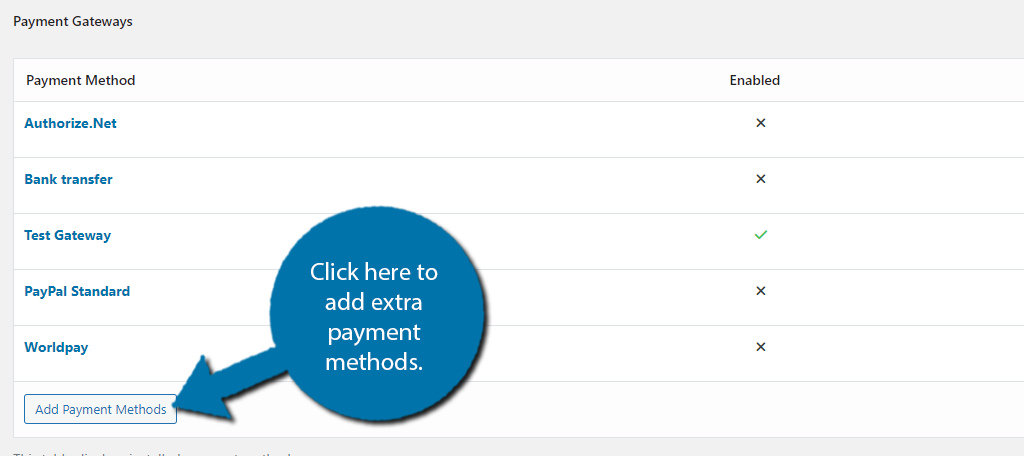
I won’t cover the setup process because they are unique to the platform and do require you to create an account first.
It’s also worth pointing out that there is a tab dedicated to taxes. You definitely need to fill this section out before using the plugin.

After this, I would recommend checking out every tab the settings offer. Some tabs actually have additional tabs to explore like Taxes. Make sure everything is correct or else it could cause headaches later on.
Step 4: Create Items, Discounts, Invoices, & More
Alright, now it’s time to start filling in the plugin with actual products and other fun stuff. The good news is that this is pretty cookie-cutter, so you won’t have any trouble.
However, you will definitely spend a lot of time here.
That’s because this is the meat and potatoes of the plugin. The bigger your business is, the longer it will take to add all of the items you offer.
You can find all of the options for this on the left-hand admin bar under the GetPaid option.
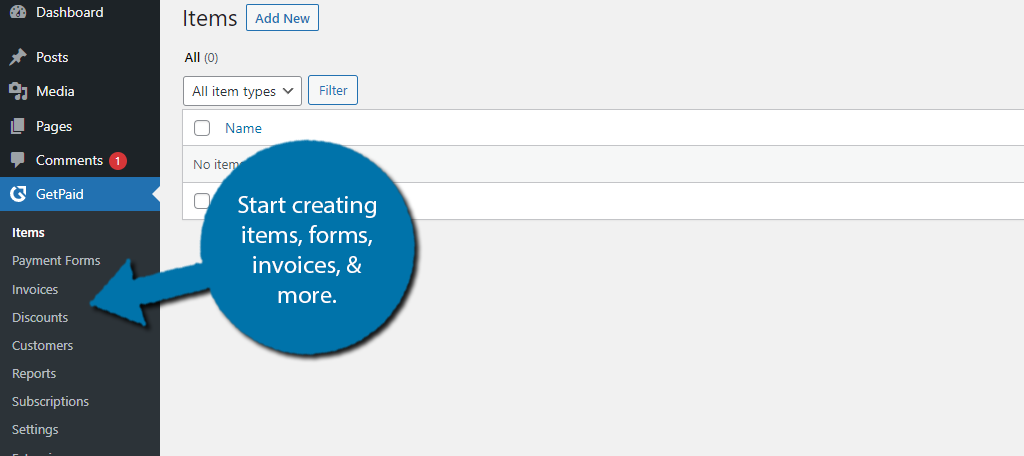
So, for example, if you want to create a payment form, just click on Payment Forms and select the add new option. This applies to all of the options available. Each one is unique, but they’re very straightforward.
Also, once you start using the plugin, remember to check out the reports section to view some analytical data.
At this point, you should have everything set up and in place. Congratulations on learning how to use the GetPaid plugin to set up an invoice system.
Create An Invoice System In WordPress Today
If you plan on running a website that sells goods, services, subscriptions, or even collects donations, you need to have an invoice system in place. This is not even just for your benefit, but for the buyer’s benefit.
For example, if someone is donating money to a charity, they may need that invoice to write it off during tax season. Not offering any would be a deal-breaker for major contributors that donate specifically for tax advantages.
But as you just saw, it’s not that hard to set one up with the GetPaid plugin, so, make sure to do it today.
How easy did you find it to set up an invoice system in WordPress? Do you use another WordPress invoicing plugin?
