WooCommerce is a great way to sell both physical and digital products from your WordPress website. The plugin runs seamlessly and gives you everything you need to start. Sometimes though, you want a little extra style. This is where a WooCommerce cart icon comes in.
Have you ever been on a website shopping and you see a small menu cart icon located somewhere in the website menu? If you own a WooCommerce website, you can accomplish this. It will give your website users the ability to see a cart icon in the menu areas of your website.
There are a couple of ways to do this. You could write your own code and build the WooCommerce cart icon that way. However, that seems like a lot of work for something that can be done using a great WordPress plugin.
I have found a solid plugin that you can install and configure to show a cart icon in the menu area of your website. We will go over how to install, activate, and set up the tool.
First, let’s talk about why you would want to display a WooCommerce cart button on your website.
Why Display a WooCommerce Cart Icon?
When a customer comes to your website, naturally you want to give them a personalized shopping experience. There are a number of ways to do this in WooCommerce. One of these ways is to add something like a shopping cart icon to your website.
Since the plugin we are going to look at allows for different display options, you give your site users the ability to see their cart items and totals from any area. What this means is that they will not have to click on the cart link to view their items and totals on another page.
This is a smooth, slick, and fun way to personalize the shopping experience. Not to mention it gives customers an easier time with navigation. Let’s take a look at the plugin.
WooCommerce Menu Cart
The WooCommerce Menu Cart plugin will automatically install a shopping cart button into the menu navigation bar area of your website. The plugin is very lightweight, and it is easy to install and configure.
This is actually one of those plugins with only a few configuration options, but it brings a lot of power and functionality. WooCommerce Menu Cart does have a pro version of the plugin that will offer even more functionality, but you can do enough with the free tool.
The plugin is packed with features for something so small and lightweight. Some of these include:
- Display Cart Icon With Prices
- Cart Icon Display With Items
- Display Cart Icon With Both Prices and Items
- Show Cart Icon Only When Items Are Added
- Always Display Cart Icon
- Float Cart Left, Right, or Use Menu Default Settings
- Ability to Customize Your Own CSS
This WooCommerce cart icon plugin is also very compatible with most (if not all) major plugins. Finally, it comes with translation for over 20 languages. Basically, it is a fantastic little plugin for displaying a shopping cart icon on your website’s menu.
Let’s take a look at how to install, activate, and set up the WooCommerce Menu Cart plugin.
Note: These instructions assume that you already have WooCommerce installed and set up on your website.
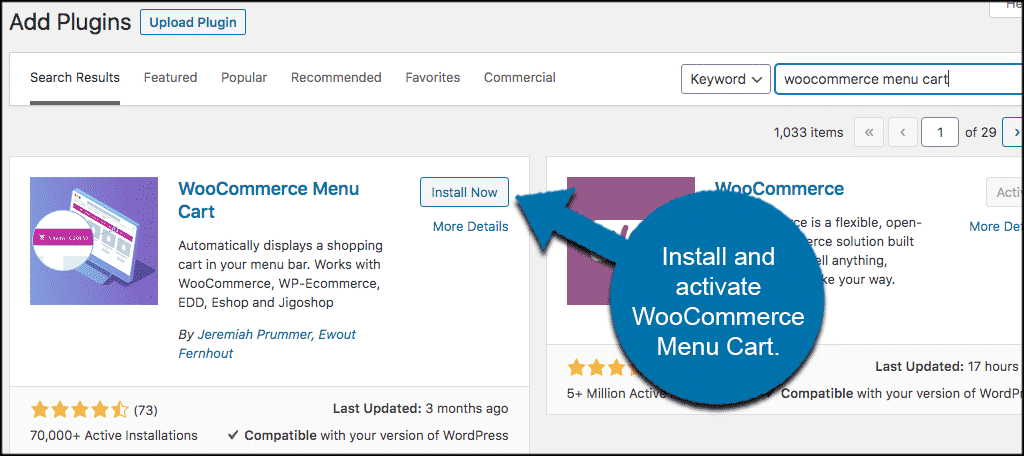
Install and Activate WooCommerce Menu Cart
In order for you to properly display a WooCommerce cart button, you first need to install and activate the plugin. You can do this right from your WordPress admin dashboard. Simply go to the plugins page and search for the plugin you want.
Once the plugin has been installed and activated, you need to get to the main settings page to configure the settings how you would like. To do this, click on WooCommerce > Menu Cart Setup.
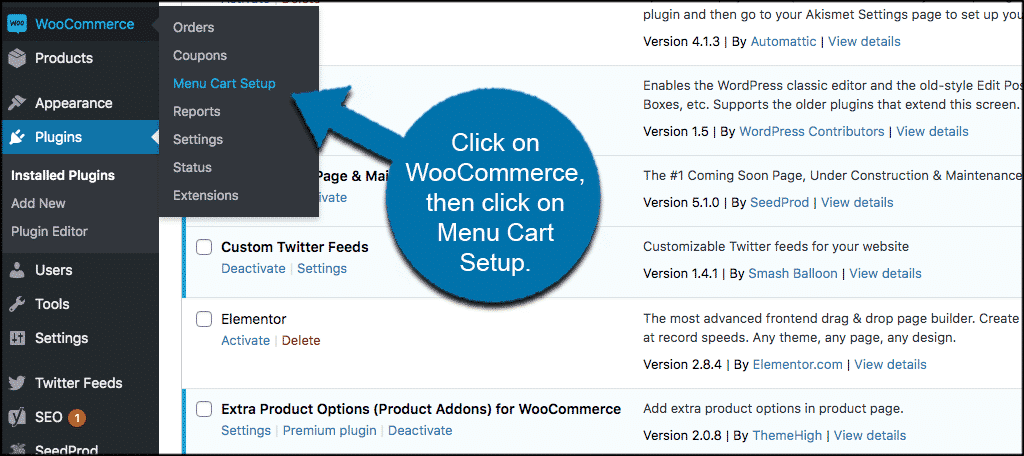
This will bump you to the main settings page where you can configure the WooCommerce cart icon plugin to fit your needs.
Configure WooCommerce Cart Icon
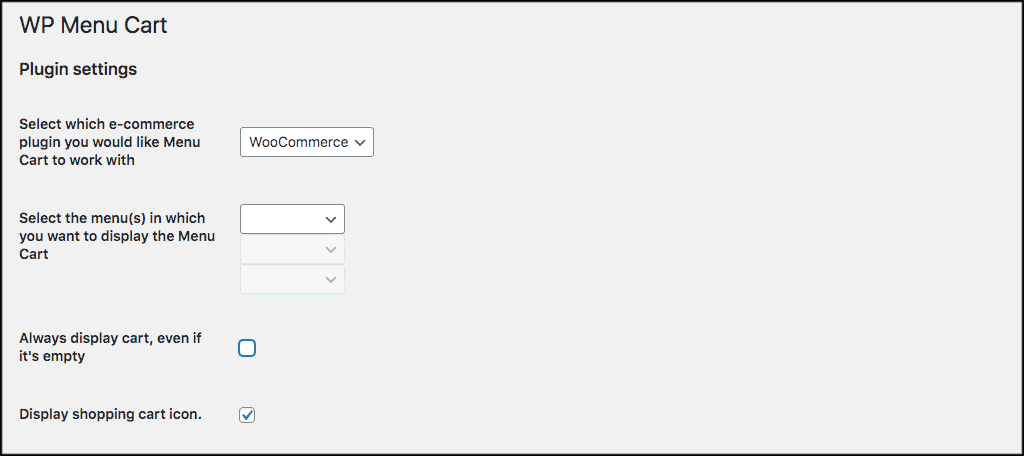
Now that you are on the main settings page, you will see all the configuration options in one area. Like I said above, the plugin is very easy to configure and get running. Let’s run through the settings together.
The first four settings of the tool allows you to set the display functionality of the icon. This includes things like the eCommerce plugin you’re using (in this case, WooCommerce), the menu where you want the icon to show and whether it’s displayed when empty. You can also choose to enable or disable the icon entirely. This might be helpful when troubleshooting.
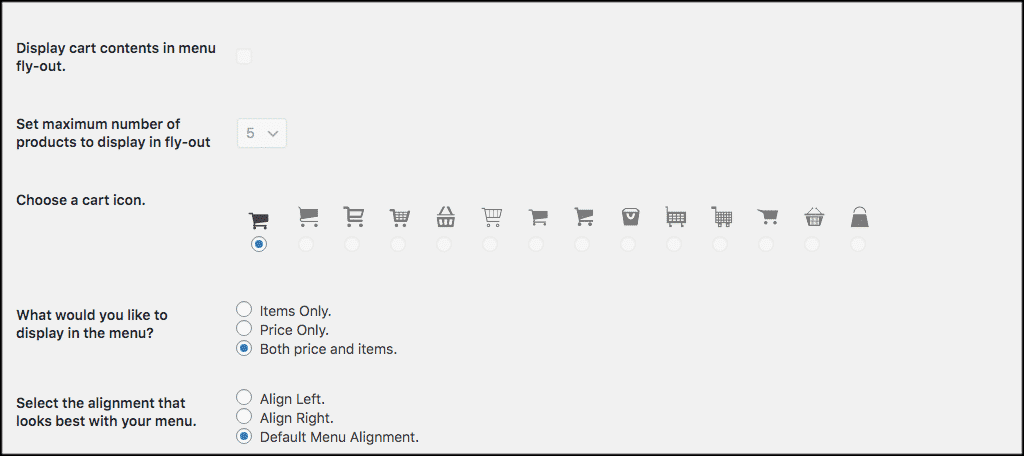
Now scroll down some and take a look at the next set of options. You have the choice of fly out display options as well as the number of products to display. Here, you also have the choice to choose your cart icon.
Note: The free version of the plugin only lets you use the default icon to display. If you want more icon options, you will need to purchase the pro version.
Also, you can choose to display prices, cart items, or both. Finally, make a choice of where you want the cart to display. You can have it float right, float left, or let it pick up the default menu alignment.
Now scroll down a little more to the last few configuration options for the WooCommerce menu cart plugin. You have the choice of how you want to display prices in the menu cart. You can display total products or display prices with discounts.
Here is where you can enter any custom CSS classes you want as well. Only mess with this if you know what you are doing. Finally, you can pick whether or not you want to use custom AJAX or not.
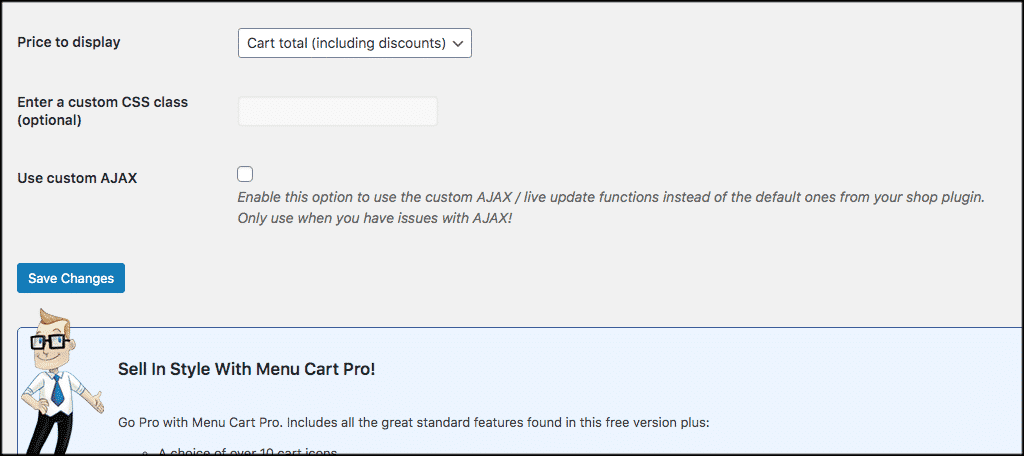
That’s it! Don’t forget to click on the “Save Changes” button so that all your configuration choices are applied. You have done it. The WooCommerce cart icon will now display on the front end of your WordPress website according to the settings you chose.
WooCommerce Cart Icon Pro
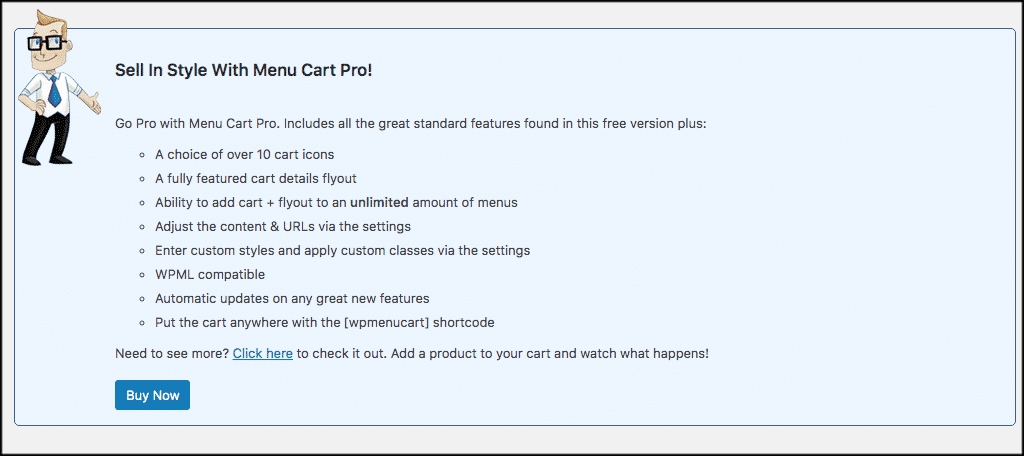
Just to touch on the pro version of the plugin for a second. You can definitely get away without buying it. However, if you want a lot more functionality and more settings and style options, then the pro version of WooCommerce Menu Cart is definitely the way to go.
You can view and purchase it right from the main configuration page of the plugin we already have installed.
Final Thoughts
Create a more personal shopping experience for your customers by adding more functionality to your WooCommerce website. A simple way to do this is to add a WooCommerce cart icon. This gives your website a more visually appealing look and also allows for easier navigation.
No longer will a user need to navigate to their main cart page to see their added items and pricing totals. You can use the plugin to display all of this for them. Adding extras to your WooCommerce setup is never a bad idea. There are other ways to add functionality as well, but adding this cart icon is a good start.
Have you ever used this WooCommerce shopping cart icon plugin to display the icon? Do you prefer another plugin or coding it yourself to accomplish this?
Thanks, I am using this but my home page has a dark background and the default colour of the cart and text is blue, so you cant see it on the home menu (i am using transparent menu). Is it possible to change the colour to be white on my home page and dark on the other pages?
Hi Andrew,
If you are using the free version of the plugin you are probably going to have to access the plugin files and change some code. The pro version may have different color settings built-in. Please contact the developer to inquire about that.
This is very good Solution. Thank You Very much.