Of all the issues you may encounter when selling products online, shipping options may be the most difficult to deal with. While WooCommerce allows you to add different shipping options, you are not able to add weight-based shipping by default. However, there is a fantastic plugin you can use to get this done.
There are a few reasons you may want to add this form of shipping to your online store. Let’s take a look at how to get WooCommerce weight-based pricing added to your website as easily as possible.
Why Add Weight Based Shipping?
Taxes and shipping; those are probably the two most problematic issues you have to deal with when you are selling items from your website. This can escalate when you need to ship out of country, or send large items. The best way to do this is to add weight-based shipping in WooCommerce.
This allows you to more easily set acceptable shipping rates based on the prices of the weight of an item. This actually works in favor of both the buyer and the seller. It allows you to produce a fair price for shipping heavier items, while at the same time giving your customers a fair rate for their purchase.
Face it, one size does not fit all when it comes to shipping. There are just too many variables involved. WooCommerce does have multiple add-ons, including a table rate shipping style to incorporate. And while this is another good way to set shipping up, it still does not allow you to deal with weight and proper pricing.
You can change prices in WooCommerce according to country, but not according to the heaviness of an item.
Let’s take a look at a great plugin that can be used to help you easily add different WooCommerce shipping cost based on weight.
WooCommerce Weight Based Shipping
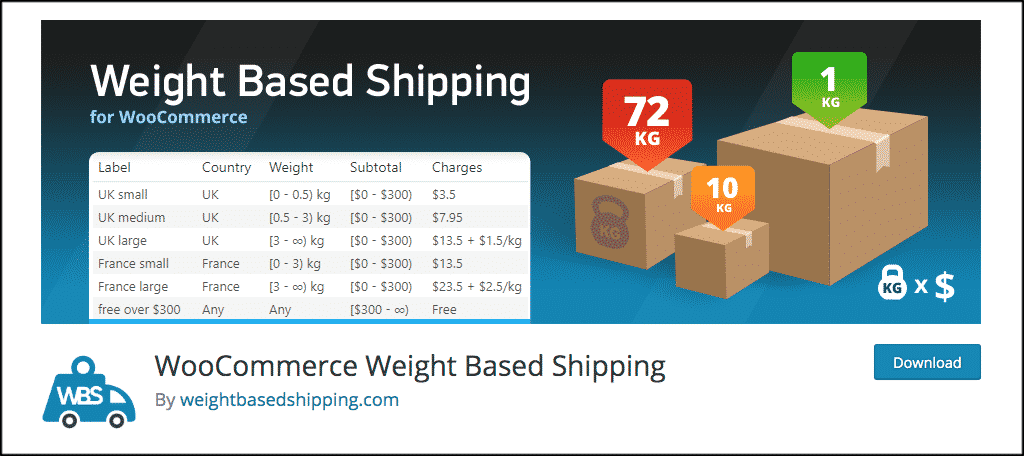
The WooCommerce Weight Based Shipping plugin is a very simple, yet very powerful tool that allows you to easily add different shipping calculation costs based on weight. You can add multiple rules for a variety of conditions. This gives you more freedom when it comes to shipping options based on the weight of a product.
The plugin is compatible with all other WooCommerce plugins and is very easy to install and set up. It comes loaded with a lot of great features as well. Some of these include:
- Order Weight
- Subtotal
- Destination
- Flexible Price Calculation
- Conditional Option for Free Shipping
- Shipping Classes Support (Pro Version)
Note: Yes, this plugin does come with a pro version (paid). You are more than welcome to check that out. However, this tutorial is based on the free version, and the free version goes you everything you need.
The plugin also gives you the ability to add as many shipping rules as you need. You can apply these rules to things like order destinations, weight, and subtotal ranges.
Let’s take a look at how to get the plugin installed on your WordPress site. Then we will go through the setup together and get you on the right track.
Note: This assumes you already have WooCommerce installed and set up on your website.
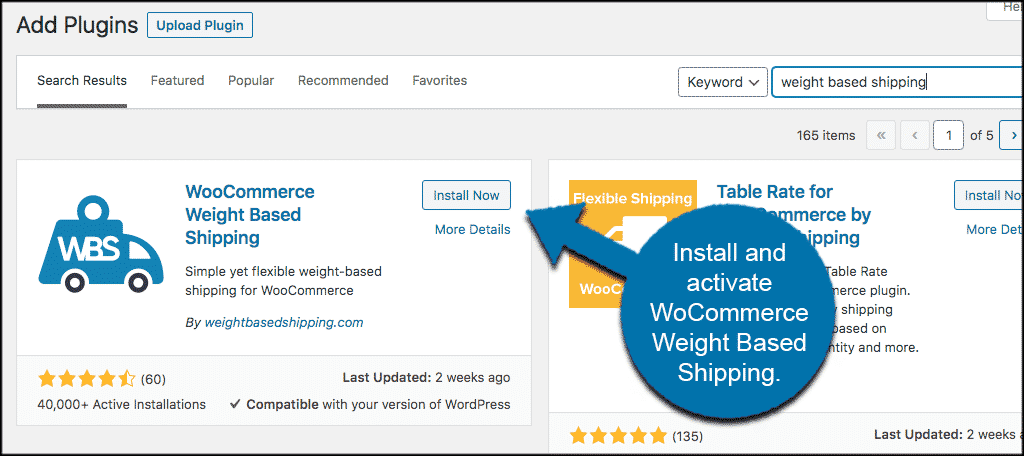
Install and Activate Plugin
In order to start creating weight-based shipping prices in WooCommerce, you first need to install and activate the plugin. You can do this by heading over to the Plugins page inside your WordPress admin dashboard. Simply search the plugin name, then install and activate it from there.
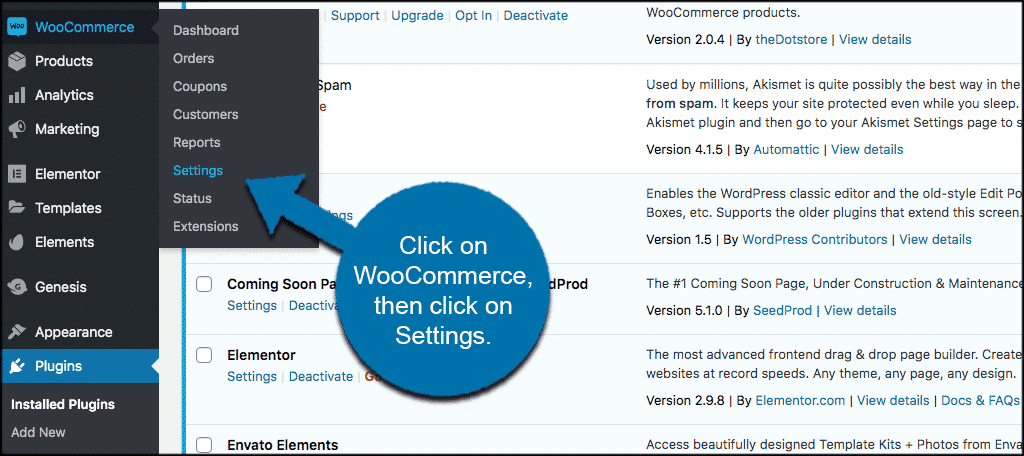
Once the plugin has been installed and activated, click on WooCommerce > Settings. You will find these options on the left side menu of your dashboard.
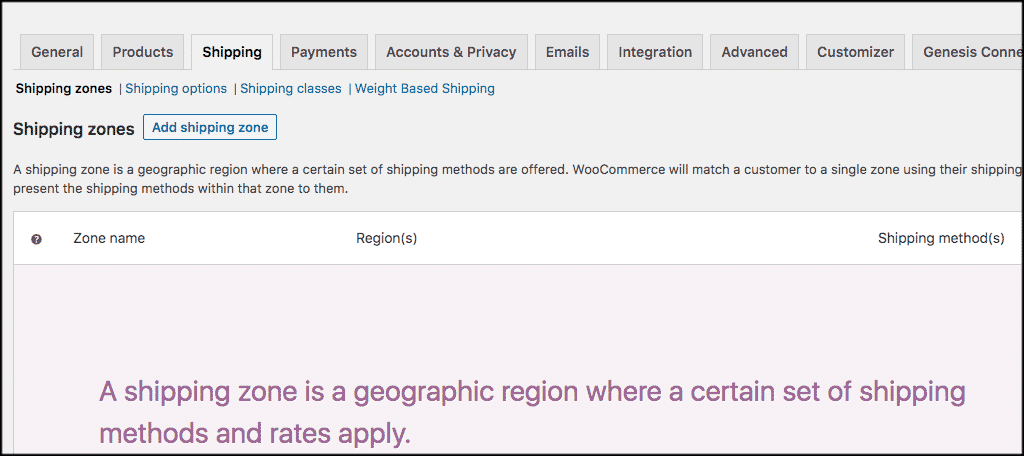
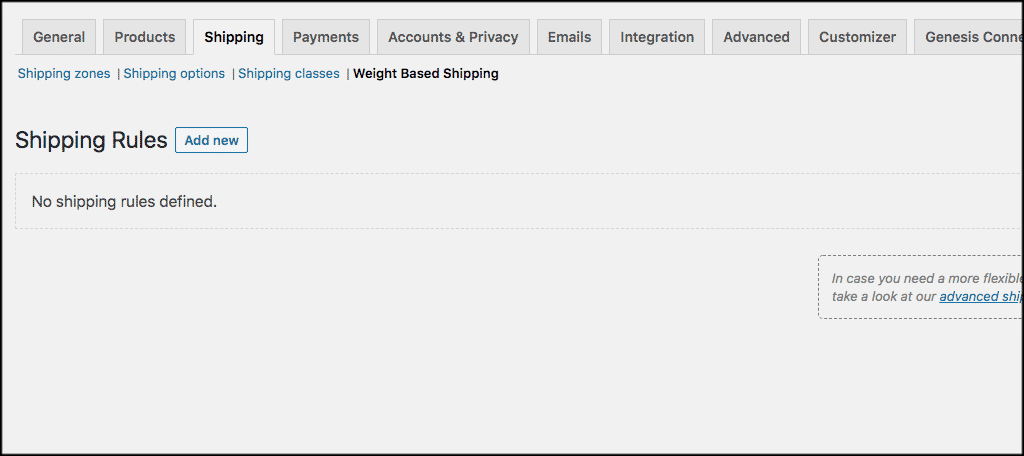
This takes you to the main settings page for WooCommerce. In here, you see a number of tabs. Click on the “Shipping” tab. Under the shipping tab, you will see some sub links. In this case, you want to click on the “Weight Based Shipping” link option.
This gets you to the area where you are now able to add weight-based shipping rules how you see fit. There are a few things to go over, though.
Let’s go through it together and get you up and running.
Add Weight Based Shipping Rule
At this point, you are on in the main area where you can add a weight-based shipping rule. Let’s go ahead and add one together.
Click on the “Add Shipping Rules” button and let’s get started.

This will take you to a blank canvas. You can see no shipping rules have been added yet. All of your rules will display here when you add them.
Go ahead and click on the “Add Rule” button and let’s add a rule together.
When you click on the add new button, a popup box will appear with several different configuration options. The way you fill these out will be based on how you want your shipping rule to act upon checkout.
Let’s go over these options together real quick.
Rule Settings
The top portion of the box has some rule settings. This will include things like labels, taxable items, and titles. Go ahead and fill in all of these options how you want. Remember, only you will see the name of the rule. This is for you to easily keep track of the rule you created.
Name it something relevant so you know which rule is being used and when it is being used.
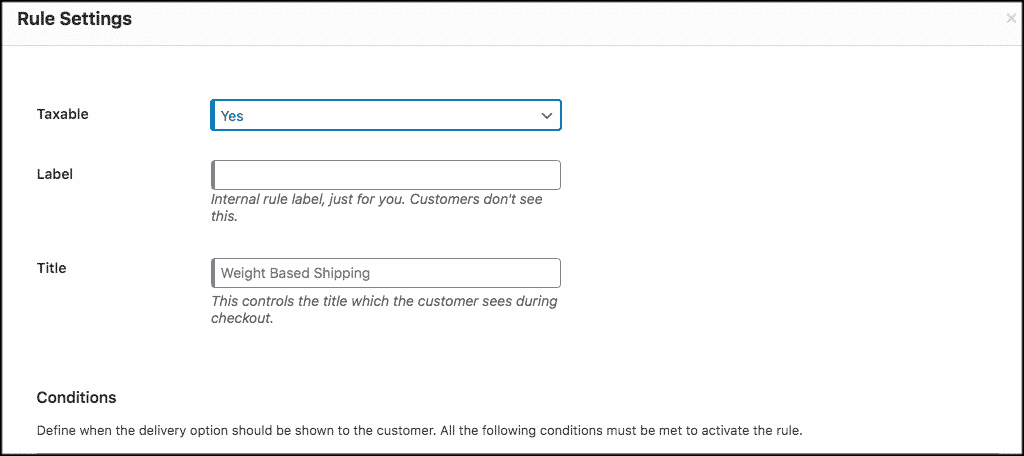
Conditions
Now scroll down a little and fill in the conditions. This includes destination, order weight, and subtotal. You can play around with these quite a bit and get them perfected.

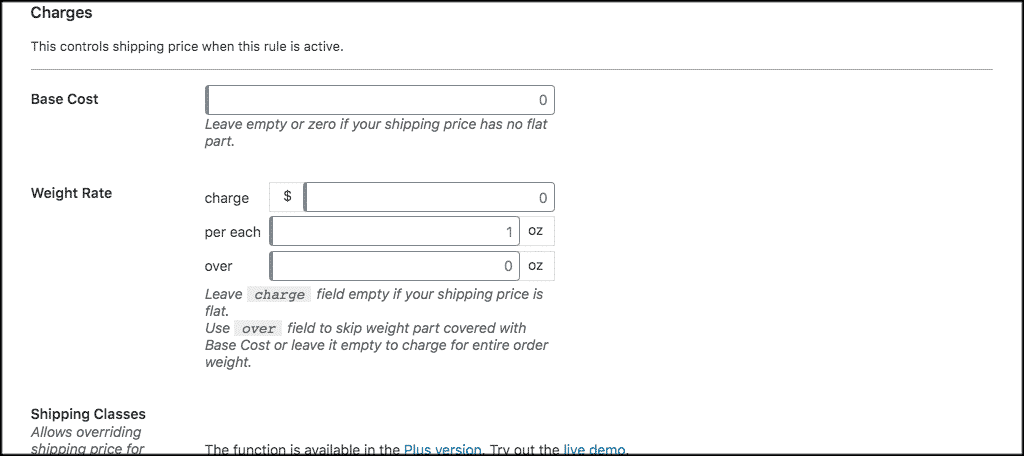
Charges
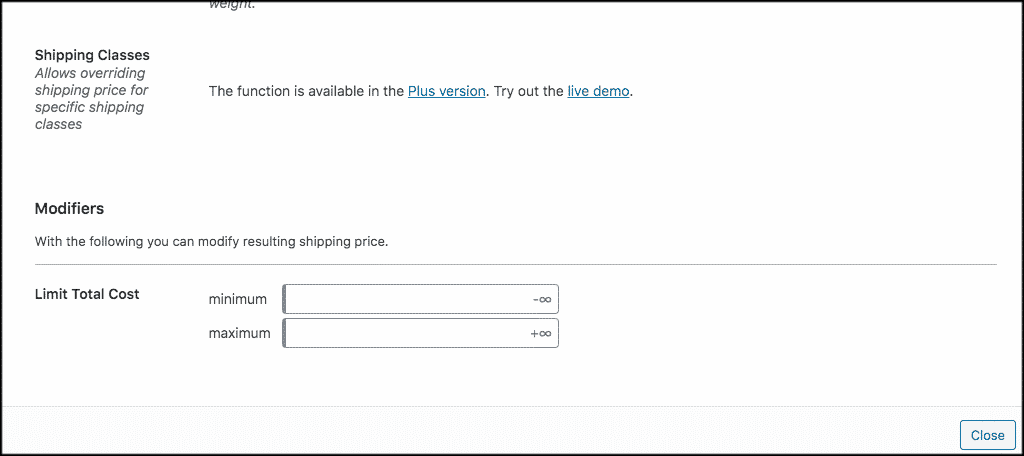
This is where you set your charge rates regarding base cost and weight. You can also add shipping classes here if you happen to be using the pro version of the plugin. Remember, this is a setup of the free version. So skip past that if it doesn’t apply.
Modifiers
Lastly, add modifiers for certain shipping prices if you need to. You have the ability to limit total cost by using a combination of minimum and maximum pricing numbers.
When you have finished with all the configurations you want, simply click on the “Close” button located on the bottom right of the popup box.
The box will close and now you see that you have a new weight-based shipping item on your list.

That’s It! You have successfully added a weight-based shipping method in WooCommerce. You can repeat this process and add as many as you want.
If you enable them, they will show as options to your customers on the checkout page.
Final Thoughts
Finding a way to make shipping as easy as possible in your WooCommerce store can be challenging. This is especially true if you ship a number of different items across several different countries.
Weight-based shipping will not only help make the shipping process smoother for you and your website users, but it will also save you a lot of time and effort when figuring out how to charge shipping prices on certain items.
I hope this tutorial has been helpful. Installing the plugin above will make your life a lot easier when it comes to shipping and the shipping process within your WooCommerce store.
Have you tried using weight-based shipping in WooCommerce before? Do you have another method for shipping that you like better?
The plugin seems to work very fine but i can’t link with any other plugin for cities
Sola,
Please contact the plugin developer and see whether or not it is compatible with what you are trying to accomplish.