When you are dealing with WooCommerce, perhaps the two toughest things to set up properly are shipping and taxes. Shipping can be tricky in a number of areas. One of the things that can be hard to deal with is shipping to a PO Box. If you want to ship to no PO boxes, then this is the article for you.
WooCommerce is the most widely used and popular eCommerce system in the world. Not only can you easily install the main plugin on your WordPress site, but it is totally free to use. Website owners go through all sorts of WooCommerce plugins to figure out which ones are best.
Why is Shipping to a PO Box Difficult?
Figuring out shipping prices, destinations, and what providers to use for shipping purposes in an online store can be difficult. You make all your selections, which is the first step. After that, you have to figure out how to tie them all together using plugins, code, and APIs.
With all these things to figure out, shipping to a PO box should not be something you are worried about. It’s not that shipping to a PO box from your store is difficult, it’s all the things that can go wrong once the shipment arrives.
Oftentimes, a PO box is not large enough to take a shipment. And in other circumstances, certain shipments may not even get to the correct destination because of the oddities that can occur during the process.
Last but not least, many providers like FedEx and UPS don’t ship to PO boxes themselves unless certain stipulations are met. If you are using any of these providers, it automatically puts your store in a bind.
If you are interested in not shipping to a PO box, then there is a simple and easy way to accomplish this in WooCommerce. Today, I am going to show you how you can accomplish this in WordPress with the help of a smooth and easy to use plugin.
Let’s take a look at the plugin in question and see what it has to offer.
WooCommerce: No PO Boxes

WooCommerce: No PO Boxes is a smooth, simple to use, straightforward plugin that simply restricts a WooCommerce checkout form from allowing PO Boxes for shipping addresses by a customer.
That’s it. Once installed and activated, you can go to the settings page for the plugin and restrict the checkout form however you want. The setup process is very easy as well, and we will go over that together below.
The plugin is very lightweight and it will not slow your website down in any way. It simply lets customers know that there are no PO boxes allowed in the shipping fields.
While compact and easy to handle, the plugin does allow for some good functionality including:
- If a customer has the same billing and shipping address, then they cannot complete checkout with a PO Box as a billing/shipping address.
- A customer cannot use a PO Box as a shipping address but can use it as a billing address if they are shipping to a different physical location.
- Plugin does not restrict the use of PO boxes on digital/virtual goods.
- WooCommerce shipping must be enabled to use properly.
- Requires that WooCommerce has a shipping method set up, even if it is free shipping only.
All-in-all, you won’t find and easier to use or manage plugin if you want to enable no PO box shipping in WordPress.
Let’s get the plugin set up and running together.
Note: The rest of this tutorial assumes that you have WooCommerce installed, set up, and running on your website.
How to Use No PO Boxes in WooCommerce
Step 1: Install and Activate the Plugin
In order to stop customers from trying to ship to a PO box from your eCommerce site, the first thing you need to do is install and activate the No PO Boxes plugin.
You can do this by heading over to the Plugins page of the WordPress admin dashboard. Once you are there, simply use the search field to search for the plugin by name. When you see it pop up, install and activate it right from there.

Step 2: Access the Plugin Settings Page
Now that the plugin is running, you want to access the settings page so that you can configure No PO Boxes and get it set up how you want.
You can do this by WooCommerce > No PO Boxes, on the left menu area of the dashboard.
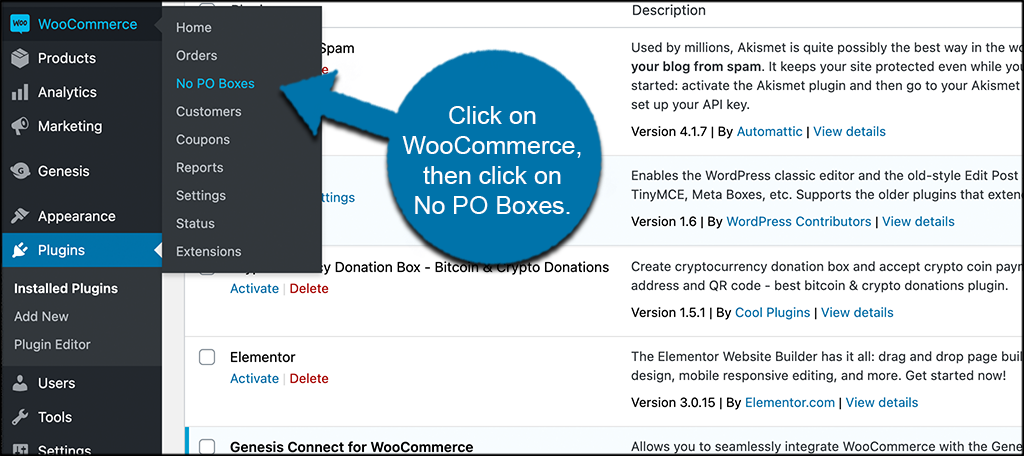
You can see that this option is now available under the WooCommerce tab because you already activated the plugin.
Step 3: Configure No PO Boxes
At this point, you have arrived on the No PO Boxes plugin configuration page. There isn’t too much to do, you just need to make a few selections and get the plugin going.
The main options at the top allow you to enable or disable the PO box restriction setting whenever you want. You will also be able to edit the error message you want customers to see when/if they try to enter a PO box as a shipping address.
You can also enable restrictions by shipping method and configure shipping zones if you would like.
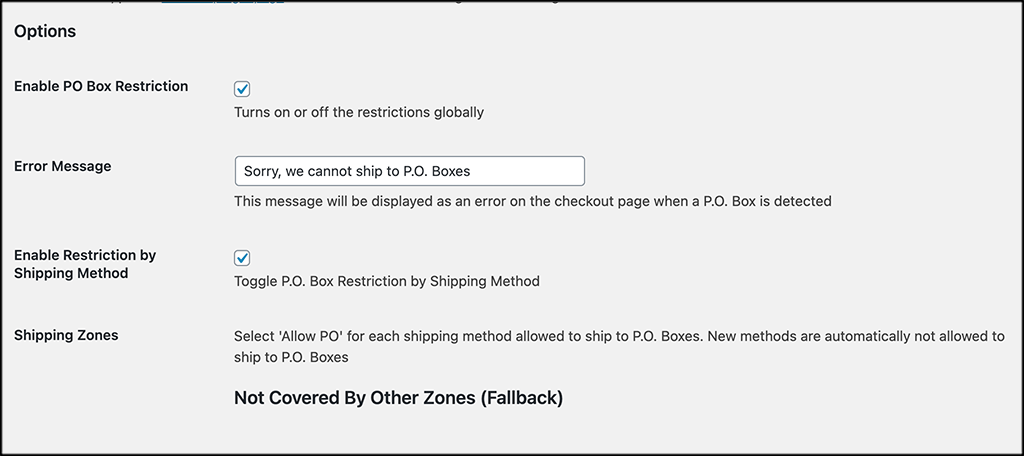
Click on the “Save” button when you are done selecting options.
Currently Restricted Text
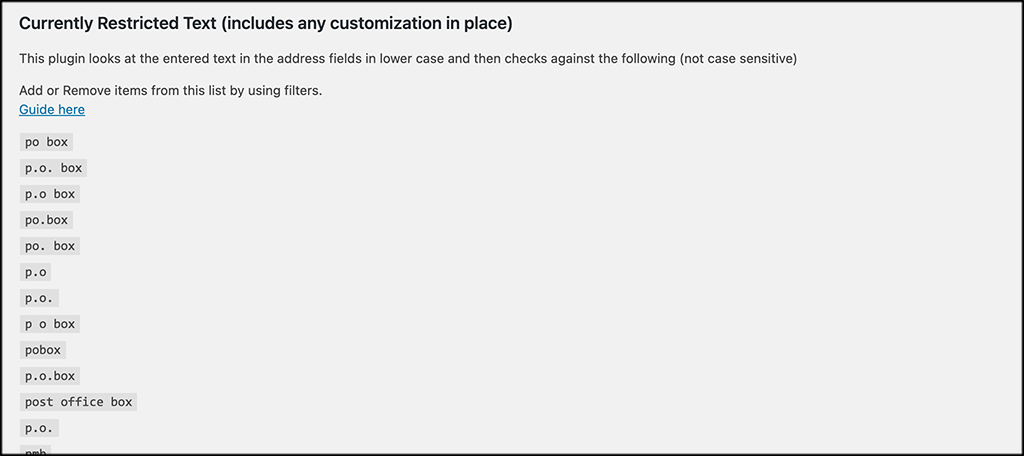
If you scroll down just a little, you will see a section titled “Currently Restricted Text.” The plugin actually shows you all the types of ways people may try to enter a PO box as text. The plugin restricts all of the ones it shows.
If you want to add or remove any of those, then you can do it by entering certain codes into the PHP file of your site. Click on the “Guide” link on this page to look at the code if you are interested.
Now, you have successfully told your platform no PO boxes are allowed on your shipping page. When someone tries to enter a PO Box as a shipping address, they will get the error message that you set in the options section.
Can I Disable This Anytime?
Oftentimes, we use a plugin that we might not want enabled all the time. In this case, maybe you do want to allow PO box shipping for a certain customer, or you want to disable the function temporarily.
You can easily toggle the no PO boxes function on and off whenever you want by going to the options section of the configurations and checking or unchecking the relevant box. It’s as simple as that.
Final Thoughts
Setting up shipping and all the relevant requirements needed in WooCommerce can be overwhelming at times. There are several ways to set up shipping, with each store wanting to employ their own method and set up.
Shipping to a PO box can be disastrous for several reasons, and many of the bigger providers won’t even do it unless certain criteria is in place. By using the No PO Boxes plugin above, you can easily eliminate all of that hassle automatically.
I hope this tutorial was able to show you how easy it is to add a no PO box shipping function to your WooCommerce website.
What other shipping functionality have you added or subtracted from your store? Have you found that the default WooCommerce shipping is enough?