The Elementor WordPress page builder offers a ton of functionality and design options. the system is basically a blank canvas that you can use to create just about any type of website design and look you want. In this tutorial, I will show you how to create a landing page using the Elementor plugin.
Oftentimes a landing page can be difficult to create because a theme does not offer the template n their page templates. So, by default things like headers and footers display no matter what you do.
Instead of writing your own code and building a landing page template from scratch, why not use Elementor to build a landing page quickly and easily?
Today, I am going to show you how to use Elementor to do just that. Let’s get a couple of housekeeping items out of the way here so that you are ready to roll right from the start.
Before You Start
There are a few things you need to have in place before you start building your landing page using the Elementor page builder. Go ahead and take care of these three things before moving on to the actual landing page building process.
Note: Certain functions are only available if you have Elementor Pro. While you can accomplish a lot with the free version, Elementor Pro will give you everything. You can build a landing page with the free version, so you are all set there.
Setting Up a Landing Page Using Elementor
Step 1: Add a New Page
First, you want to click on Pages > Add New, and then click on the “Edit with Elementor” button.
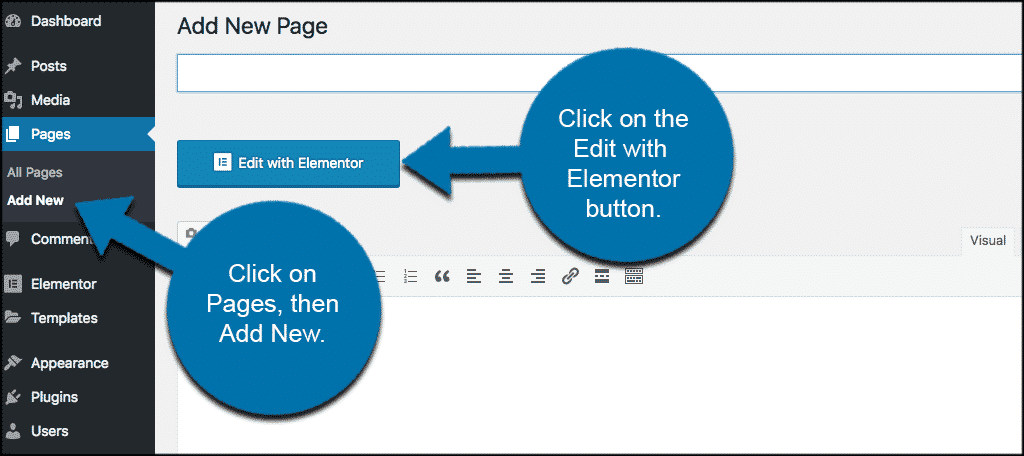
Now scroll down to the bottom of the page and click on the bottom left gear icon and switch the page layout to “Elementor Canvas” in order to work on a blank landing page.
![]()
Removing Header and Footer Elements
Note: In order to build a landing page in Elementor that removes the traditional header and/or footer from the page, you need to do one of two things:
- Make sure that the “Elementor Canvas” option is selected under the theme templates dropdown menu.
- Some themes have a “Landing” template built-in. If you select that, you can build on top of it using Elementor as well.
Either of these options will work. If you have another page template selected, then the header and/or footer will automatically still show.
Step 2: Add Elements to Your Landing Page
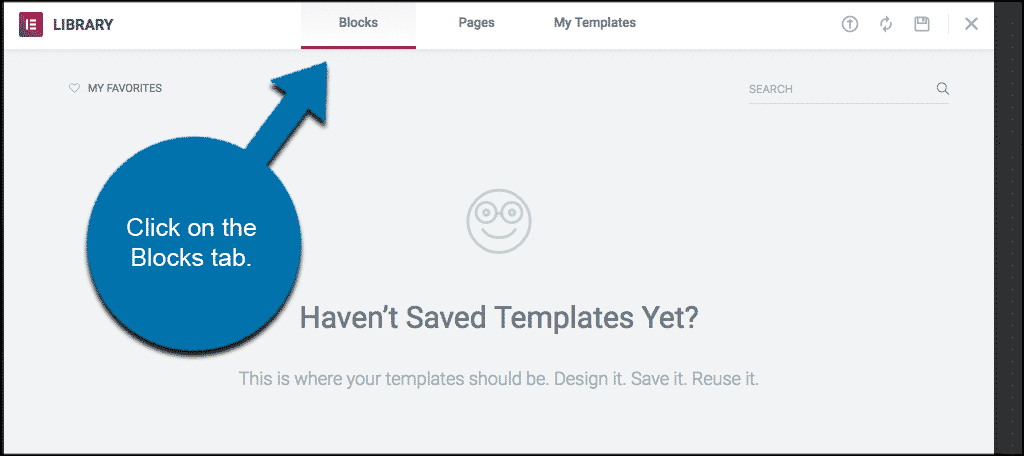
In order to add elements to your landing page, click on the folder icon and add a template.
![]()
You will see a popup box come up. From here click on the “Blocks” tab. Using the select dropdown, start adding the different blocks that will make up your landing page.
That’s it! At this point, you are set up to start adding elements and building blocks to your landing page.
Items to Add to a Landing Page
Now, every landing page will be different, and there are dozens and dozens of different things you could add to build your Elementor landing page. Here are some examples of things you may want to add:
Hero: This is, without a doubt, the most important part of your landing page. It is sometimes called the ‘Above the Fold’ section, as it is the first thing your visitor sees before scrolling the page. For this reason, we will place the most important elements here. Title, sub-title, and subscribe form.
Services: Here, we go into more details, depicting the main services or features our business provides.
Testimonial: The testimonial section shows social proof that your current clientele is satisfied with the service they received from you.
Portfolio: Show the visitor examples of your work, so they know if you match what they are looking for.
Footer: Because your visitors have already scrolled down the page, you want to offer them another call to action, to encourage them to do what you want them to do.
At the end of the page, you will want to pop in a footer, as mentioned above, which should include your Privacy Policy and Terms of Service. Or something related to it.
Customizing Elementor Blocks
Go over each block and customize it to fit your website. Some things you may want to customize will include:
- Title Content
- Images
- Colors
- Backgrounds
What About Mobile Customization?
You don’t have to worry about customizing each block and page differently for mobile purposes. All blocks come pre-designed as 100% mobile responsive. Even so, you can switch to mobile view and start customizing margins, padding, and other settings for mobile and tablet devices.
Preview Your Landing Page
Before you publish the Elementor landing page you have built you can (and want) to preview it. This allows you to see how it will look when published.
To do so, click on the “eye” icon on the bottom left panel.
![]()
If everything is in order go ahead and publish your landing page. You will notice that the green “Publish” button now shows as a grey “Update” button.
Congratulations, you have now built and published an Elementor landing page for your WordPress website.
Final Thoughts
Building a landing page with the Elementor page builder is not a difficult process. As a matter of fact, if you have the right process in front of you, then you can start building one in just a few minutes.
With the tools that Elementor gives you, you will be able to build a smooth, clean, well-design landing page in no time at all.
What other tools have you used to build landing pages in the past? Did you find that using Elementor simplifies the process?
Hello, how do I make only the elementor page show up, without showing the default header and those kinds of things?
Please see the comment above and let me know if that helps. If you notice in the article, we select the “Elementor Canvas” page template option together in the steps.
yeah, that would be great to know.
^^ Right? Like the sole purpose of a landing page vs a regular site page is there’s no header. This was a waste of time.
Amber, the instructions were right here in the article. Sorry about that, thought it was clear. You need to select the “Elementor Canvas” option under the page templates. You can also use the “Landing” template if your theme allows and build on top of that.
Very clear! Thank you!
Does Elementor Pro include Landing Page templates?
I’m not 100% sure, to be honest. I know you can change the overall language of Elementor, but it looks like you might have to use a separate plugin. Even on Elementor’s blog, they show how to use something like TranslatePress: https://elementor.com/blog/multilingual-website-translatepress/