Have you ever wanted to display weather maps and updates on your website? Having a weather map widget on your site for your visitors can be very beneficial for the right website. Today, we are going to use a great plugin called Ventus to accomplish this.
Weather forecasts, maps, updates, and radar coming from your site give you another type of tool to use to help gain site users. This is especially true in the right situations and website niches.
Why Use the Ventus Weather Map Plugin
There are a few different ways that you can embed weather radar on a website. That being said, the Ventus plugin makes the entire process as simple and easy as possible, while giving you access to great tools and a lot of functionality.
The plugin will also allow you to use a shortcode, which means you can display your weather map widget on any post or page, along with all the widget areas.
Having a weather embed on your site can be beneficial if you have a travel site, a surfing blog, or even a local-focused website with some sort of news and weather information. It allows users to easily track weather and get the information they need for a particular trip, outing, or activity.
If used correctly, your site can become a solid source of weather-relevant information. This helps to bring more site users and increase traffic.
Let’s take a look at the plugin and see what all it has to offer.
Ventus – Weather Map Widget and Shortcode

Ventus is a plugin that allows you to easily embed the weather forecast and other map options on your WordPress website. It does this by connecting to windy.com and grabbing all the data needed and pulling it into your website.
It is a very lightweight, yet functional plugin and gives you access to a lot of really cool weather-related features. Furthermore, as stated quickly above, the plugin provides a shortcode that you can use to display the weather maps you make on any post or page.
Some of the other great features included inside the plugin are:
- Set overlays to clouds, radar, temps, snow, and more
- Use Celsius or Fahrenheit temperature
- Define latitude and longitude manually
- Choose from 8 different levels of zoom
- Show or hide several options, including map marker
- Choose from several different wind measurements
This weather map widget plugin basically gives you everything you need and more to display weather forecasts.
Let’s get the plugin installed and set up together.
Embed Weather Radar on Your WordPress Site
Step 1: Install and Activate the Plugin
In order for you to start buildings maps and displaying weather functions, you first need to install and activate the Ventus weather widget. You can do this by popping over to the Plugins page of the WordPress admin directory.

Simply use the available search field that is provided on the page to search for the plugin by name. Once you see it pop up, install and activate it directly from there.
If you choose, you can also manually install the plugin by downloading it off the page, then uploading it directly to your website. This is totally up to you.
Step 2: Go to Widgets
Now that the plugin is installed and activated, you want to go ahead and go directly to the widgets page in the WordPress dashboard.
Note: The Ventus plugin does not actually have a settings page. All configurations are done when building the weather map embed that you want to display. The relevant shortcode given is also customizable, which we will talk more about below.
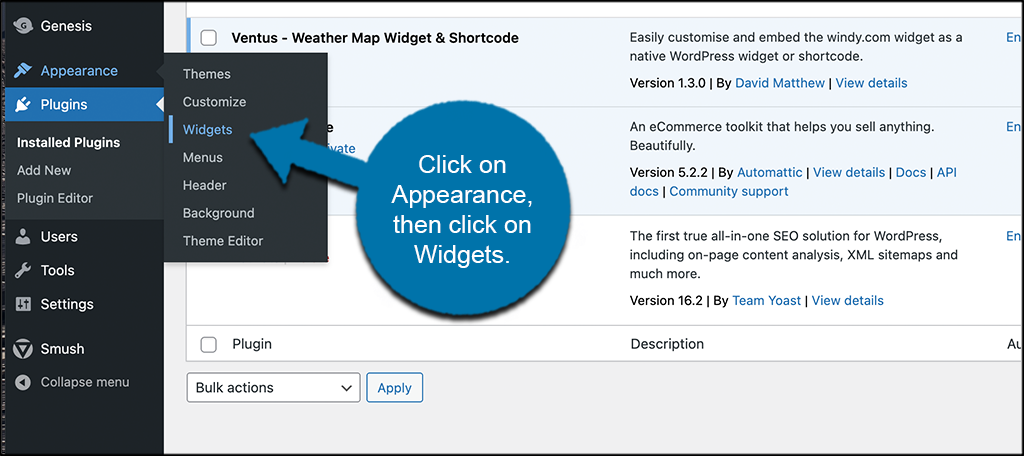
To access the widgets page in WordPress, click on Appearance > Widgets. This is located on the left side menu area of the dashboard. It is always there, but when you arrive on the page, you will notice there is a new weather widget that has been added because you activated the plugin.
Step 3: Find the Ventus Weather Map Widget
Now that you are on the right section of the site, look through the available widgets and find the “Ventus Weather Map” widget. They are listed in alphabetical order, so simply scroll down some on the page and you will see it there.
When you see it, drag and drop it into the widget area of your site that you want it to display on.

Note: The widget areas available on your website may differ, as all WordPress themes are different in the widget areas that they offer.
Step 4: Configure the Weather Map
The weather widget will automatically open up. You can see that there are quite a few configurations and settings to play with.
Start filling in the applicable options for the widget. Add a title, choose width and height, add rounded corners if you want, and create a manual latitude and longitude.

Scroll down the widget some and finish filling out the rest of the available configurations how you see fit. These will include layer types, wind units, temperature scales, and more.

When you are finished, click on the “Save” button within the widget to save all the configurations you made.
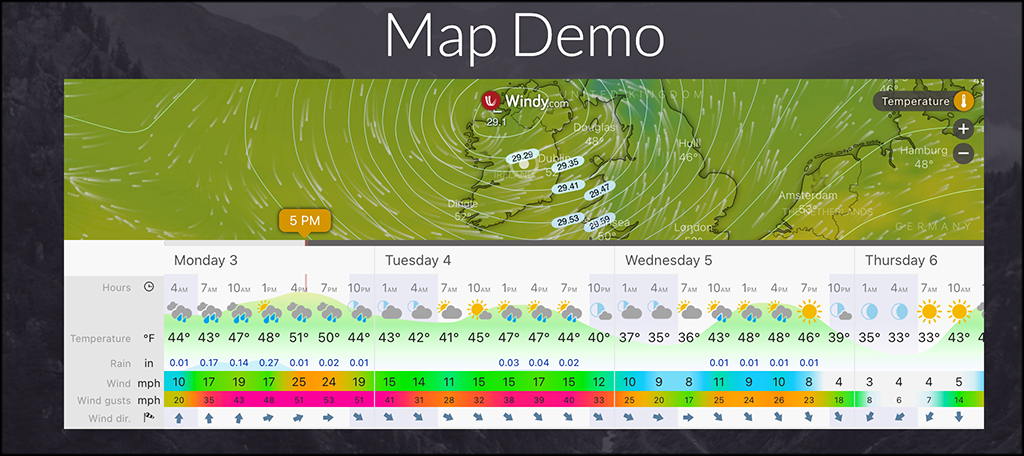
Step 5: View Your Live Weather Map Widget
At this point, you have finished creating a weather map. Head over to your live site and see what it looks like. If you feel you need to make any changes, then pop back into the widget and just do those updates there.
That’s it! You can repeat the above steps over and over and create as many Ventus weather maps as you want for your site.
How to Use the Shortcode
The Ventus plugin comes with an available shortcode that you can use to embed weather radar on your website on any post or page.
The shortcode to use is [ventus]. There is also an old available shortcode that will work called [weather-map], which should continue to work for a while. However, it is recommended you use the updated shortcode.
This shortcode is also customizable, and you can add all of the following to it to create whatever you want.
- Width (any valid CSS property for width)
- Height (any valid CSS property for height)
- Radius (any valid CSS property for radius)
- Latitude and Longitude Attributes
- Zoom Attribute
- Layer Attribute
- Scale Attribute
- Units Attribute
- Pressure, Marker, Forecast Attributes
- Time Attribute
Using this information, you should be able to create a custom shortcode that fits with what you are trying to do.
You can get an example of what the fully-customized shortcode looks like on the plugin’s page on WordPress.org.
Final Thoughts
The process of embedding a weather map widget on your WordPress site is not a difficult one. If you have the right plugin, then a few clicks of a button here and there and you can have beautiful weather maps all over your site.
The Ventus weather map plugin makes this entire process simple. Not only does it give you all the tools you need to build and embed beautiful weather maps, but it also allows you to use an available shortcode to put those maps on any post or page.
What other ways have your been able to embed weather-related items on your website? Have you found that the plugin method is the easiest way to accomplish this?