Are you looking for a way to show off your amazing employees to the world? If so, the Team Members with Slider plugin can help. It allows you to make your own supreme slider to create the perfect team showcase in WordPress.
This plugin is ideal for any website that wants to show off its staff members in a professional style. There are a variety of customization options, which means it will have no trouble fitting in on your website regardless of the theme you use.
Today, I will demonstrate how to build a team showcase in WordPress.
What Can I Use Team Showcase For?
One thing that every business has in common is the talented staff that keeps it running, and as a business owner, you can show the world what everyone does.
Showing off your staff, and putting faces in general, offer a variety of benefits according to studies.
For instance, showing a photo of an employee a customer is interacting with can help strengthen a relationship. Team photos help people associate the name with the face, and that is extremely valuable in our online world.
It’s also beneficial when a customer visits the office. They’ll know who to look for.
Showing staff photos also adds a sense of credibility. Anyone can build a website and claim to have a team standing by. But how many actually show off that team? Many larger companies tend to do this, especially when they offer customer support.
After all, customers do not want to talk to robots. They want humans.
Luckily, adding a team showcase is easy to do with a plugin.
How to Build A Team Showcase with Sliders
Step 1: Install Team Members with Slider
Team Members with Slider is a team showcase WordPress plugin and it is one of, if not the best plugin for building sliders that present your staff.
It allows you to enter the position, name, department, email, phone number, social links (LinkedIn, Facebook, Twitter, etc.), and other pieces of information into a stylized slider.
And it supports a live preview option, which makes getting it right that much easier.
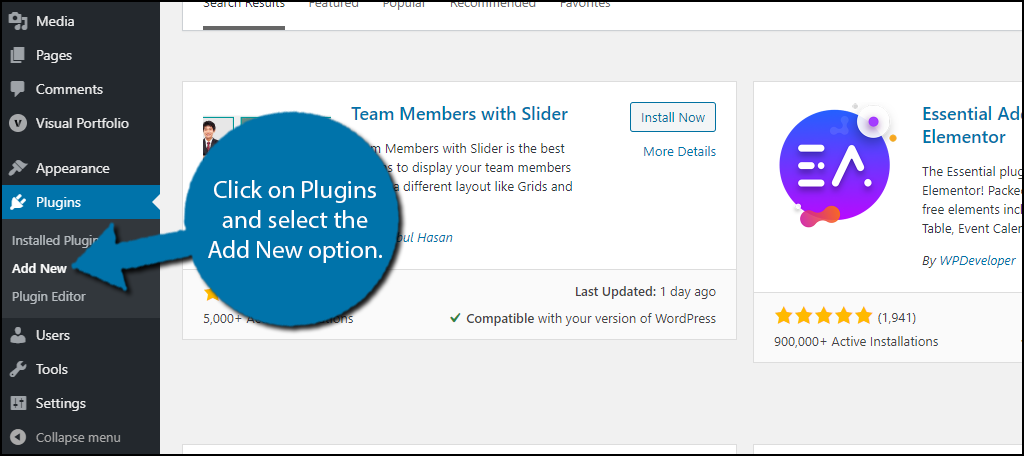
Let’s start by clicking on Plugins and selecting the Add New option on the left-hand admin panel.
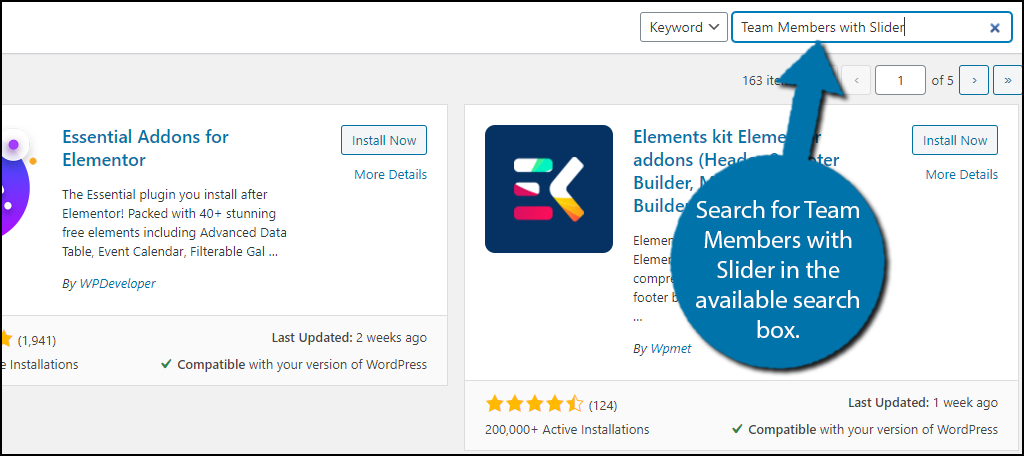
Search for Team Members with Slider in the available search box. This will pull up additional plugins that you may find helpful.
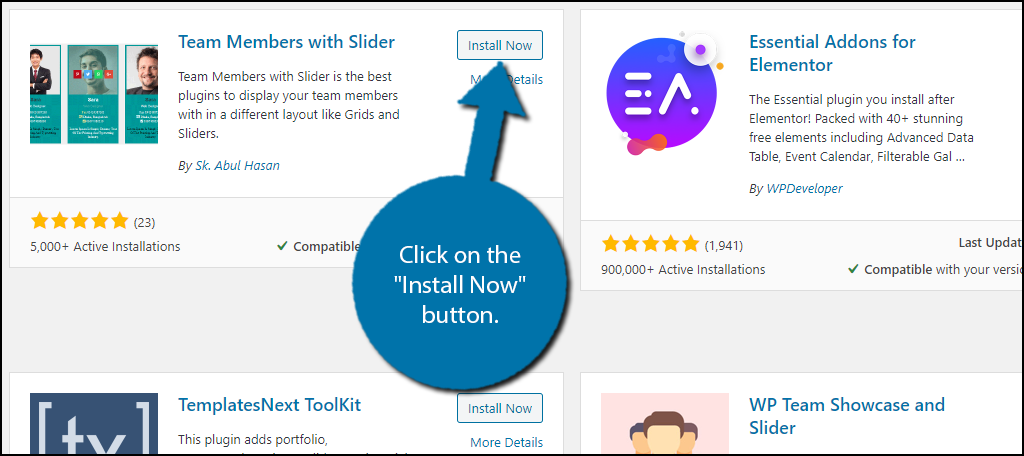
Scroll down until you find the Team Members with Slider plugin and click on the “Install Now” button and activate the plugin for use.
Step 2: Add Members
Building a team slider is pretty straight forward, with the first step being to add the team members.
Note: If you purchased the pro version, I would instead recommend creating categories first. They are treated as departments by the plugin.
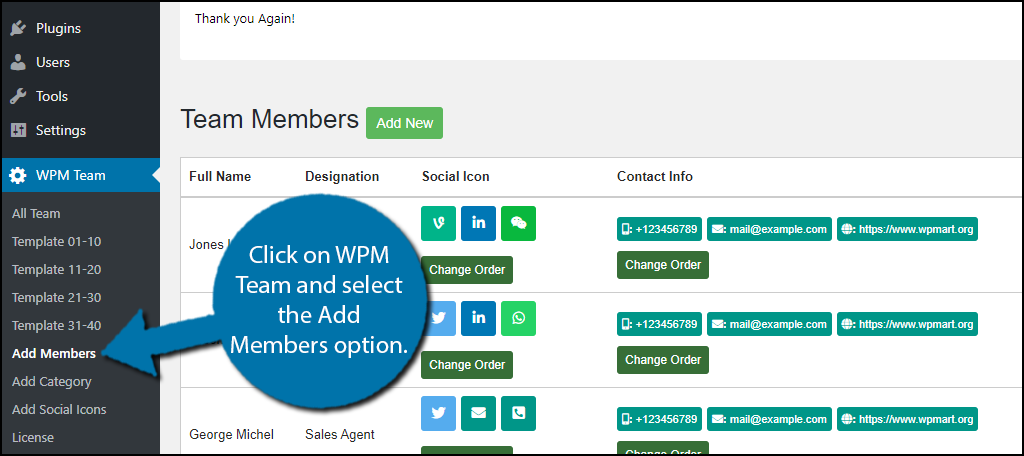
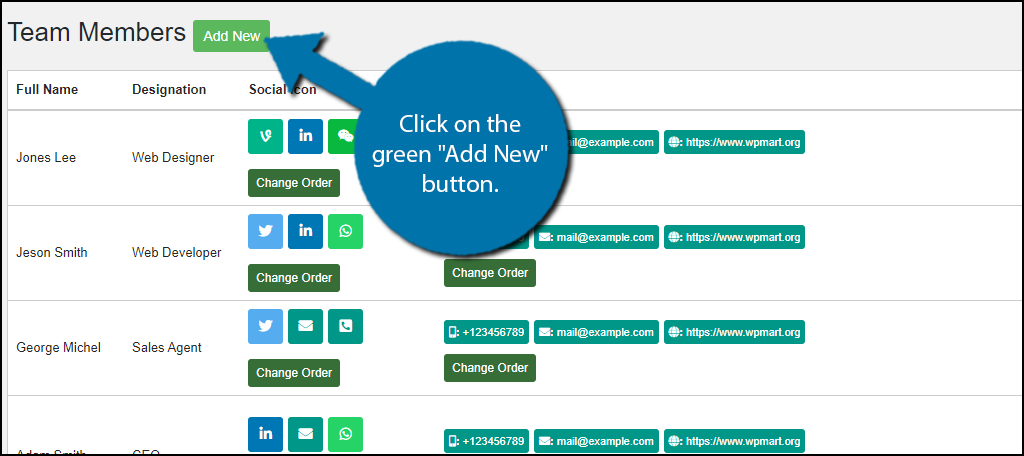
On the left-hand admin panel, click on WPM Team and select the Add Members option.
Here, you will see some example members. You can leave them alone for now, but I encourage you to delete them by pressing the red x icon on the right-hand side.
Note: These examples use some features only available in the Pro version of the plugin.
Click on the green “Add New” button.
This will pull up a small pop-up window. Here, you can enter the staff member’s full name, designation (position in the company), fill in additional profile details (a short bio), choose which social icons to add, image and if you have the pro version, create custom fields (email, phone number, etc.) and select a category (department).
Note: I recommend using a 300×300 photo.
Fill out all of the information and click on the “Save” button.

Repeat these steps for all of your staff members. Make sure to use the same sized image for all photos.
Step 3: Pick a Template
Once you have your staff members added, it’s time to pick how they will be displayed as customers slide through the team. This is done by selecting a template. The plugin offers over 30 pre-built templates that you can choose from.
With so many available, you should have no problem choosing one that fits your design ideas.
The templates are broken up into 4 different options. These are labeled Template 01-10, Template 11-20, Template 21-30, and Template 31-40. Thus, you will have to do some searching.
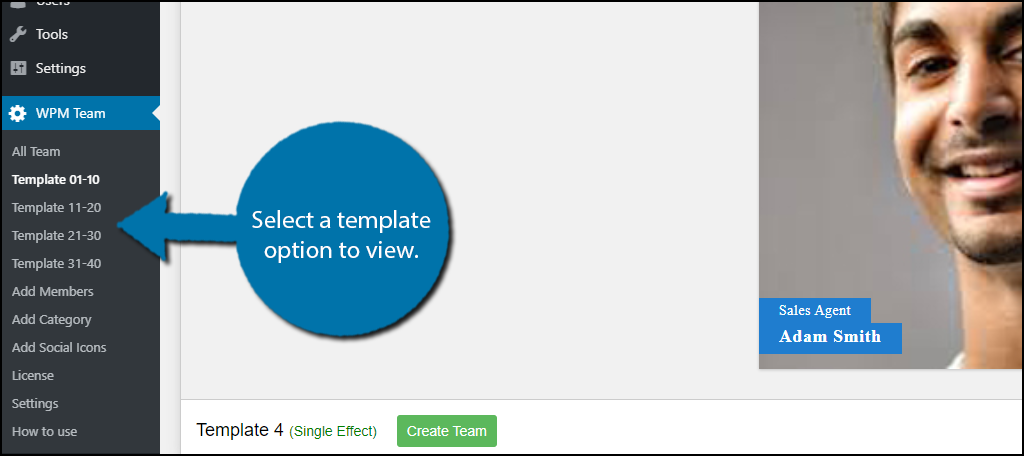
Each template demonstrates an example of what it looks like in action. Simply go through all of the staff templates until you find one you like.
Note: Some of the images appeared broken while searching through the templates. The only solution I could find was going into the template and adding some members to check the live preview option. However, usually, at least one image was visible to me on every template.
Once you do, click on the green “Create Team” button.
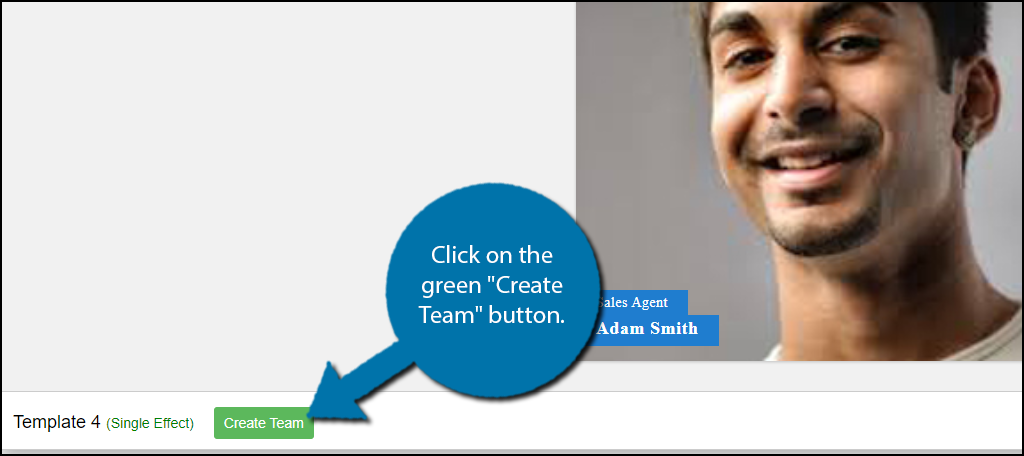
A small pop-up will appear asking you to enter the team name. Enter the name and click on the “Save” button.
Step 4: Edit the Template
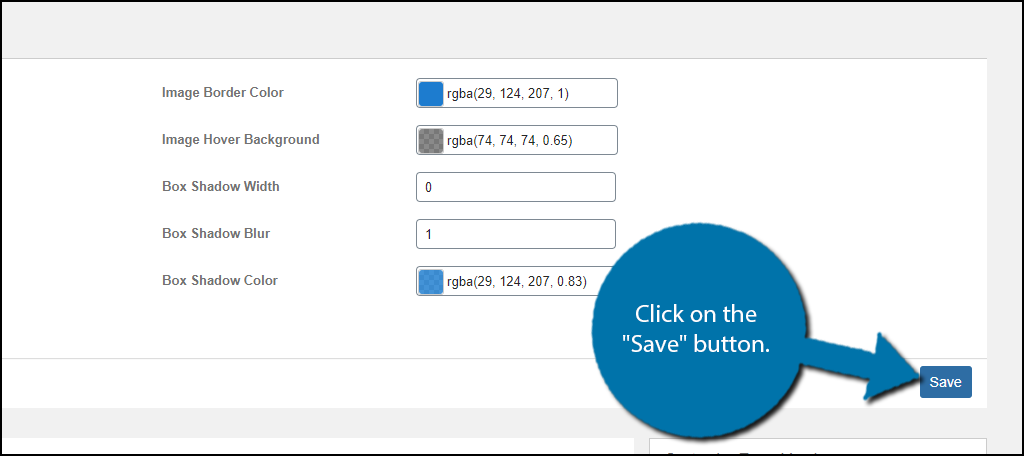
You now need to go through the process of editing the template. The edits are very simple and only involve filling in a text box, editing the pixel size, picking an alignment, or choosing a color.
Note: There are a variety of customization options exclusive to the pro version.
You can preview any changes you make by looking at the Preview section at the bottom of the page.

This area is broken down into 8 tabs that include General, Name, Designation, Social Icon, Category Filter, Slider, Search, and Custom CSS. Most of these are very self-explanatory, but keep in mind that the Category Filter and Custom CSS tabs are exclusively for the Pro version.
On the right-hand side, you will find an option to add or remove members, but the rearrange option is locked behind the Pro version. To get around this, you need to remove and add members until they are in the correct order.
Thus, make sure you add them correctly the first time.
Once you are happy with the presentation, click on the “Save” button.
Step 5: Display the Team Showcase
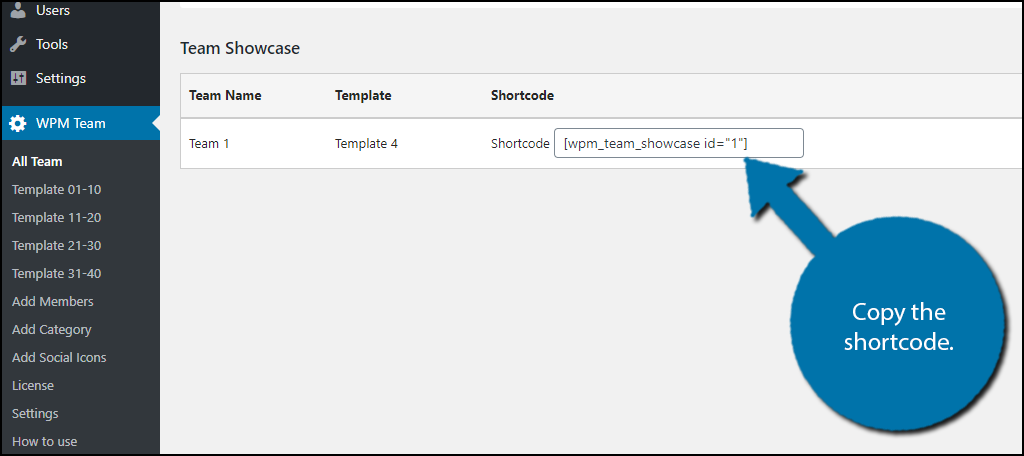
Finally, it is time to display your team showcase. To do so, you will need the shortcode of the template you just created. To find the shortcode, click on the All Team option.
The template shortcode will be visible, copy it.
At this point, you simply need to add the shortcode onto an existing page or post. Alternatively, you can create a new one for testing purposes. Once the shortcode has been added, the team slider will appear on your website.
Congratulations on building a slider with the Team Members with Slider plugin.
Get Good Pictures
The purpose of building a team showcase is to show off your staff, thus you need to make sure the picture you have is of good quality. Make sure that the picture is not blurry, focused, and that the individual is dressed appropriately.
It should include a smile and match the tone of your website. You should also consider the background of the image. For example, if you have ever noticed the photos of lawyers from a law firm, they often include a background of legal books.
Again this is very specific to the industry you are in, but make sure the background is appropriate.
Why did you want to create a team showcase in WordPress? Have you noticed any benefits since adding one?