Most WordPress themes come with an option to add sidebars to pages. You can add them to the left or right side, and even choose what pages they show on. However, what if you wanted to customize a particular sidebar and show it in a specific place for a certain time? Well, now you can do that with Content Aware.
Sidebars in WordPress offer unique ways to display extra content that you want your site users to have access to. The main issue with these sidebars is that while you can show them on certain pages, you can’t make unique ones to go on other pages unless you have a plugin.
Today, I am going to show you how you can use a plug called Content Aware to create customized sidebars for your WordPress website and show them where you want when you want.
What Are Sidebars in WordPress?
When we talk about WordPress sidebars, we are talking about a “widget-area” that is used by WordPress that will allow you to display and publish extra information that is not really part of the main content on the page. Usually, when a site developer uses a sidebar, they are including things that are not necessarily connected to a blog post but still relevant to the site.
For example, a travel blog could show a weather widget in the sidebar. This way, travelers would know what to expect when traveling in terms of weather.
This could include things like social media buttons, email subscription lists, important articles, and advertisements. Of course, this varies from site to site, but the idea is to display the same content on every page so that no matter where a user is, they can see the info.
However, there are some instances where you need to build a specific sidebar to show on a specific page.
Taking it even further, you want the sidebar to only show for a specific amount of time. This is because maybe you are running advertisements, or you may want to show content-specific information based on posts or pages that a user is viewing.
For instance, showing a Black Friday banner makes sense if you’re planning holiday sales or information.
The plugin we are going to use today allows you to customize those sidebar elements. Let’s take a look at it and see what all it has to offer.
Unlimited Custom Sidebars – Content Aware Sidebars
Unlimited Custom Sidebars – Content Aware Sidebars is a sidebar plugin that allows you to create an unlimited amount of custom sidebars that you can display around your website.
Building these helps with all sorts of things. You can boost conversion rates, optimize SEO, upsell certain products, and display a variety of useful information.
If you are looking for a way to help grow your site, then Content Aware Sidebars can help you with that. it comes with a ton of features and display options. These include:
- Posts
- Pages
- Custom Post Types
- Tags
- Categories
- Custom Taxonomies
- Page Templates
- Blog Page
- Author Archives
- Front Page
- Search Results
- bbPress Profiles and Forum Topics
- Pods Pages
Note: There is a pro version of this plugin available. It does provide quite a few more display and customizable options. If you feel your site needs access to this, then go ahead and give it a look. The tutorial below is based on the free version of the plugin.
Add a Custom Sidebar to WordPress
Step 1: Install and Activate the Plugin
Before you can start building custom WordPress sidebars, you first need to install and activate the Content Aware plugin. You can do this right from the WordPress admin dashboard.
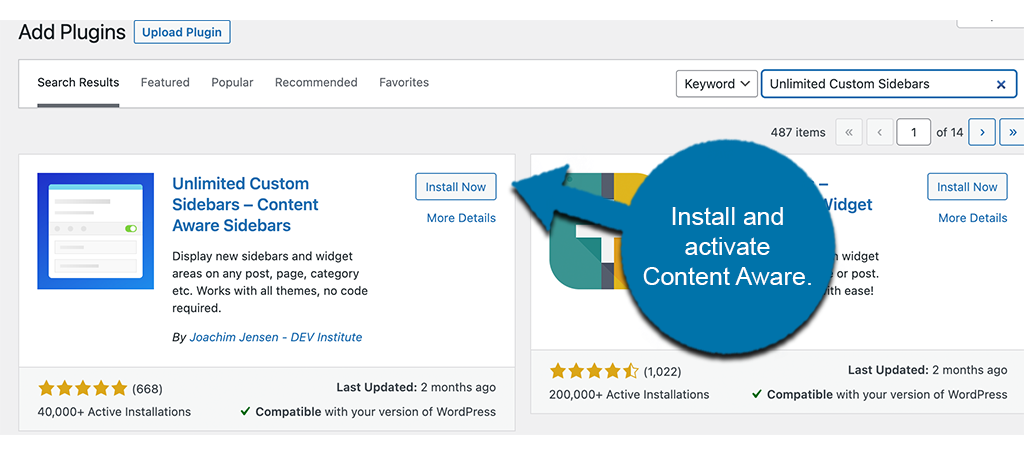
Simply go to the Plugins page and use the available search filled. Search the plugin by name and when you see it pop up, install and activate it right from there.
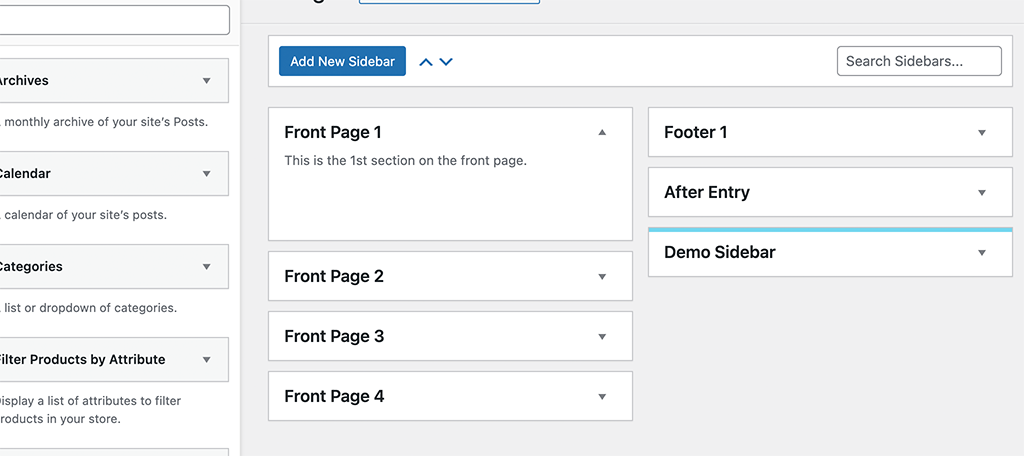
Step 2: Click on Add New Sidebar
Now that the plugin is installed and activated, you can go directly to adding a new sidebar. There are no settings or configurations to be made before you begin. You complete everything individually, during the process of setting up in WordPress.
Click on Content Aware > Add New, located on the left side menu of the dashboard.
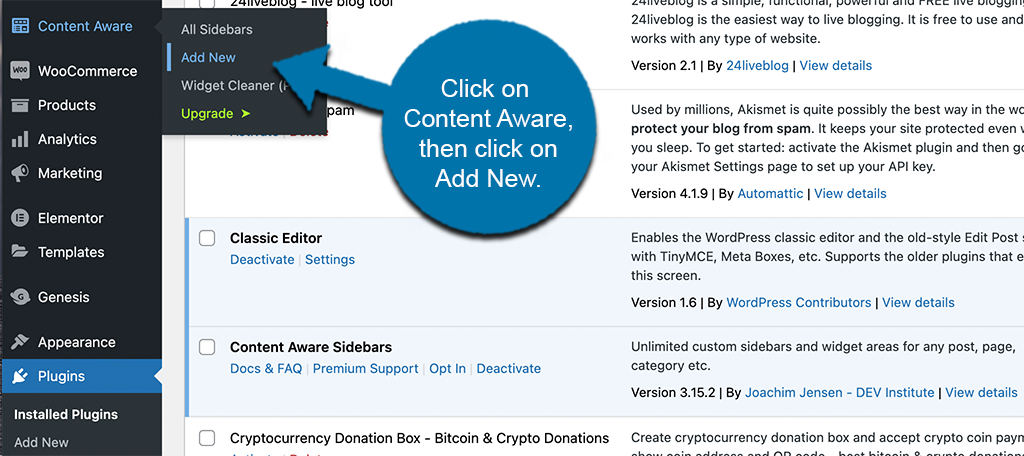
You will see these are options that are now available because you installed the plugin.
Step 3: Add a Sidebar Name and Display Conditions
A new sidebar editor will come up. Here is where you will build your first custom sidebar. Add a name for your sidebar and then select the display conditions you want to be attached.
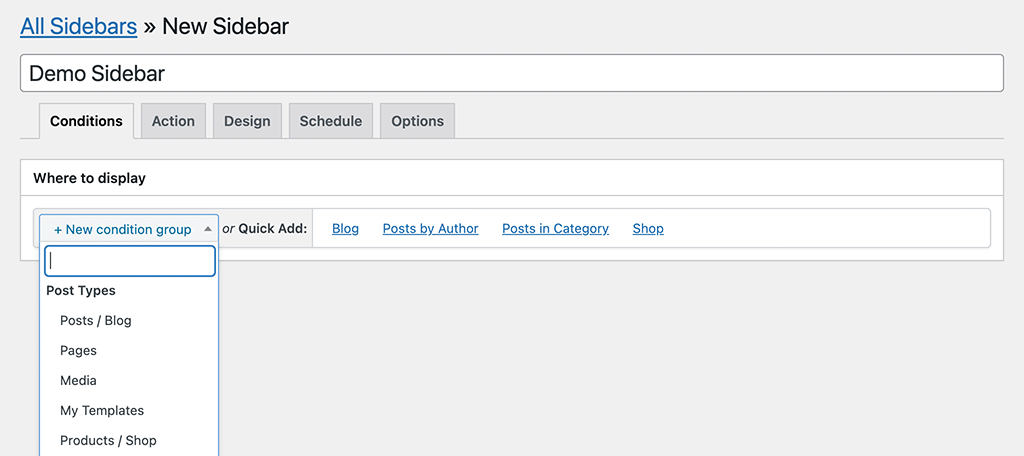
Note: You can also click on one of the “Quick Add” buttons to add your sidebar display condition without using the drop-down menu.
Step 4: Create Sidebar Actions
After you set a sidebar name and display condition, click on the “Action” tab. From here, you want to set the actions for this particular sidebar that you are building.

Use the dropdown to add the actions you want.
Step 5: Design Your Sidebar Widget Area
Now comes the design part of the process. When you click on the “Design” tab, you will be given several different design options. Go through all of these and design the sidebar the way you feel is best for your particular setup.
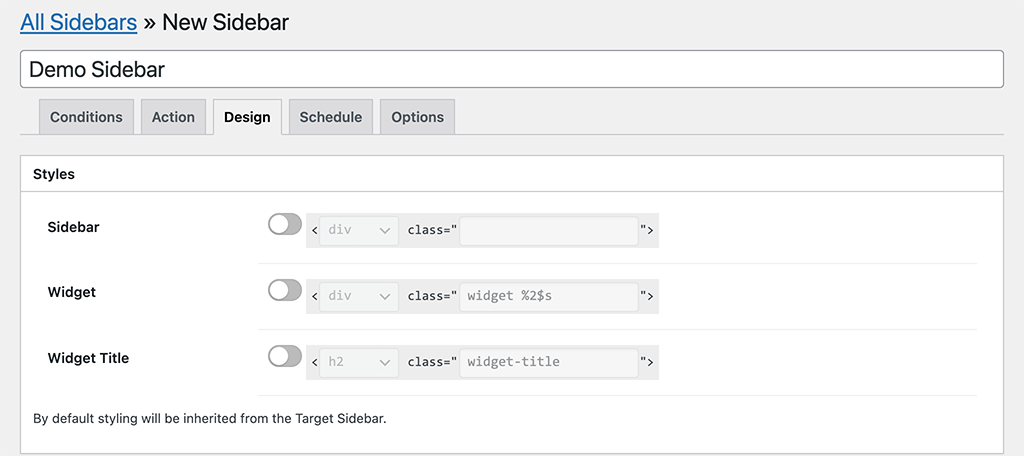
Note: If you leave the settings at default, then the styling will be inherited from the target sidebar.
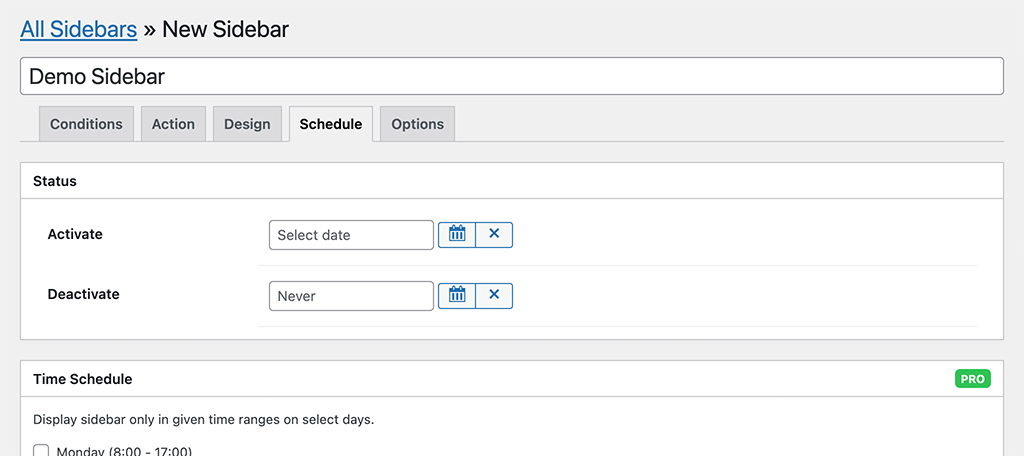
Step 6: Set a Schedule for the Sidebar
The Content Aware plugin allows you to set a schedule for the sidebar. You can choose when you want to activate or deactivate it.
Step 7: Set Final Options
Last but not least, click on the “Options” tab and set the order of the sidebar you want.
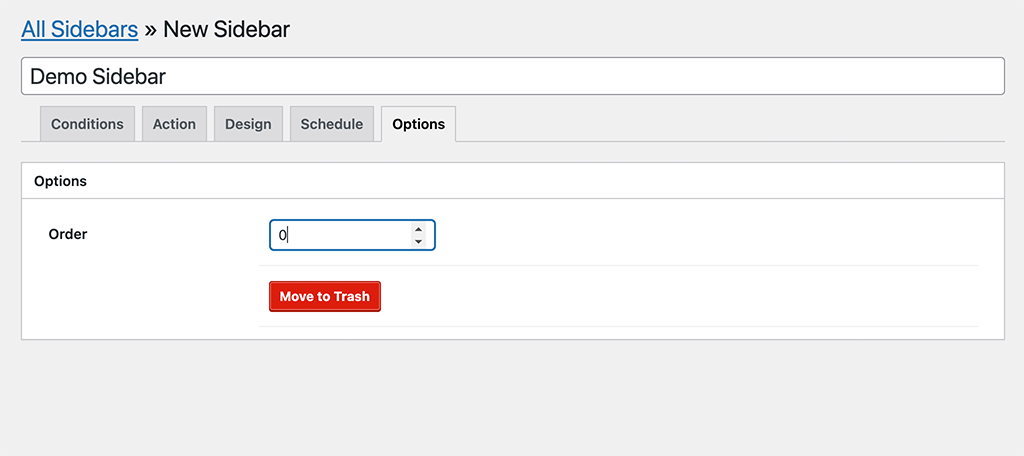
Once you do this, click on the “Create” button to create the sidebar. That’s it! The sidebar will now display based on the conditions you chose during the building process.
Handling the Widget Area
Content Aware comes with a built-in widget area as well. To utilize it and display your custom sidebar that way, you need to go to the widgets page and place it where you want.
Click on Appearance > Widgets, on the left menu are of the dashboard.
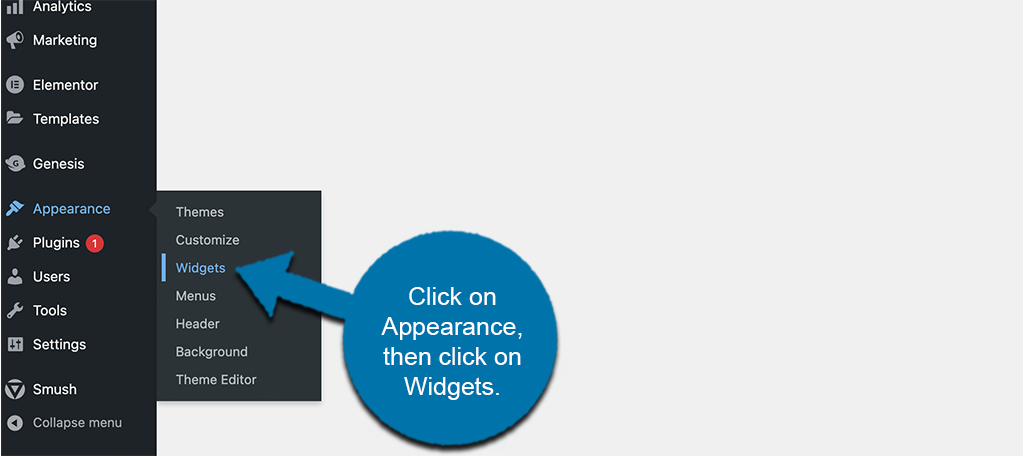
Once on the widgets page, you will see that there is a “Sidebar” widget added that has the name of the sidebar you built.
Now that you know how to build and display custom WordPress sidebars, you should be able to expand and build your site more rapidly. This is just one of many different types of plugins that can really make a difference when it comes to customization.
Final Thoughts
You want to have a website that is unique from other sites. It doesn’t really matter what niche you are in, you have to do things to separate your site from other sites. One great way to do this is to build customized sidebars that allow you to display the information you want on the pages and posts you want.
The Content Aware plugin makes this entire process simple and fast. Once configured, you can build and display an unlimited amount of WordPress sidebars on your website.
Have you tried building sidebars another way? Is there another custom sidebar plugin you prefer over this one?