A lot of work goes into making a website run properly. From the build and design portion to the overall SEO structure of the site, there is a lot of work to do. So, you want to make sure your website runs fast and is optimized properly. For this reason, I am going to introduce you to the Speed Booster Pack plugin.
Perhaps the most important aspect of a website is its performance. Optimization affects so many parts of the site, including overall SEO. For this reason, it is a good idea to have a tool in place that can help boost your site performance and optimize it properly.
What Should You Do to Optimize Your Website?
There are several things that need to be done in order to ensure that your website is running at its highest level. There are different aspect points to optimization. Yes, you want a solid SEO structure, but you also need to optimize images, have a good host, and make sure you are doing everything you can to create a fast website page speed.
Now, there are a lot of different WordPress optimization tools out there today. A lot of them are really good, but some of them really don’t accomplish anything. You need to find one that will actually work correctly with your site setup and boost your overall Google page speeds.
Luckily, I have found an easy-to-use plugin that will help the overall performance of your website on several levels.
Let’s take a look at the plugin in question and see what all it has to offer. After that, we will set it up together so you have it up and running on your site.
Speed Booster Pack – PageSpeed Optimization Suite
Speed Booster Pack – PageSpeed Optimization Suite is a popular optimization suite that will help you improve your site speed and get your site better scores across all the major speed testing services.
Do you want your page load speed and site speed to get faster? Well, this is definitely a plugin that you want to check out. WordPress speed optimization is so important, and Page Speed Booster can help get you better scores with testing services like Google PageSpeed, GTmetrix, Pingdom, and Web-PageTest.
Not only does it help with site speed, but the plugin will also improve the overall site usability. When this aspect is upgraded, Google and other popular search engines can rank your site higher and send more traffic to it.
While there are a lot of great features added to the plugin, there is no need to be overwhelmed. You simply go through the settings and set it up how you want it to act on your website.
We will go over that a little more below. Some of the main features and controls you get access to when the plugin is installed include:
- Core Web Vitals
- Caching
- Optimize Google Fonts
- Lazy Load
- Custom Code Manager
- Optimize JavaScript
- Optimize CSS
- Preload Assets
- Localize Google Analytics and Tag Manager
- Enable CDN
- Cloudflare Integration
- Plugin-Specific Optimizations
- Dequeue Core Scripts and Styles
- Declutter HEAD
As you can see, the Speed Booster Pack plugin is pretty comprehensive and provides a ton of options to help with page speed.
Let’s get the plugin installed and set up together.
Boost Your Page Speed Performance
Step 1: Install and Activate the Plugin
The first thing you need to do before anything else is install and activate the Speed Booster Pack plugin. You can do this from the Plugins page in the WordPress admin dashboard.
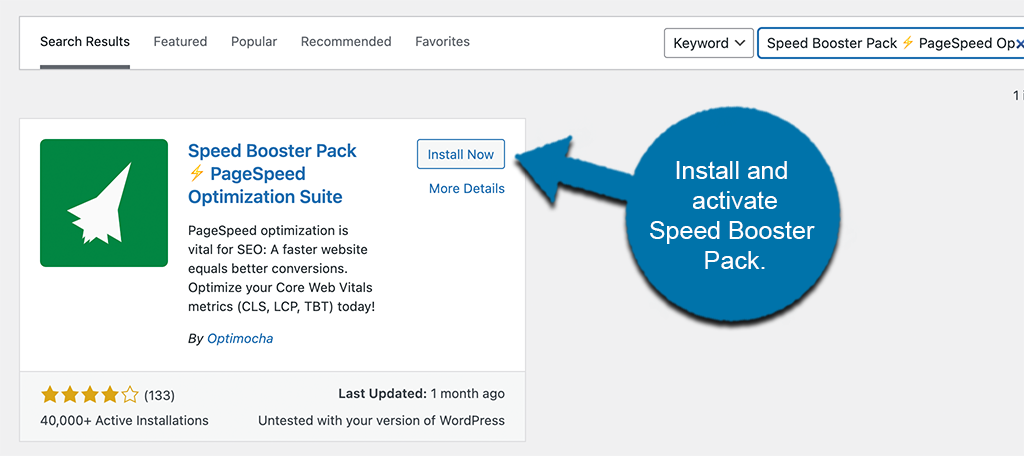
Once you have landed on the page, you will see a search field that is available. Go ahead and type in the plugin name. When you see it come up, install and activate it right from there.
Step 2: Go to the Speed Booster Pack Dashboard
Now that you have successfully installed and activated the plugin, you want to head over to the main dashboard so that you can go through all the settings and configure them accordingly.
To get there, click on Speed Booster > Dashboard, located on the left side menu area of the dashboard.
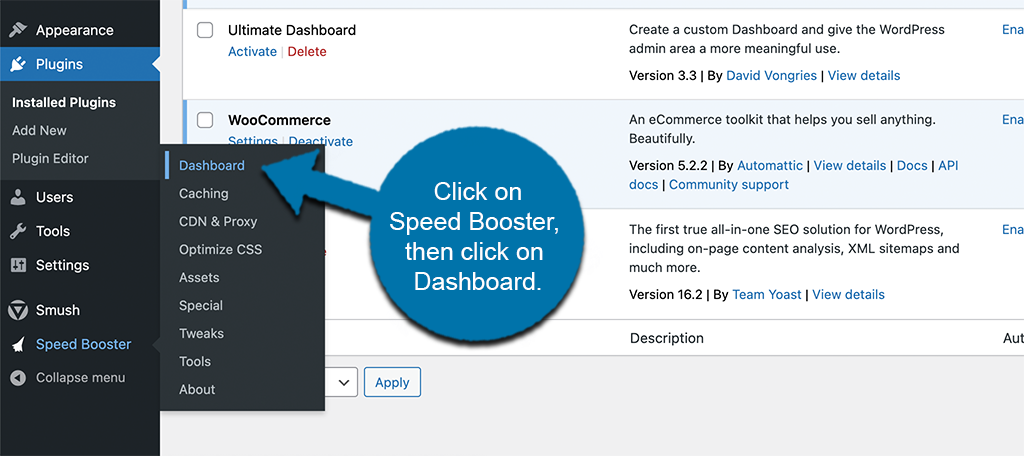
You can see that these options are now available because the plugin was successfully installed and activated on your website.
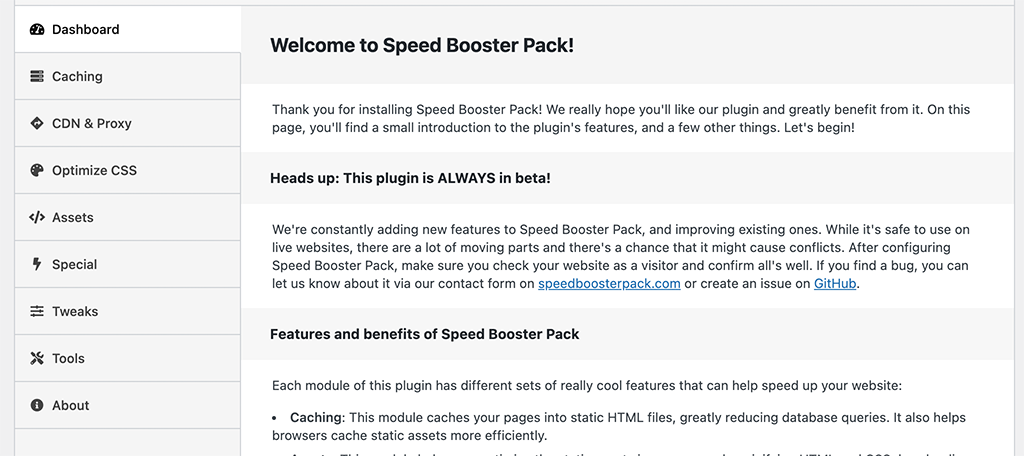
Step 3: Configure the Plugin Settings
The main plugins settings page has the entire dashboard and all the tab settings on it. You will see option tabs for:
- Dashboard
- Caching
- CDN and Proxy
- Optimize CSS
- Assets
- Special
- Tweaks
- Tools
- About
Let’s pop through these together so you can see the setup.
Dashboard
The dashboard tab will give you some info on the plugin and explain some things. Feel free to read through it.
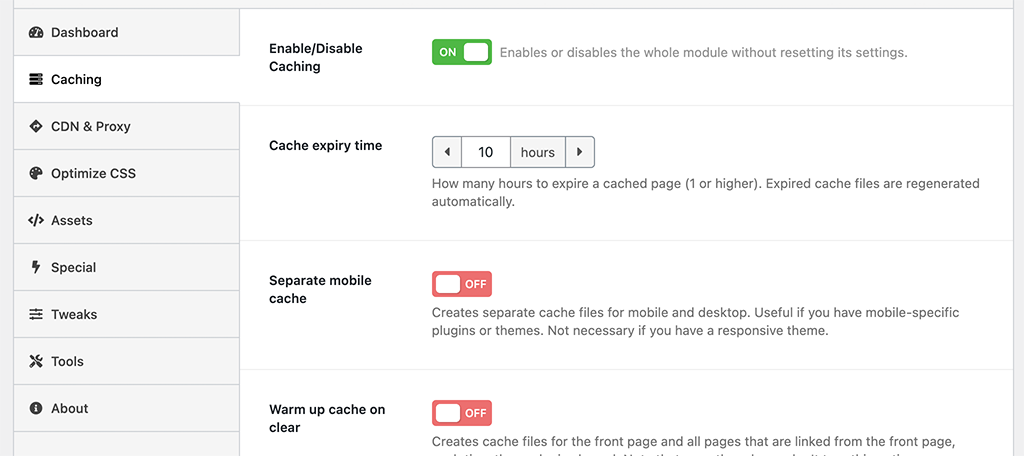
Caching
Set up all the caching options and configurations you want for your site under this tab.
CDN and Proxy
If you are running a CDN, then you can enter that information here. The plugin also allows you to connect to Cloudflare, so you can do that here as well.

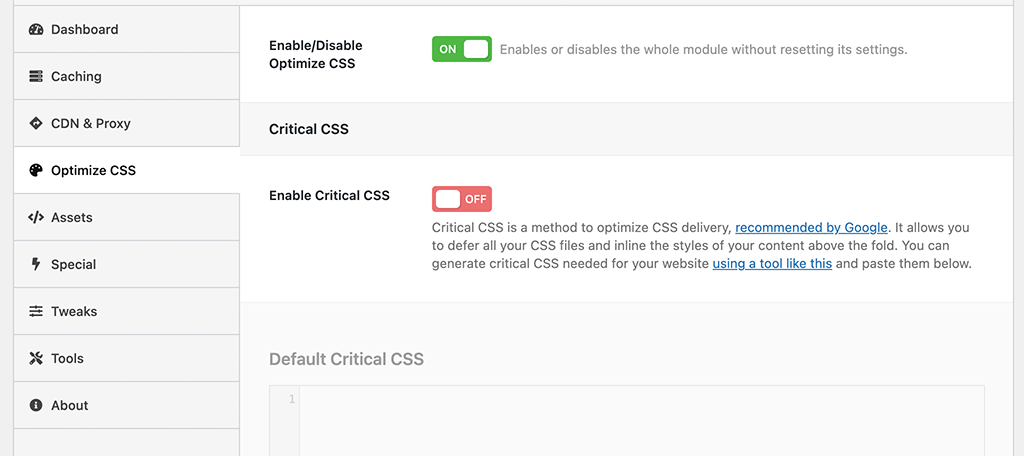
Optimize CSS
Under this tab, you will be able to enable or disable the built-in optimize CSS functions that Speed Booster Pack provides.
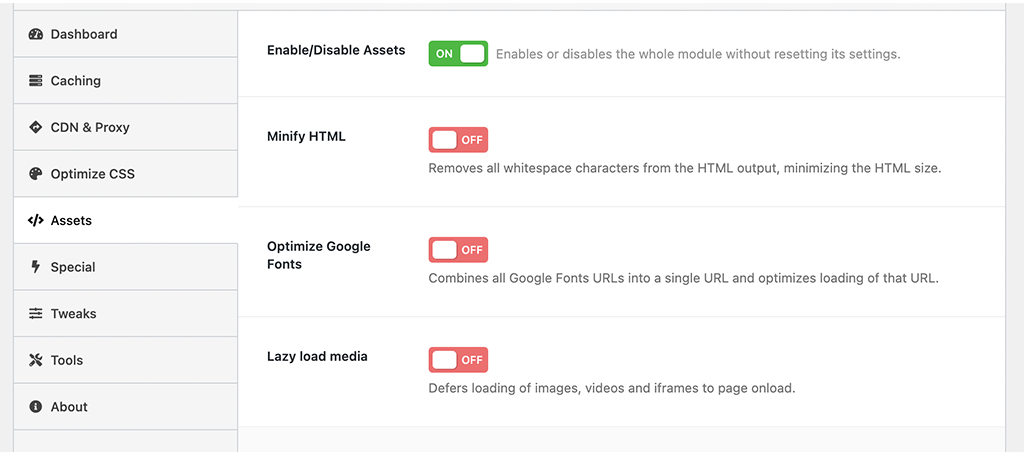
Assets
This is a great section, as you can optimize some really cool functions here. Some of the things included are Minify HTML, Optimize Google Fonts, Lazy Load Media, and more. Set these up in the way you want them to run on your site.
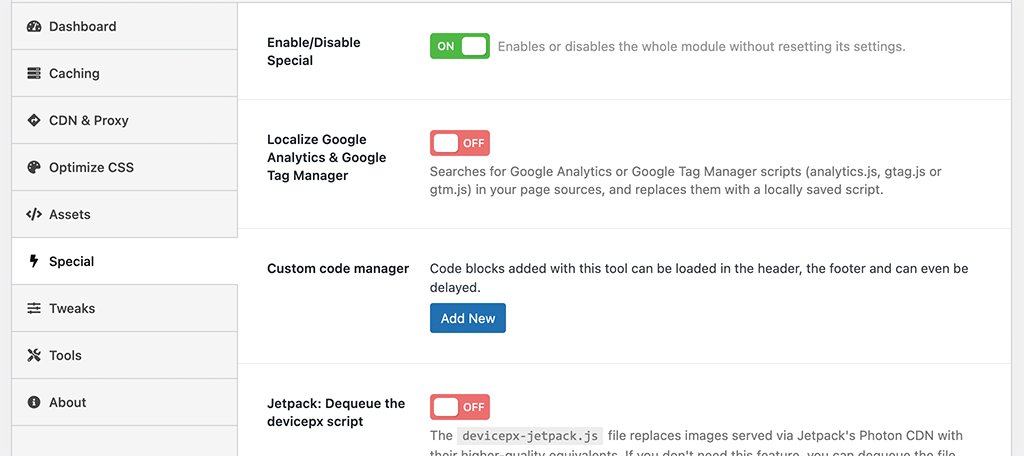
Special
The special tab gives you configuration options for things like Google Tag Manager and Analytics, WooCommerce, and other page speed options.
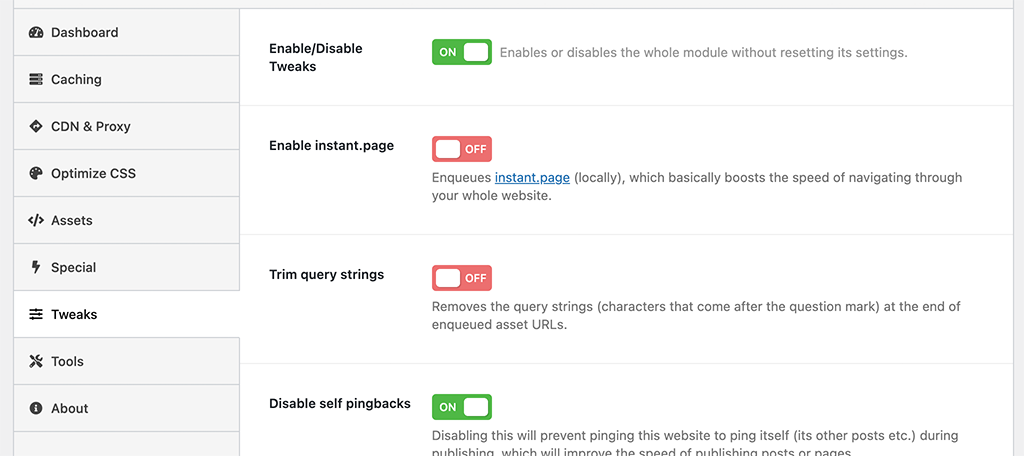
Tweaks
The tweaks tab is just that, a bunch of enable or disable buttons that you can tweak to your desired functionality.
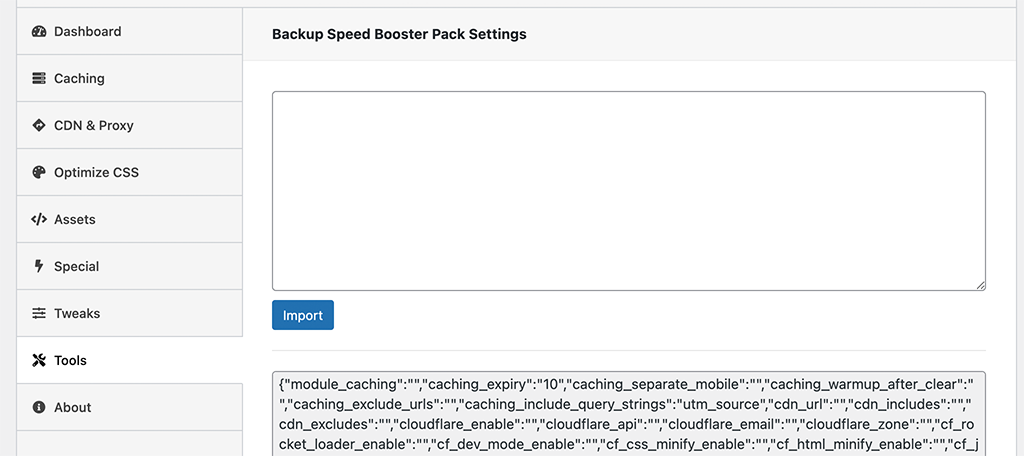
Tools
The tools tab provides two main options. You can import Speed Booster Pack settings, or you can download and export settings to another site.
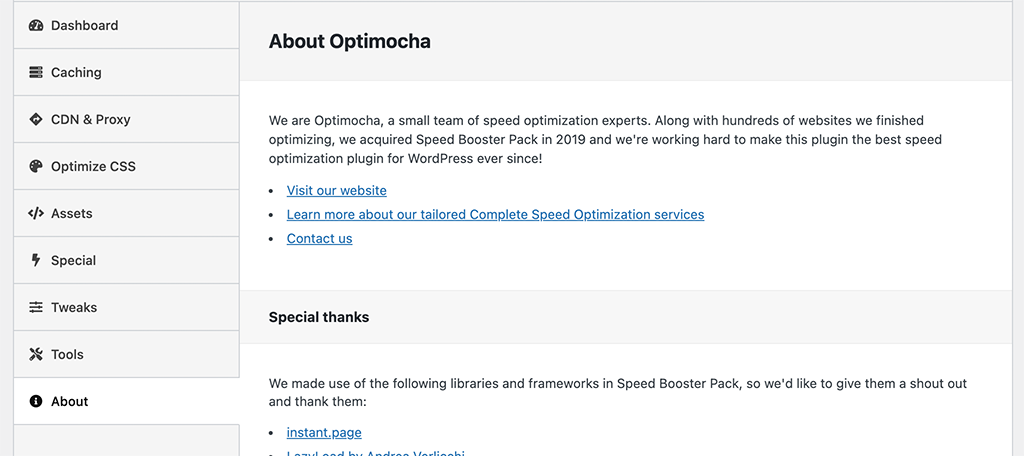
About
Last but not least is the about tab. Here you will be able to learn about the plugin developer, contact them, and a few other things.
That’s it! Make sure you save all your configurations and you are good to go. The plugin is now running on your site based on the way you set it up. If you ever want to make changes, come back to the dashboard and adjust whatever you need.
Lazy Loading Issues
Lazy loading is a fantastic function to utilize and will help with a lot of page speed issues. That being said, while you can experiment and play around with different optimization tools and plugins, it is never a good idea to run more than one lazy loading option at a time.
Doing this runs a high risk of breaking all the images on your website. So keep this in mind if you are still figuring these options out.
For example, using Speed Booster Pack and Lazy Load by WP Rocket may cause all of your images on the website to break. This means you will need to choose one or the other to manage the image load.
Final Thoughts
Optimizing a WordPress website is time-consuming, but it does not need to be difficult. Since there are so many items you need to explore and take care of when performing website optimization, having the right plugins, tools, and instructions is key.
The Speed Booster Pack plugin offers a ton of functionality, is easy to install and set up, and will definitely make a huge difference once you get the correct settings plugged in.
What other optimization tools and techniques have you tried? Do you have a favorite or are you still looking?