Boosting the performance of a WordPress website happens on several levels. There are certain things you can do to optimize a website, and they all work together toward one goal. One of the main things you need to do is properly optimize images. You can do this using the Robin Image Optimizer plugin.
There are actually quite a few really good image compression and optimization tools out there today. Picking the right one is always key. A lot of this will have to do with what exactly you are looking for, as well as personal preference. The image optimizer for WordPress that we are going to use today will give you access to some really great features.
What is Image WordPress Image Optimization?
Image optimization in WordPress means that you are taking images that are being uploaded into your WordPress media library and optimizing them in several different ways. When you perform image optimization, your WordPress website will load faster and images will be SEO-ready so that Google and other search engines can properly read them.
Two of the main ways you can optimize images properly for WordPress are by compressing images and adding alt tags. You can also mess with titles and captions, but compression for proper loading speeds and alt tags that allow Google to understand the image are two of the most important.
In this article, I am going to show you how to use a free image optimization tool for WordPress that will help you get all your images where they need to be. Let’s take a look at the plugin we are going to use today and see what all it has to offer.
Robin Image Optimizer
Robin Image Optimizer is a free image optimizer that can compress your images and help speed your site by up to 80%. It compresses images and makes them more website-friendly without any loss of quality.
The plugin is totally free to use and does not put a limit on how many images you are allowed to compress and optimize. The only stipulation the free version of the plugin has is that an image weight should not exceed 5MB.
The Robin Image Optimizer plugins works with the thought that the lighter an image is, the faster a page will load. This is the case whether there is one image or multiple images on a page. With the increased use of mobile devices to access websites and content, it is extremely important that your site renders images properly.
The plugin is easy to set up and easy to use. You can be up and running in just a few minutes. That being said, it still comes packed full of a lot of great features. Some of the main reason you may want to use this free image optimizer for WordPress include:
- The plugin is totally free to use
- No restrictions or limits on image optimization
- Automatic optimization using Cron, no need to wait
- Optimize images in mass with the click of a button
- All images are backed up before optimization starts
- Choose normal, regular, or high compression mode
- Image optimization on boot
- Reduce pre-optimization weight by reducing image size
- Detailed reports and statistics on image optimization
The plugin is very user-friendly and has an intuitive interface. Let’s get it all set up and running so that you can start optimizing your images in WordPress.
Optimize Images Using Robin Image Optimizer
Step 1: Install and Activate the Plugin
Before you can start manually or automatically optimizing images, you first need to install and activate the Robin Image Optimizer plugin. You can do this by jumping over to the Plugins page in the WordPress admin dashboard.
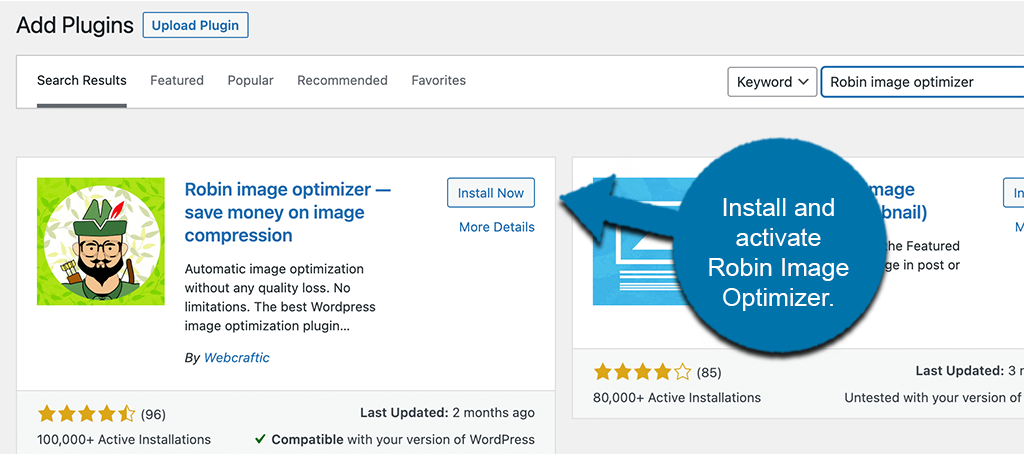
Once you are on the page, you will notice that there is a search field available. Simply use that search field to search the plugin by name. When you see the correct one pop up, install and activate it right from there.
Step 2: Go to the Settings Page
Now that you have installed and activated the plugin, you want to head directly over to the main settings page. Here, you will be able to start optimizing images and configure the plugin exactly how you want.
To get there, click on Settings > Robin Image Optimizer, located on the left side menu area of the dashboard.
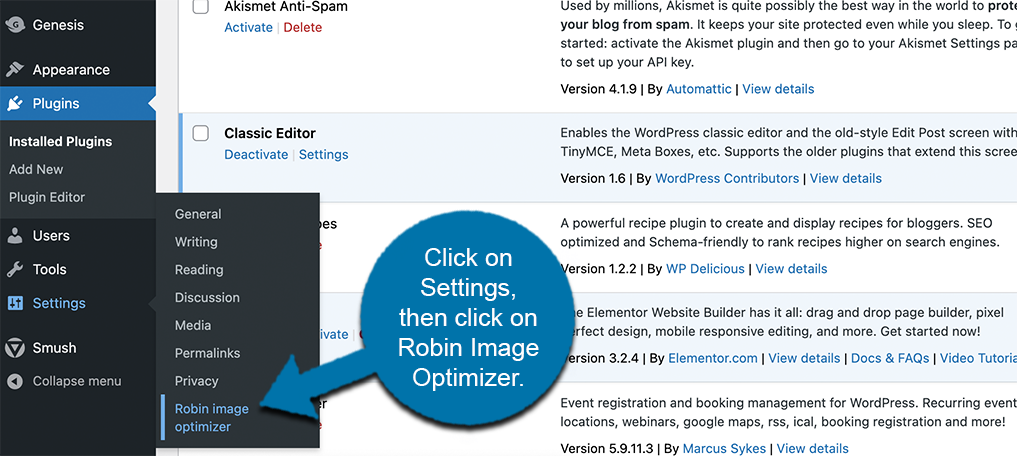
You can see that this option has appeared in your WordPress menu because you successfully installed and activated the plugin.
Step 3: Configure the Plugin Settings
At this point, you are on the main settings and configuration page for the Robin Image Optimizer plugin. You will see it is laid out neatly and it looks easy to navigate.
Before you compress and optimize images, go ahead and configure the plugin settings to your liking. You will see three main tabs that you can use to navigate around. These include:
- Bulk Optimization
- Settings
- License
Go ahead and click on the “Settings” tab located on the left and open those configuration options up.
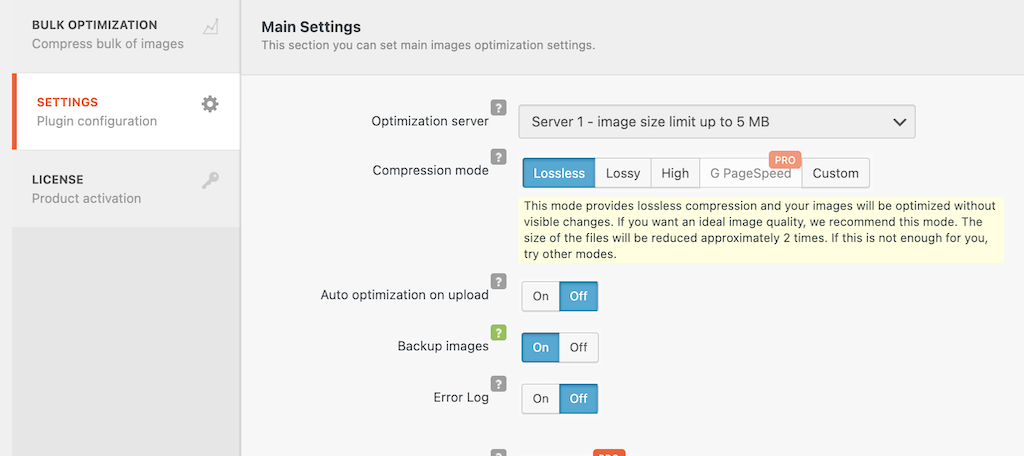
Now, start going through the main settings and get everything set properly (according to what you want). This has options for compression mode, servers, errors, and more.
The top portion of the page contains is main settings for the plugin.
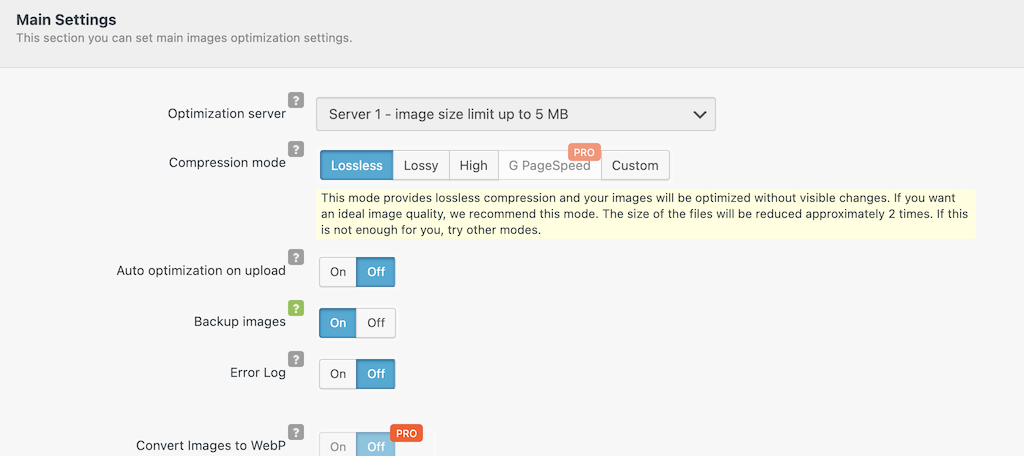
Now, scroll down a little and you will see optimization settings. This includes thumbnails, formats, and larger image formatting options.

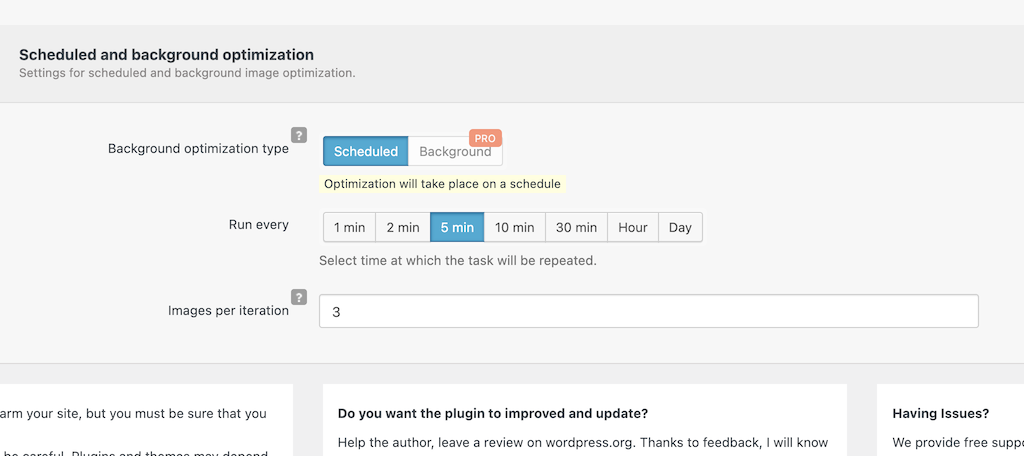
Lastly, the bottom of the page contains the scheduled and background optimization settings. This includes images per iteration and how often background optimization should run on your site.
When you are finished, click on the green ‘Save” button at the top of the page and all your configurations will automatically be applied.
Step 4: Start Optimizing Images
Click on the bulk optimization tab. This is going to take you to where you need to go in order to start optimizing the images that are already on your website.
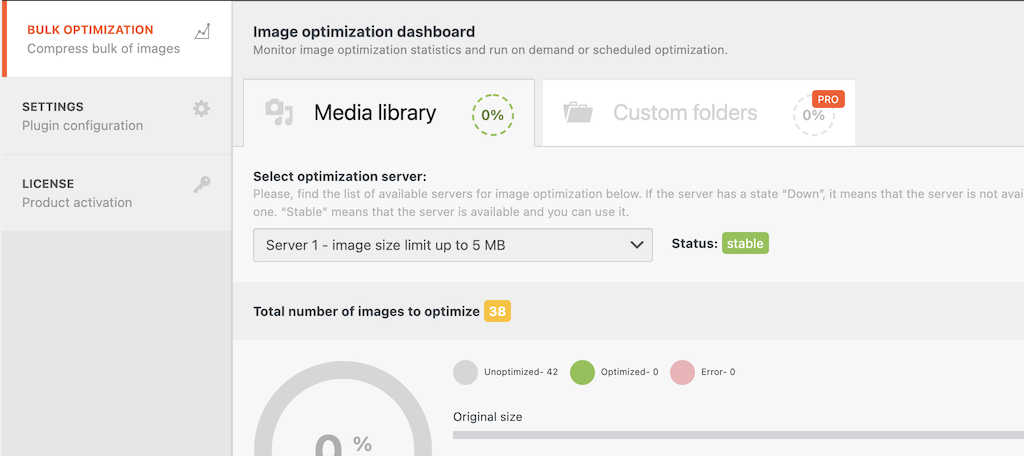
Select the server setting you want from the dropdown. You can leave it on the default.
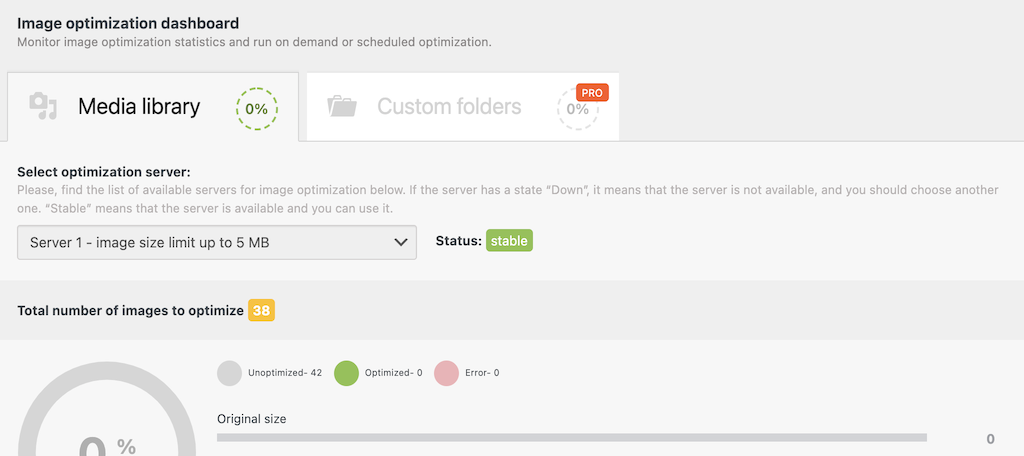
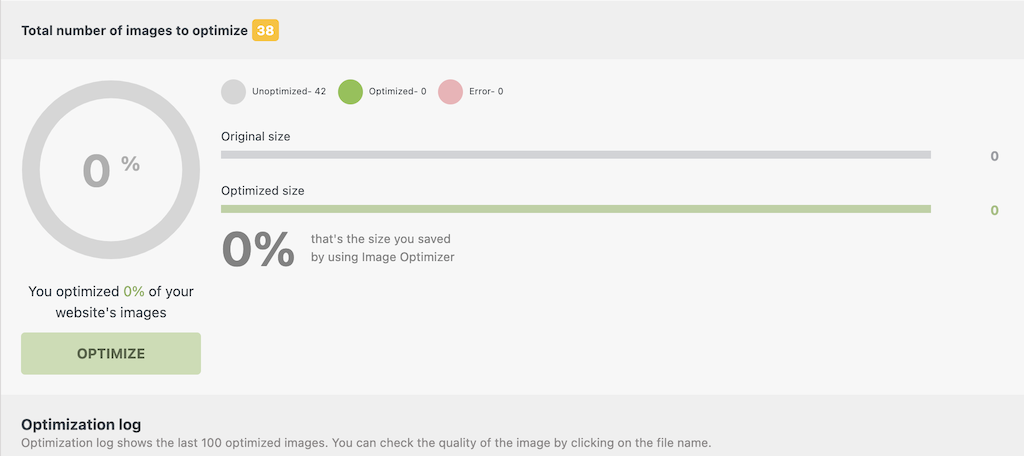
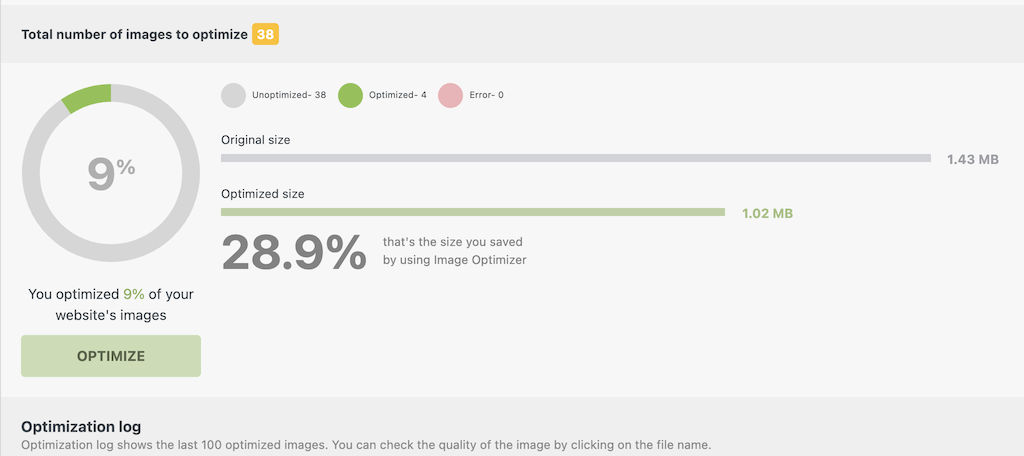
Now, scroll down a little and click on the green “Optimize” button.
This brings up a popup box. You will be presented with some information and then you can decide whether you want to optimize now or schedule optimization for later.
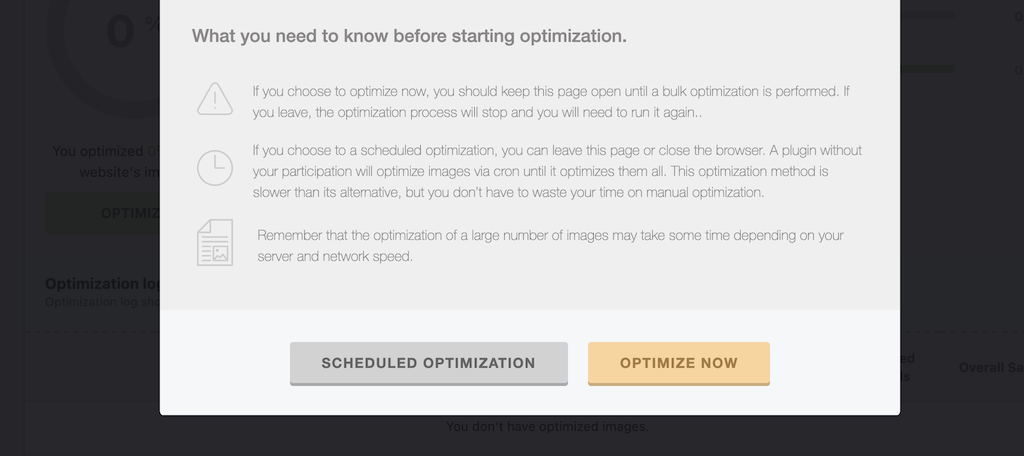
For this tutorial, I am selecting to optimize now.
The optimization process will start and you should stay on the page and track it. The amount of time it will take will depend on how many images need to be optimized. You can track it live.
Step 5: View the Optimization Log
The Robin Image Optimizer plugin provides users with a complete optimization log. You can view the log at any time. Simply scroll down to the bottom of the “Bulk Optimization” page and all the relevant stats and statistics will be there.
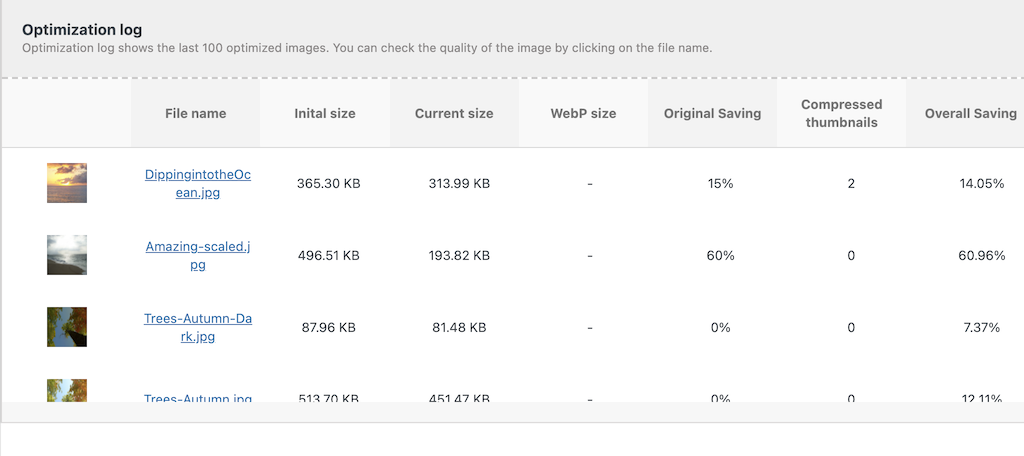
You can use this to see what exactly the plugin is doing for you.
That’s it! You can optimize more images whenever you want. The plugin will also automatically optimize images when they are uploaded to your media library if you selected that option.
FAQs
Here are some frequently asked questions that you might be interested in.
What Image Types Are Supported?
The Robin Image Optimizer plugin supports .jpg, .png, and .gif. Images can be animated or not, both work.
Are There Image Optimization Limits?
No, Robin Image Optimizer is completely free to use. While they do have a pro version of the plugin that gives you access to some other features, the pro version does not extend image optimization limits.
Is EXIF Data Removed From Images?
By default, EXIF data is removed. That being said, you can easily stop this from happening by disabling the feature within the plugin settings.
Final Thoughts
Image optimization is very important when it comes to website speed and overall SEO. The process of properly optimizing images in WordPress does not have to be difficult, you simply need the right tool.
Robin Image Optimizer is easy to use and gives you all the features you need.
Have you been optimizing images manually? Do you prefer using a different compression plugin?