Do you want to give customers the option to compare two selections on your online store? If so, you’ll be pleased to know that I have found the perfect plugin, NicheTable. Normally, you would need to install a full table building plugin to accomplish this.
However, this plugin allows you to create comparison tables on any post or page in under a minute. That means you don’t have to waste any time with features you don’t need. And these tables are natively responsive, thus you don’t have to worry about mobile customers.
Today, I will demonstrate how to build a comparison table with the NicheTable plugin.
Why Add A Table Comparision Feature?
It’s no secret, customers love to get the best deal. That often means they need to be able to compare multiple products. In fact, many stores use this feature to their advantage to showcase that their product is the better option.
You’ve probably seen one website compare its service or product to another. At least when they are the cheaper option. It’s a powerful marketing tool that not only demonstrates the value of your service but can also make a page look more professional.
Of course, the focus of these tables does not have to be the price.
In fact, some websites might want to focus on everything they include in a service or product that a competitor doesn’t in order to justify the higher price. Again, it’s a great marketing tactic that helps customers see all of the advantages they get by buying your product.
And just to be clear, this isn’t exclusively for comparing one website’s offerings against another. You can do it to compare different packages or products you offer.
How to Add a Responsive Comparison Table
Step 1: Install NicheTable
NicheTable is a responsive table maker plugin for WordPress that adds a new block to the Gutenberg editor. This block can be used on both posts and pages to compare any two items on your website. You can display the price, features, manufacturer, and just about any piece of information on the table.
Overall, the plugin is extremely easy to use and will only take a few minutes to master.
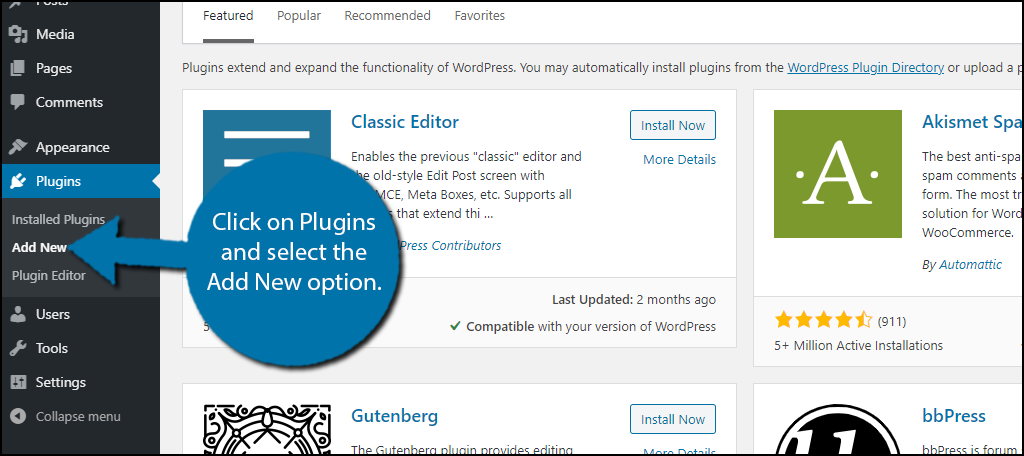
Let’s begin by clicking on Plugins and selecting the Add New option on the left-hand admin panel.
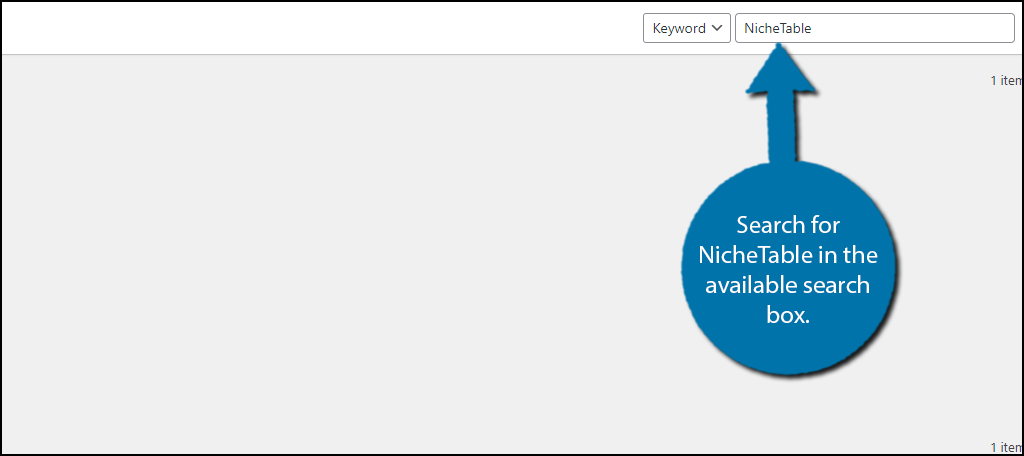
Search for NicheTable in the available search box.
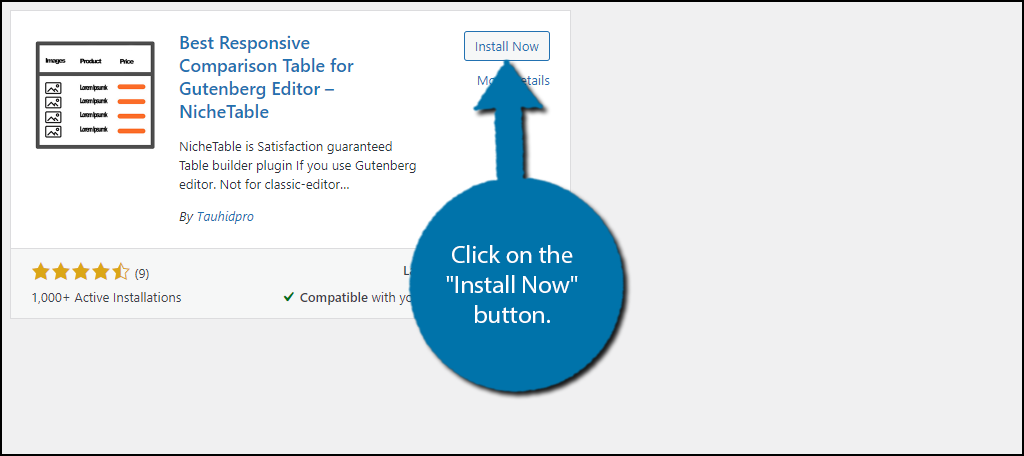
Find the NicheTable plugin and click on the “Install Now” button and activate the plugin for use.
Upon activation, the plugin will ask if you want to receive notifications anytime an update is available. This is completely optional so you can choose to accept or skip the offer.
Step 2: Import Table Block
There are no settings to configure this time around, the plugin simply adds two blocks to the Gutenberg editor and they are available upon activation. In this section, we will go over the Import Table block.
Go to any existing page or post that you wish to add a table to. Alternatively, you can create a new one for testing purposes.
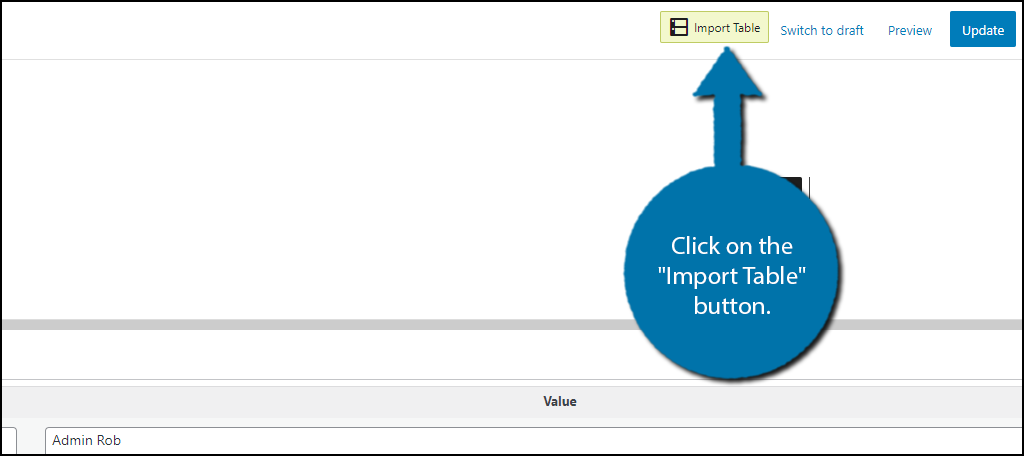
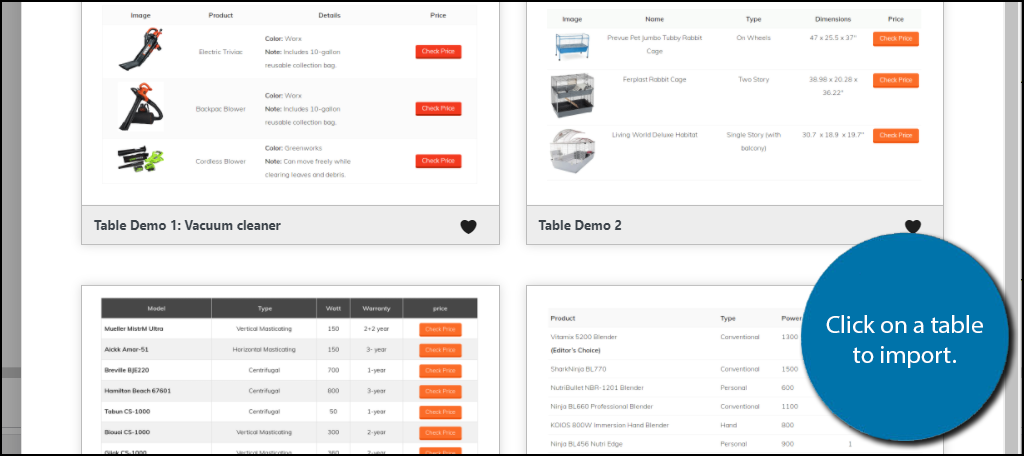
Click on the newly added “Import Table” button on the top right of the page.
A pop-up window will now appear on your screen. It consists of three tabs, Basic, Pro, and Favorites. In the Basics tab, you will find five table demos that showcase different tables that you can import into your post or page.
Everything in the Basic tab is free to use. You will find an additional eight tables in the Pro tab, but this requires upgrading to the Pro version.
Click on the table you want to import.
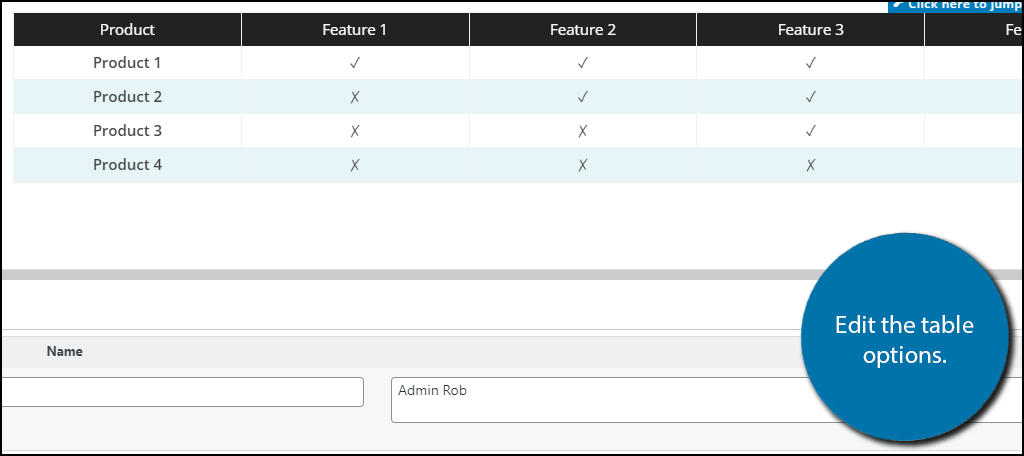
Doing so will add the NichTable block with the settings preconfigured to match the choice you just made. Now, you just simply need to fill out all of the fields by editing each one.
Note: If you are including images, make sure they are all the same size and properly fit within the allotted space.
If you’re looking for premade comparison tables, the Import Table option is your best friend. However, if you want to be creative, you can create your own table design with the NicheTable block.
Note: You can also find the Import Table block through the block search feature within Gutenberg, but using the button is much quicker.
Step 3: NicheTable Block
The second block is all about creating your own comparison table and it’s quite easy to use. However, I do want to point something out; you can also choose to import a table and then customize the design of it.
For instance, you might want the color scheme to match your website. You can do this with the pre-built tables.
Click on the “+” button, search for the NicheTable block, and select the Niche Table block.
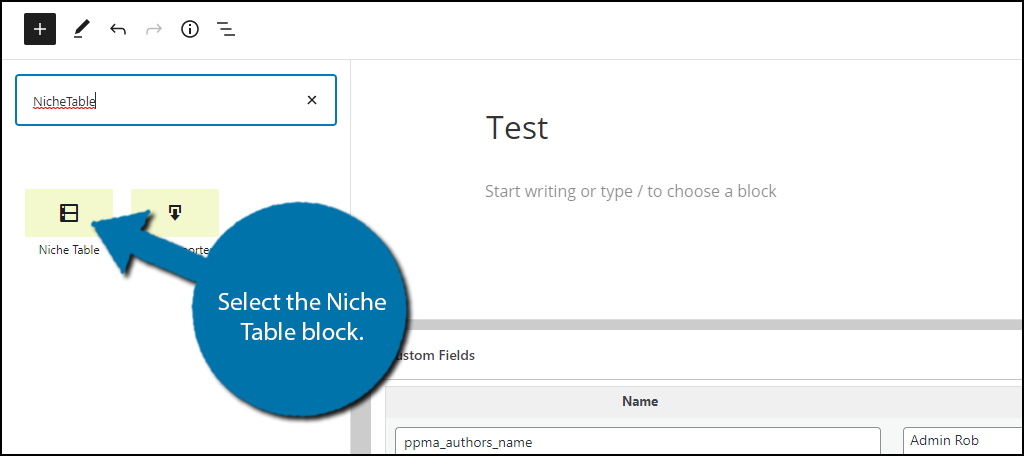
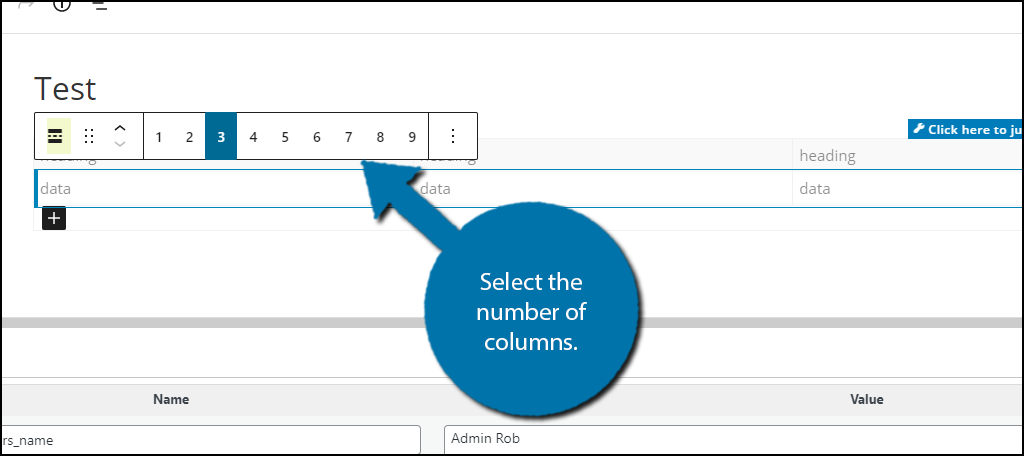
A simple 3×3 table will now appear in the post or page editor. To expand the table, click on the blue wrench icon at the end of a row.
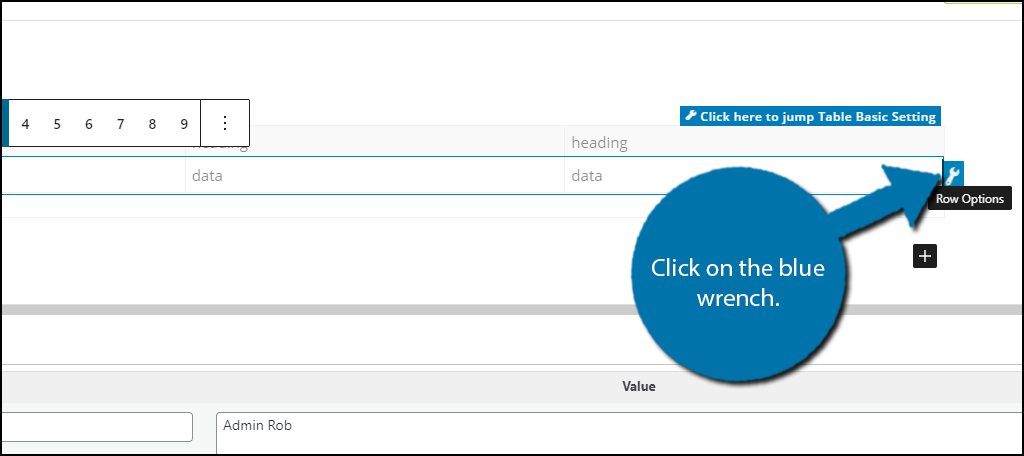
You can select how many columns the row will have by selecting the number. However, it is important to understand that each row is technically its own block. Thus, if you make one row have 4 columns, that will not affect any of the other rows.
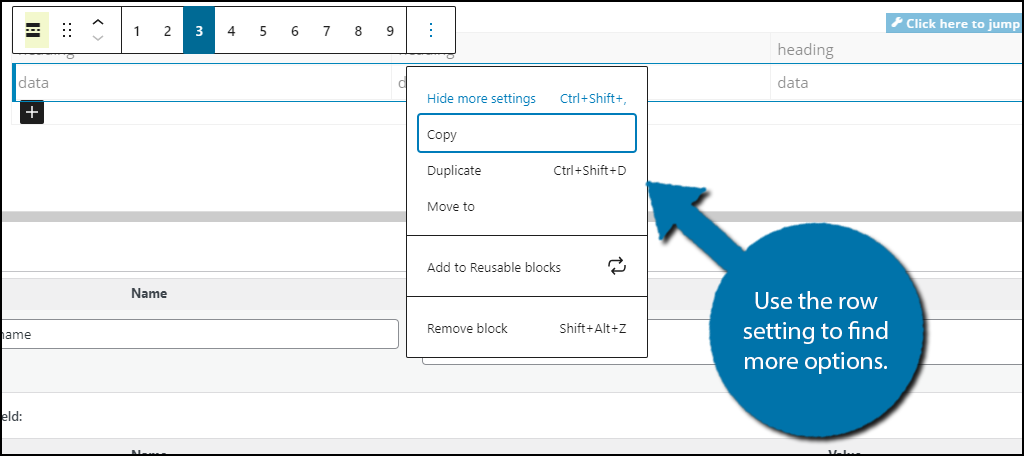
You will have to manually alter each one.
Click on the verticle three dots to reveal more options. Here you will find the options to copy, duplicate, move, and remove the block.
Note: The difference between the copy and duplicate option is that the duplicate option copies the row and then pastes it below, whereas the copy option simply adds it to your clipboard. The copy option is useful if you do not want to place the row directly underneath the original.
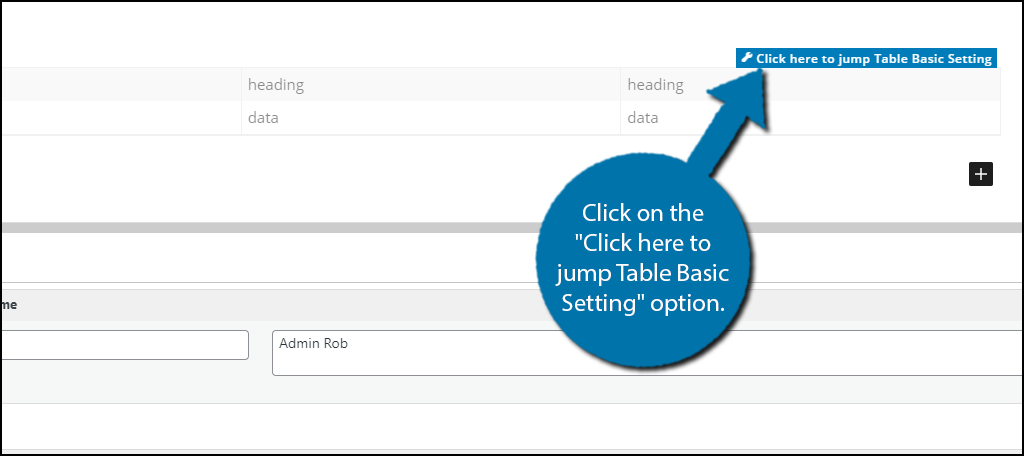
Click on the “Click here to jump Table Basic Setting” option.
First, you are required to enter the headings of the table for mobile users.
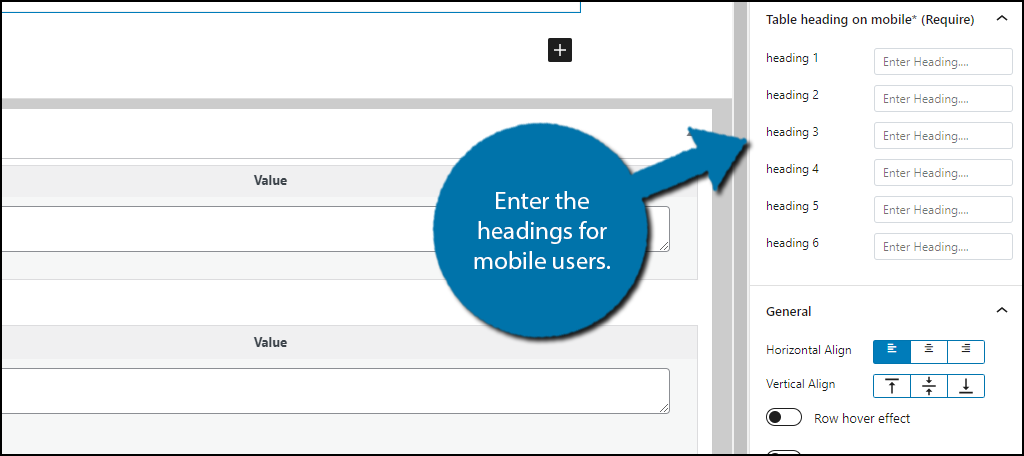
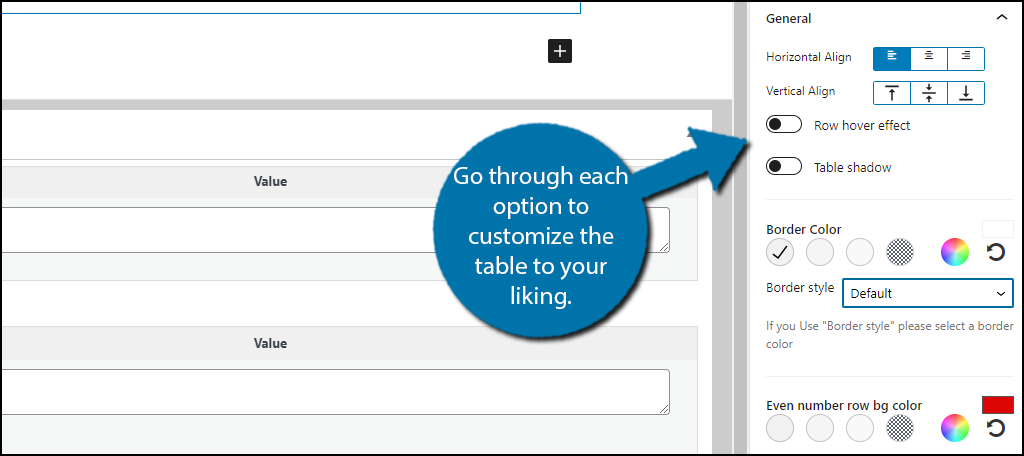
In the general section, you will find vertical and horizontal alignment, hover effects, shadow options, color options for both the border and alternating rows, and you can even add your own custom CSS.
Go through each option to customize the table to your liking.
With all of these steps complete, your table is ready to go, congratulations.
You Can Use NicheTable For Anything
While the plugin was intended for product comparisons, it doesn’t mean you are limited to that. These tables also work nicely for other topics like comparing two movies or video games.
Although it would be fair to say these are products in their own right.
In any event, tables are powerful tools that skilled developers can take advantage of. In the right hands, they can enhance your content and help visualize the differences between two similar objects or services.
And with a customizable design, they fit in on any website.
Show Customers They Are Getting the Best Deal
The entire point of including a comparison table in WordPress is to show how two products or services stack up against each other. Showing a full list of features, or highlighting the ones a product may be missing can help improve sales.
It can also help justify higher prices.
How easy did you find the plugin to use? Did you create your own table or import one?