Being able to accept payments online is an important part of many businesses today. Whether you’re selling goods through eCommerce or offering freelance work, Internet-based payment gateways are a growing need. When you use WordPress hosting, the prospect for getting paid is much easier to handle.
In this tutorial, I’m going to show you how to accept payments with Stripe through your WordPress website. In a few moments, you’ll be able to launch forms and collect money owed from your clients.
Using an SSL
A Secure Sockets Layer is a way to encrypt information from your website to the visitor. It’s a standard practice for anyone who wants to protect customers. It’s also an effective method of boosting your search engine optimization. After all, search engines hold secured sites in higher regards.
With that being said, you should spend the money to buy an SSL certificate for your website. It’s a nominal yearly fee that is worth the expense for search engine rankings and reputation of the site.
Setting Up Stripe with WordPress
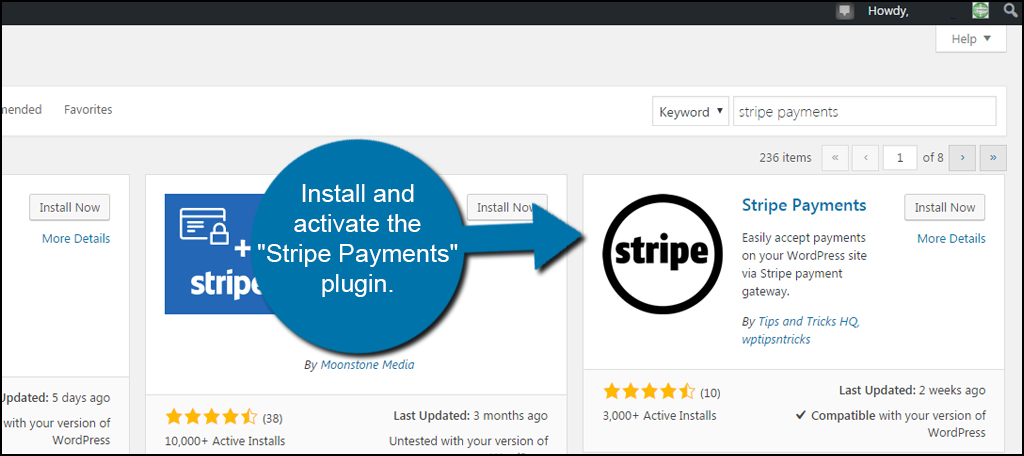
Today, I’m demonstrating the Stripe Payments plugin. There are many different ways to set up a form to accept payments, but this plugin is one of the few that is free to use. Otherwise, you may have to purchase one of the other methods. For now, let’s keep this process as cost-effective as possible.
You’ll need to install the WordPress plugin to continue this tutorial. This will add a new feature to your website and allow you to make money using Stripe.
Install and activate the “Stripe Payments” plugin. There will be several with a similar name, so you’re looking for the one created by “Tips and Tricks HQ.”
Go to the settings area and click “Accept Stripe Payments.”
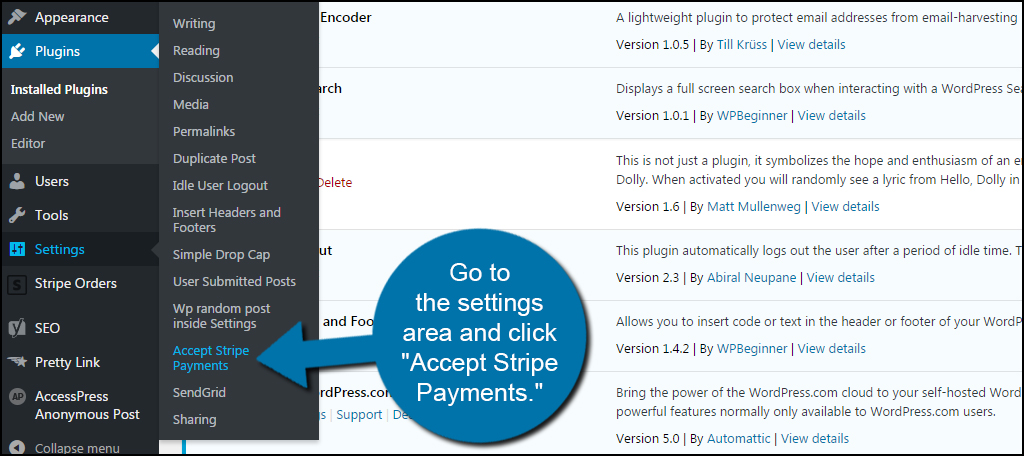
In this screen, you will set up the configuration of how your Stripe button works on the website.
Global Settings
In the Global Settings, you have a few options that will affect every button you create on your website. This includes things like the checkout page, currency and button text. The Checkout Result Page is automatically created when you install the plugin, so you may want to keep that as-is for now. Of course, you can always create a custom page later on.
Credentials
In the Credentials section, you input your API keys from your Stripe account. Without them, you will not be able to accept money. You can find more information about Stripe API keys from its website.
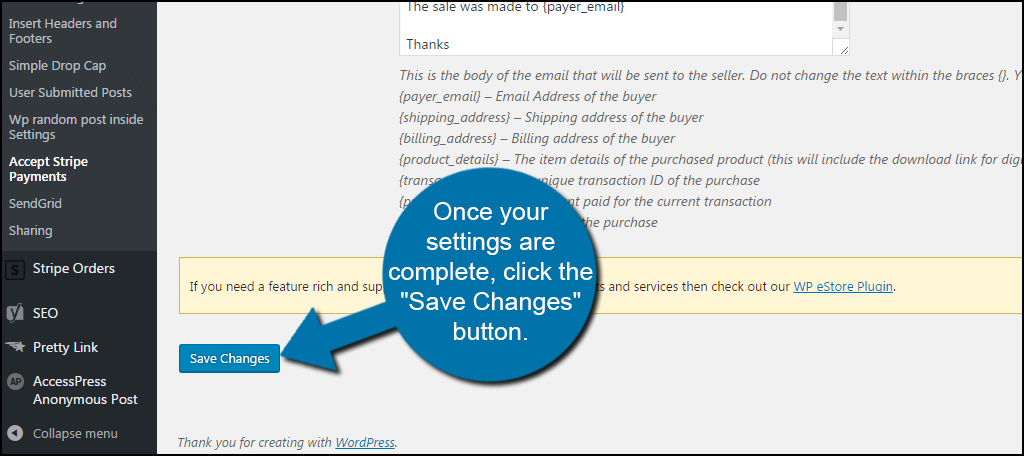
Email Settings
In this area, you can customize the messages that are sent to buyers as well as yourself. This includes notifications so that you know immediately when someone makes a purchase.
Once your settings are complete, click the “Save Changes” button.
Adding a Stripe Button for Purchases
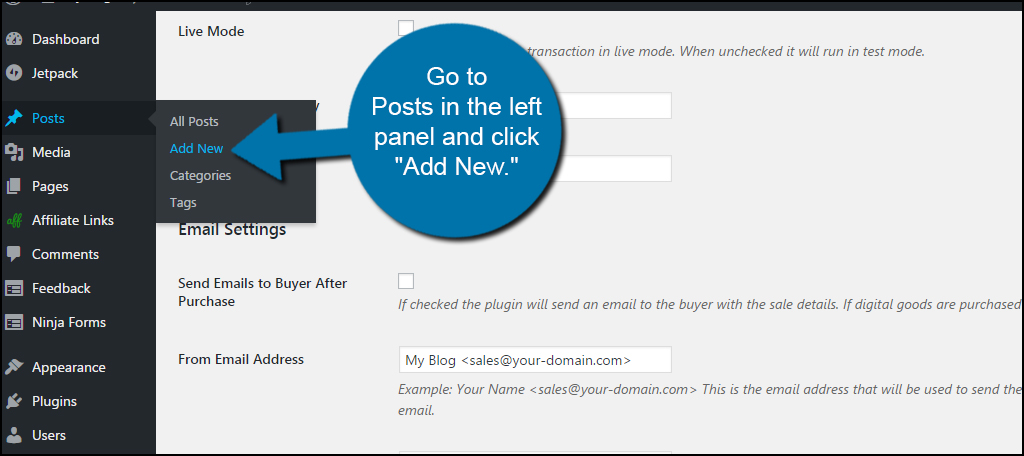
Now that the general settings for Stripe Payments are ready, it’s time to start making buttons. For this tutorial, I’m going to make a new post for selling an eBook. You can do virtually anything you wish, but this is just the simplest way to show you how to make a quick payment button.
Go to Posts in the left panel and click “Add New.”
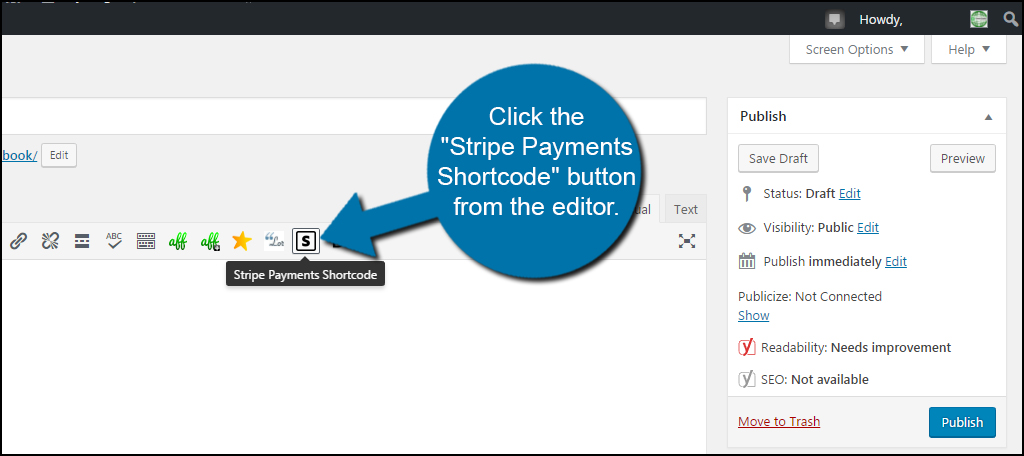
Give the post a title and a bit of a description about what it is people are buying. Afterwards, click into your text editor where you want to place the button. For example, move the cursor to the end of the post if you want to place the button at the bottom.
Click the “Stripe Payments Shortcode” button from the editor. This is only visible in the Visual editor of WordPress.
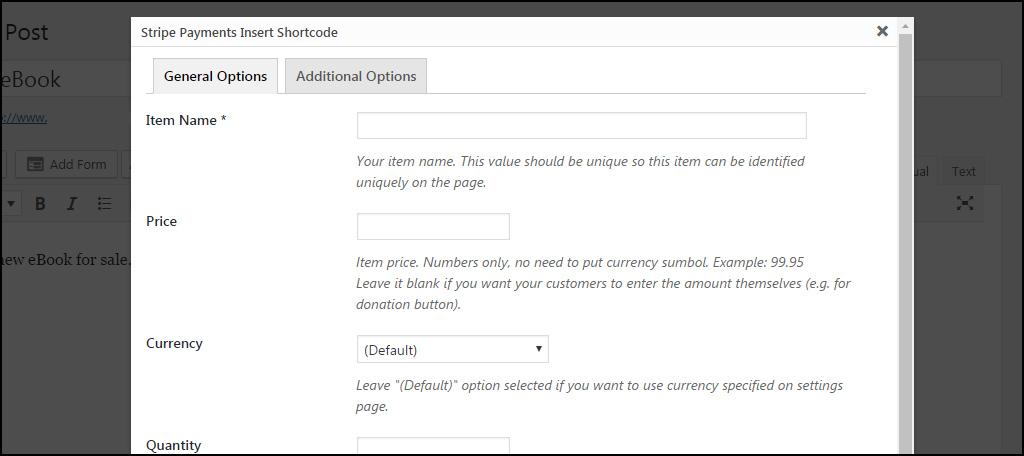
Set the item specifications in the General Options tab. This includes things like the product’s name, price, quantity and button text if you want it different than the default global setting.
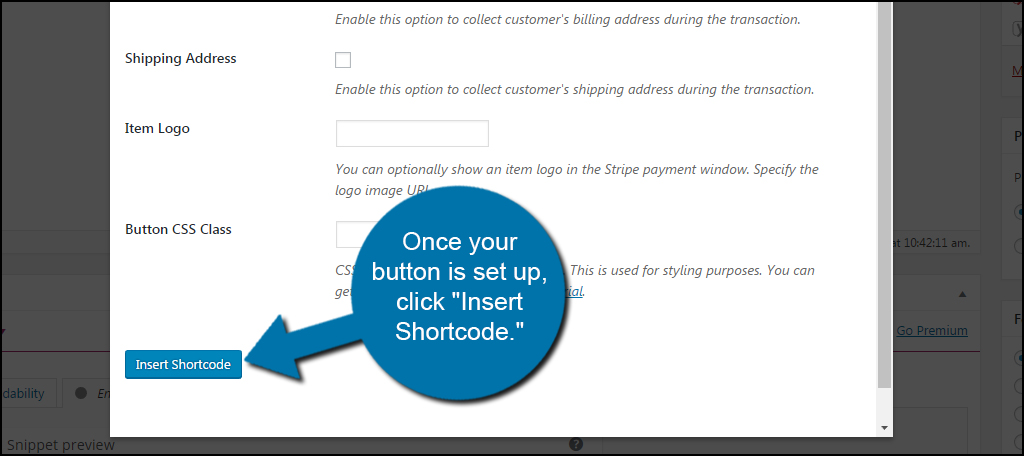
In the Additional Options tab, you can add components specific for the item. For instance, I would put in my eBook’s URL as this is a digital product for sale. You can also input custom CSS classes if you want to further customize the button.
If you’re selling a tangible good that needs to be shipped, you want to include the Billing and Shipping address by clicking the check boxes.
Once your button is set up, click “Insert Shortcode.” This will add the button to your post.
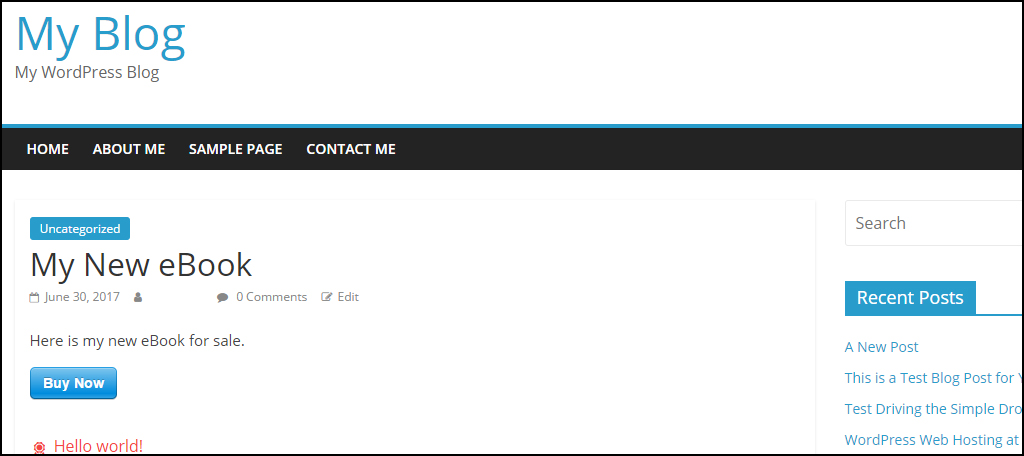
When you publish your post, the button will be prominently displayed within your content.
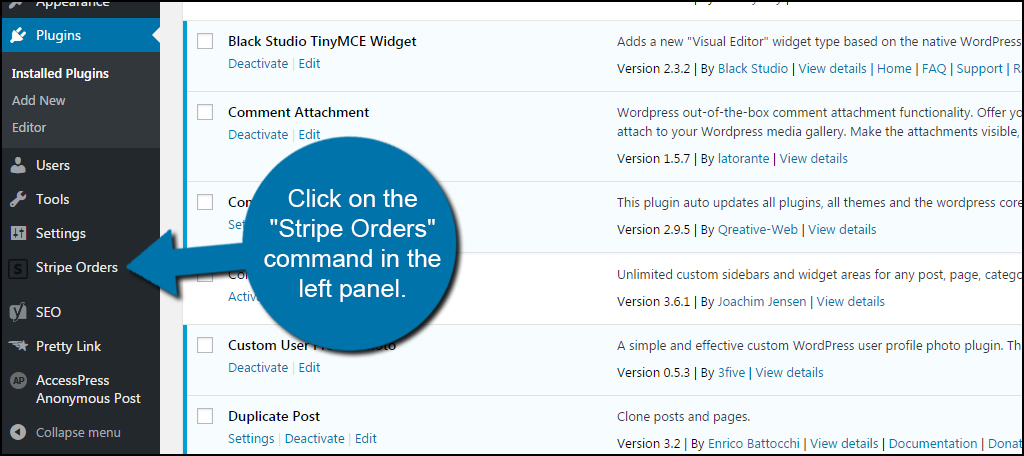
Checking On Your Orders
Although the plugin will send emails through WordPress when someone makes a payment, you can also check the status manually. You do this by accessing Stripe Payments’ tool in WordPress.
Click on the “Stripe Orders” command in the left panel.
Any active payment you receive through your Stripe button will show in this screen. It will include the title as well as the date. At which point, you can click on the purchase and view details such as the customer’s data and the amount paid.

Payment Gateways A-Plenty
Stripe is a common form of online payment, but it’s not the only way customers can send you money. There are a number of plugins that can prove to be quite beneficial. From donations for charities to paying for digital downloads, your WordPress website can be a useful tool. Find the best methods to monetize your site and get more out of it than just a place to post content.
How do you make money from your website? Have you sold digital goods such as your own eBooks from a website before?
Hi Josh,
I was wondering if the Stripe Payments interface has changed since you wrote this? I just activated the plugin and it looks much different than your screen captures. I’m only given the ‘orders’ and ‘settings tab’. I’m having issues finding where to populate the Stripe shortcode.
Thank you!