Not long ago, I wrote about different ways to earn income from your blog. One of the suggestions was to place and manage ads on your blog using ad networks. Ad networks are places like Google AdSense, media.net, Propeller Ads, etc. But what if you want to sell ads directly?
If your blog or website runs on WordPress, you can become your own ad network by installing the AdRotate plugin. I’ll show you how to install and set up AdRotate in this tutorial.
But first, let’s talk about why you might want to sell advertising directly rather than using an ad network.
Selling Ads on Your WordPress Site
There are advantages to using an ad network. Set up an account, insert some code into your site, and you’re displaying ads. You don’t have to find advertisers; the network takes care of that. You just set it and forget it, and the ad revenue shows up in your bank account.
Who would turn down a sweet deal like that?
But what if your website is just getting started and you don’t yet have a lot of traffic? Some ad networks have minimum traffic numbers that have to be met.
Or what if your website contains material that isn’t allowed by the ad networks? Most ad networks steer clear of content they feel their advertisers might find objectionable. For any reason (and those reasons can change without notice).
When you apply to an ad network, they evaluate your site and decide whether they can do business with you. That’s fair enough; they have to keep the advertisers happy after all. But if they do find a reason to decline to work with you, you’re out of luck.
Ad networks are in business to make money. They sell to the advertisers and break off a piece of that sale to send to you. The size of the piece that makes its way to you is different for every network (and type of ad). But the fact remains, it’s still just a piece of what the advertiser is paying.
When you keep your ad business in-house, 100% of the revenue from the ads goes into your pocket. If you really want to make money running ads on a WordPress site, it’s best to eliminate the middleman.
Convinced? Good! Let’s get started with the plugin.
Installing the AdRotate Plugin to Manage Ads in WordPress
Log in to your WordPress admin panel.
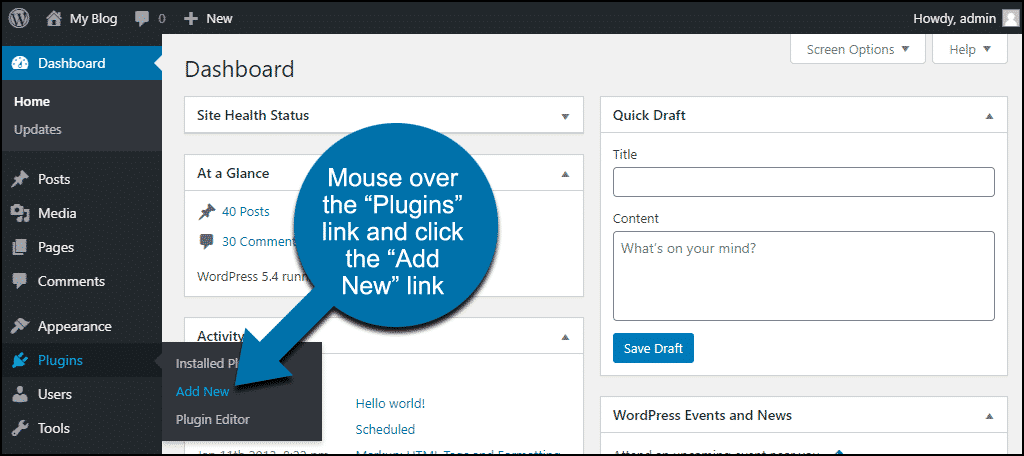
In the left column navigation, mouse over the “Plugins” link and click the “Add New” link.
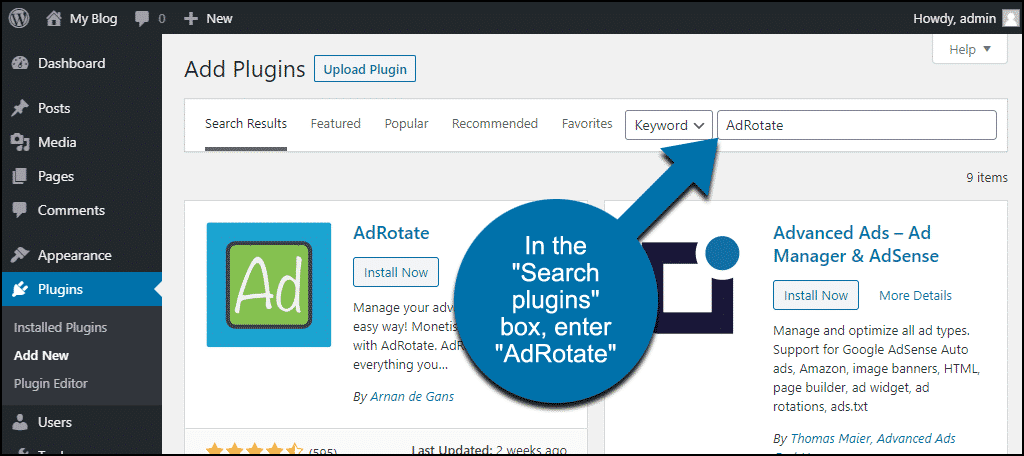
In the “Search plugins…” box, enter, “AdRotate.”
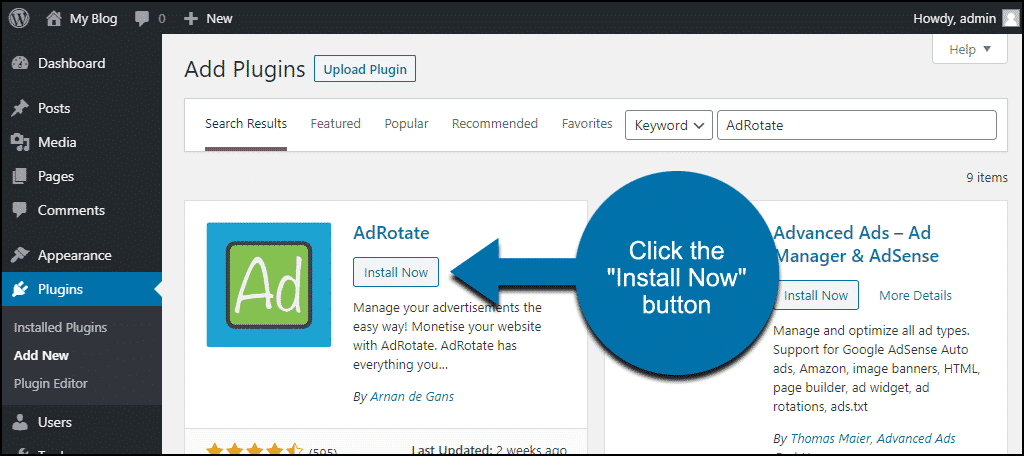
Once you have located the plugin, click the “Install Now” button.
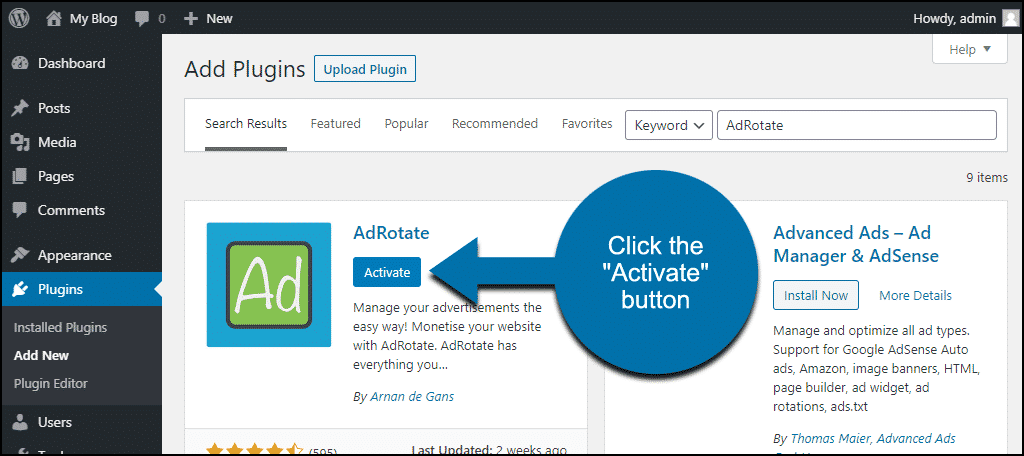
Finally, click the “Activate” button.
Before We Go Any Further
If you use an ad blocker in your web browser, you’ll have to whitelist your site to manage ads with AdRotate.
For example, if you use AdBlock, click the AdBlock icon and select “Don’t run on pages on this site.”
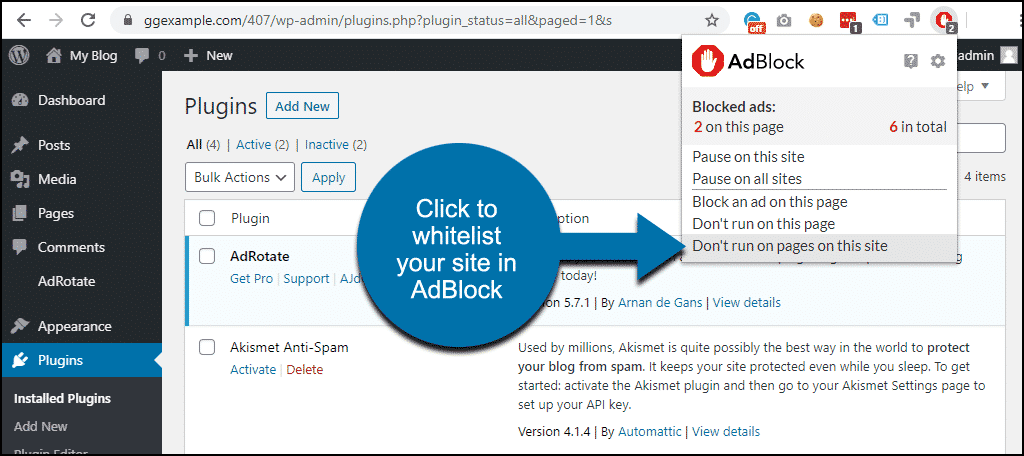
Most other adblockers will have a similar setting to whitelist your site.
Getting Started With AdRotate
There are more configuration options available to manage ads than we can hope to cover in this article, so we’ll stick to the basics. We’ll talk about inserting an ad, scheduling it, and how to use ad groups.
You can use the AdRotate ad manager plugin to manage ads from advertising networks. But since we’re focusing on running ads that you sell yourself, those are the features we’ll cover.
There are a lot of “standard” banner sizes. Which sizes you can sell depends on your WordPress theme or your site’s layout.
I’m using a default WordPress theme with a sidebar for this tutorial, and the sidebar is about 325 pixels wide. So if I’m selling ads for that sidebar, they can’t be more than 325 pixels wide.
So let’s assume I’ve sold a standard size 300 x 250 pixel ad to be placed in the sidebar. The advertiser sent me a graphic (which I uploaded to the WordPress Media Library) and a target URL.
Now what?
Creating Your First Advertisement
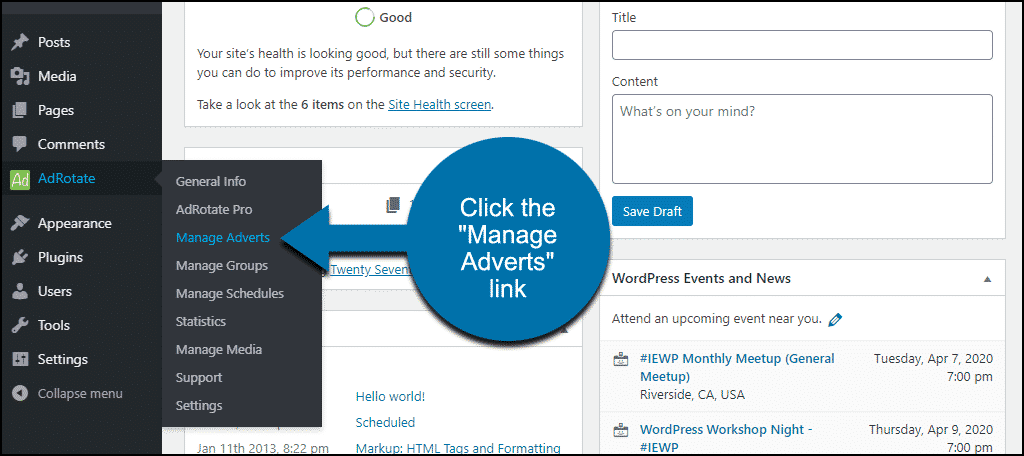
1. Open Manage Adverts
In the left column navigation, mouse over the “AdRotate” link and click the “Manage Adverts” link.
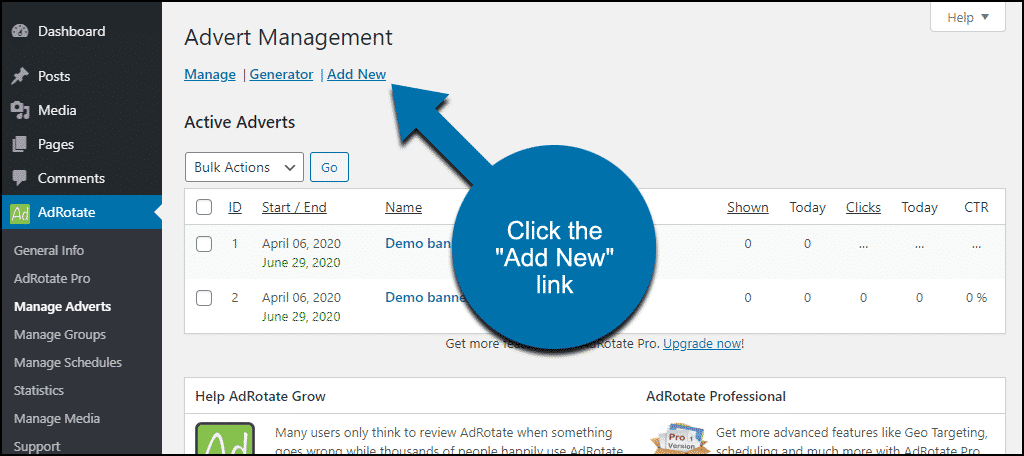
2. Add a New Advertisement
Click the “Add New” link.
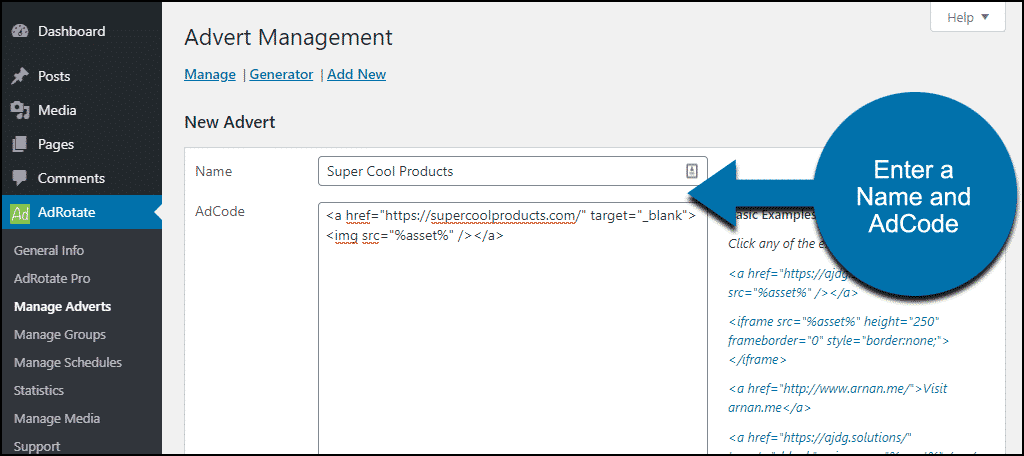
First, we’ll give the ad a name. That can be anything. It’s for your reference.
Then we’ll enter the “AdCode.”
The ad code is HTML, so it can include anything you can wrap in HTML. For our purposes, we’re going to have the ad image without any text. Clicking on the ad should take our visitor to the advertiser’s site.
So we’ll enter this HTML:
[ht_message mstyle=”info” title=”” show_icon=”” id=”” class=”” style=”” ][/ht_message]
That’s an image (the “img” part) inside a link to the advertiser’s site. We use target=”_blank” to make the browser open a new window or tab to the advertiser.
We don’t want our visitor to leave us!
You’ll notice that the image tag uses a variable, %asset%. The plugin will insert the image URL in place of that variable.
If you need help constructing the AdCode, there is a generator available. Go to Manage Adverts > Generator.
3. Choose Your Image
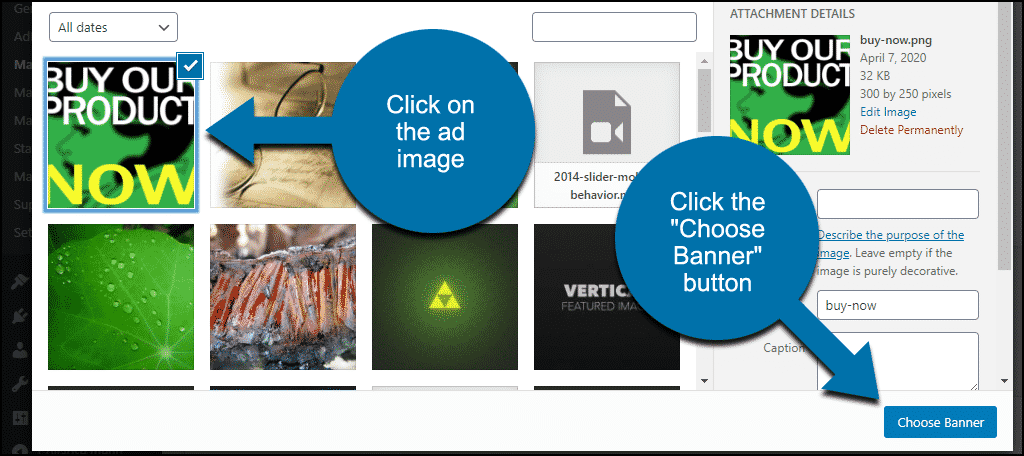
Next, we’ll select the ad image from our Media Library.
On the “Banner asset” line, click the “Select Banner” button.

The Media Library will open.
Click on the ad image to select it, then click the “Choose Banner” button.
4. Save the Advertisement
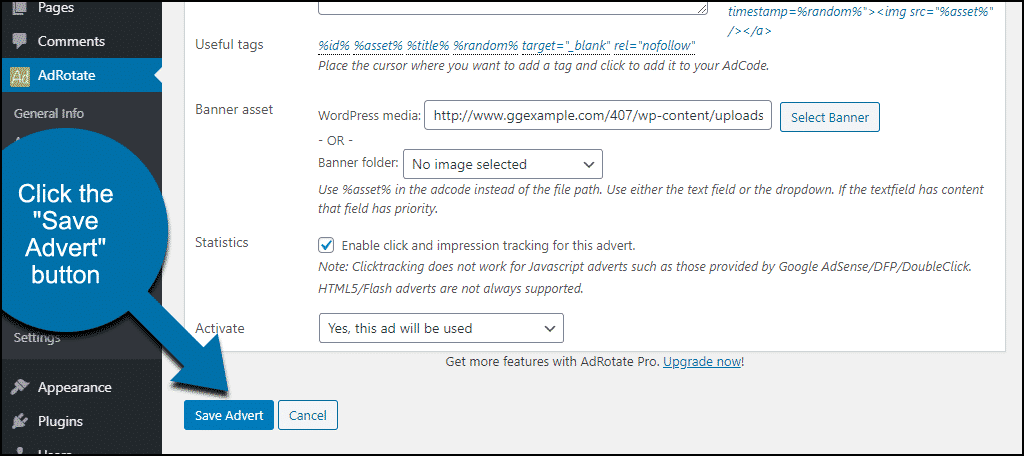
Now the image URL will be in the “Banner asset” field.
On the “Statistics” line, check the box to “Enable click and impression tracking for this advert.”
On the “Activate” line, leave the drop-down set to “Yes, this ad will be used.”
Click the “Save Advert” button.
Scheduling the Ad
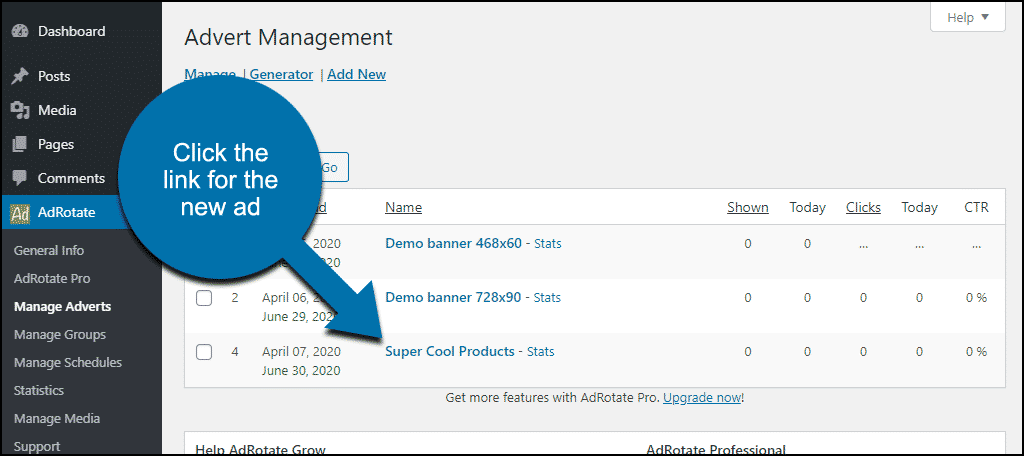
When we saved the ad, we were brought to the “Advert Management” page. Now, I’ll click the link for the ad we just created.
Scroll down to the “Schedule your advert” section.
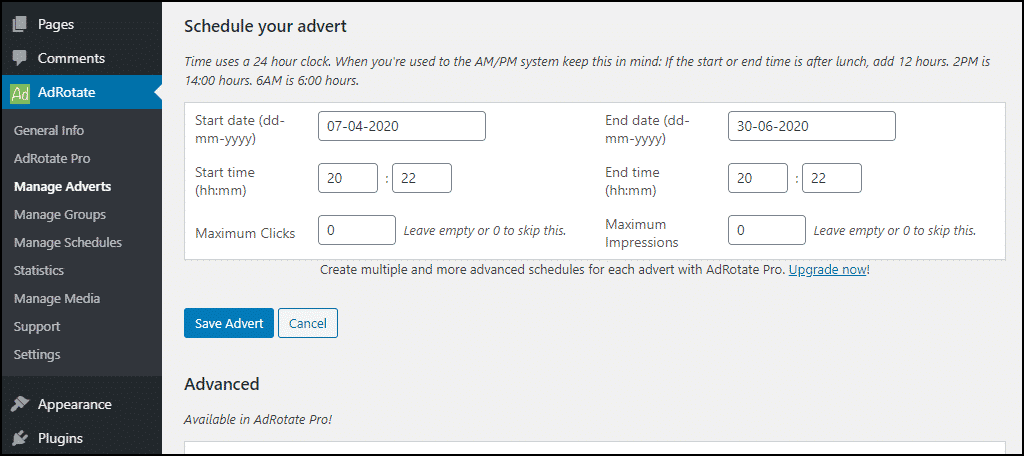
The “Start date” and “Start time” should be set to the date and time we created the ad. That means the ad will be visible as soon as we add it to the site.
If you want to schedule an ad to appear at a future date, enter that date here. Pay attention to the end date, and make sure it’s set to a time after the start date.
The “Maximum Clicks” and “Maximum Impressions” settings are used to manage ads with click or impression limitations.
If you make any changes to the schedule, click the “Save Advert” button.
Since we want to see the ad right away, I’m going to leave all the scheduling fields as-is.
Placing the Ad on the Site
There are a couple of options for placing the ad on the site. It can be placed on a specific page or in a post. Then it will only be seen on that page or post.
The second option, which we’ll use, is to place it in a universal spot that shows up on every page, like the sidebar, footer, or a widget.
Placing the Ad in a Post or Page
To place the ad on a specific page or post, you’ll need the ad shortcode. You can find that in the “Usage” section of the “Advert Management” page.
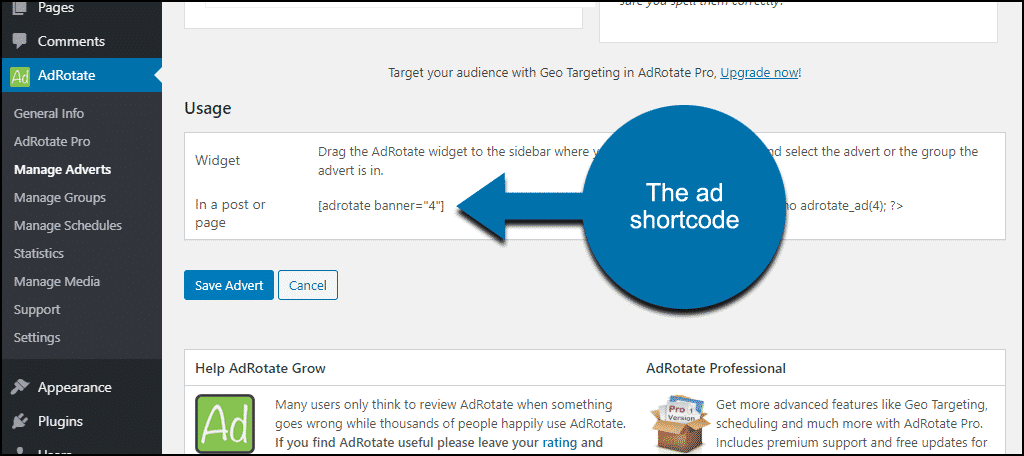
So as you can see, for the ad we created, the shortcode is:
[ht_message mstyle=”info” title=”” show_icon=”” id=”” class=”” style=”” ][adrotate banner=”4″][/ht_message]
If you paste that into a page or post, the ad will show up right where you put the shortcode.
But we want the ad to show up on every page of the site, so we’re going to place it in the sidebar.
Placing the Ad in the Sidebar (or Any Widget Area)
To insert our ad in the sidebar, we’ll use the AdRotate widget.
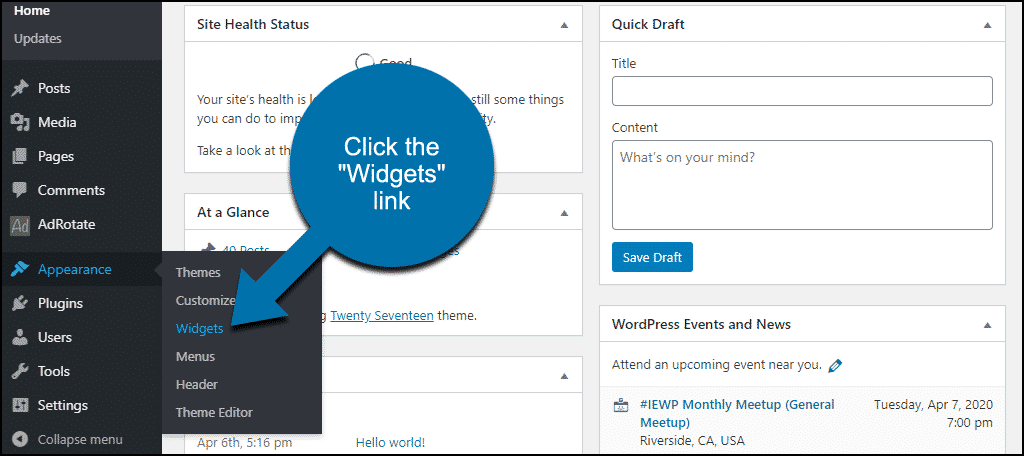
In the left column navigation, mouse over the “Appearance” link and click the “Widgets” link.
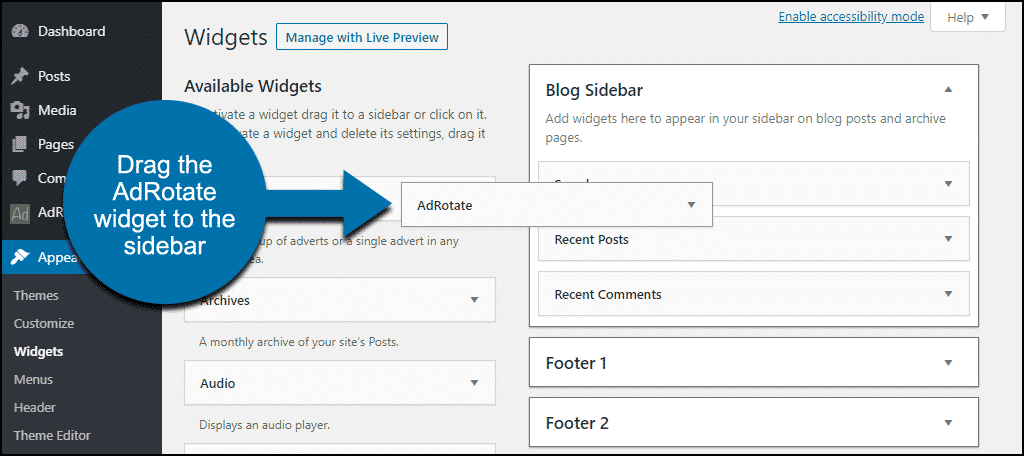
Next, we’ll drag the AdRotate widget into the Blog Sidebar area, dropping it between the Search and Recent Posts widgets.
The widget will open to the settings.
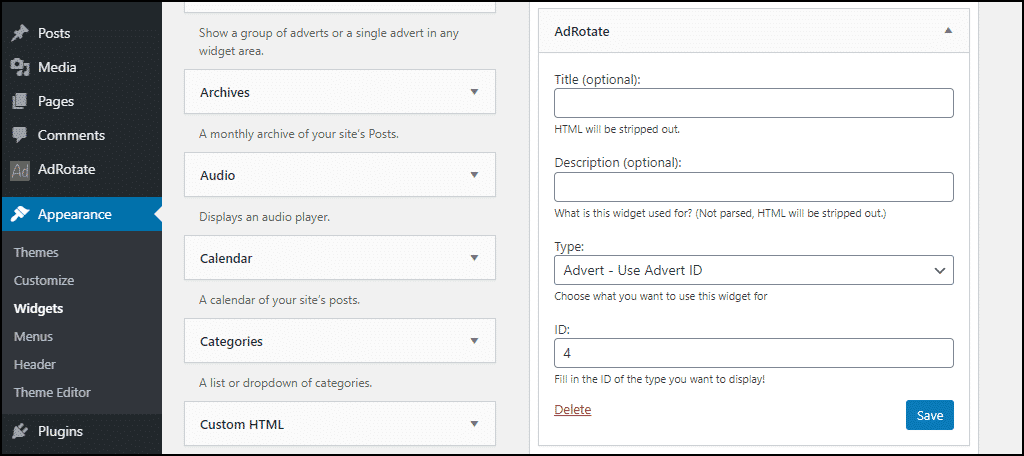
The “Name” field isn’t required, and since it displays text above the ad, we won’t use it.
We’ll also skip the “Description,” since we only have one ad at the moment.
The “Type” line chooses whether to display a single ad or a group of ads. (More on groups in a minute.) We’re showing a single ad, so we’ll leave it set to “Advert – Use Advert ID.”
The “ID” field is where we place the ad ID. Remember when we looked at the shortcode? The ad ID is in there. So our shortcode, [adrotate banner=”4“], tells us the ad ID is 4. You can also find the ID on the “Advert Management” page.
Finally, we’ll click the “Save” button.
Now when we view the site, there’s the ad in the sidebar.
Since we wrapped a link around the image tag, clicking the ad image takes us to the Really Cool Products page.
Or I should say that it would take us there if such a page existed.
Ad Groups
Groups are a great way to manage ads, and can be found in Manage Groups > Add New.
Groups can hold one or more ads. If you put multiple ads in a group, the ads will rotate. The “Mode” determines how often the ads are displayed.
- Default: On every page load, a different ad from the group will be shown.
- Dynamic: The ad changes every [number you provide] seconds, cycling through the ads in the group.
- Block: Displays a grid with all of the ads in the group.
The rotation is “semi-random,” and I’m not sure what that means, but the ads don’t repeat in the same order.
We add a group to a page, post, or widget the same way we added a single advertisement. Either as a shortcode or a group ID.
There are a lot of configuration options for groups, so take some time to read up on them and experiment.
How to Decide How Much to Charge for Ads
Now that the mechanics to manage ads are out of the way, we get to the nitty-gritty. Monetizing your blog.
So how do you know much to charge for an ad on your site?
The rate that blogs charge for ads varies quite a bit, as you might expect. But generally speaking, ad rates are usually based on visitor numbers, the type of advertisement, and placement.
If you’ve never thought about the subject of rates, I have an excellent resource for you. It’s a site called BuySellAds, and you can use it to see what typical prices are in your general niche.
Let’s take a look at a site listing on BuySellAds
To take a site at random, WE AND THE COLOR in the “Design and Art Inspiration” category.
As I write this, they are listed as having 130,000 monthly impressions. That sounds like a lot, but impressions are not visitors. They are page loads. So whenever a page loads with an ad on it, that’s an impression. One visitor who loads ten pages equals ten impressions.
You see two types of ad rates here, “sponsorship” and “CPM.”
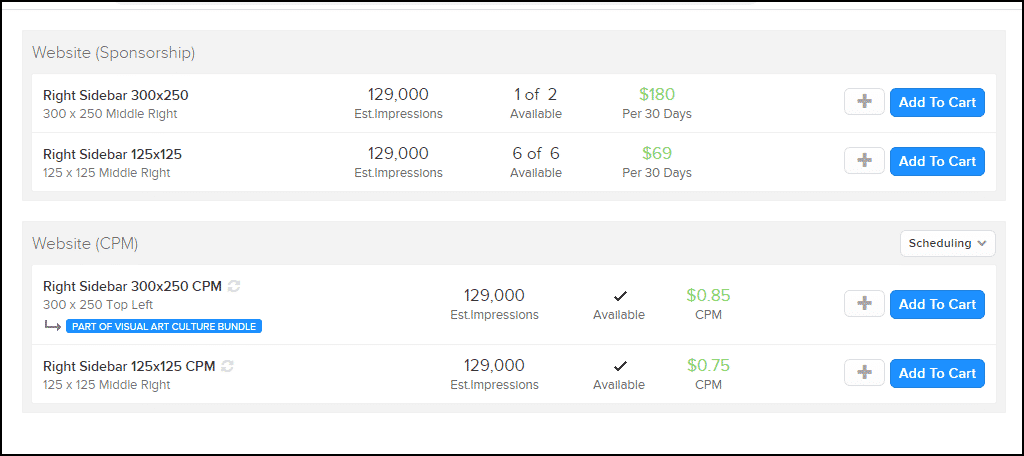
The sponsorship rate is the rate to have a particular sized ad visible in a specific location for 30 days. The ad has that location exclusively; no other ads appear there for those 30 days.
The CPM rate is the cost per thousand impressions. The CPM ads may rotate with other advertising. Since they may not appear on every page load, the rate is lower than the sponsorship rate. The advertiser pays you for every thousand impressions, whenever those impressions happen in the ad rotation.
Doing some research on the BuySellAds site can give you a pretty good idea of what you can charge. Look for offers from websites that are similar to yours as far as the topics and visitor numbers.
If you have trouble finding advertisers, you can also list your site on BuySellAds. But of course, they are an ad network. Not exactly the same as the big ad networks we talked about, but an ad network all the same. Which means – you guessed it! They’re going to take a share of the ad revenue.
What Happens if You Uninstall the AdRotate Plugin
If you uninstall the plugin, pages and posts that used the plugin will be affected.
- The ads you created will be deleted (though the images will remain in your Media Library).
- The plugin widget will be deleted.
- The plugin shortcodes will stop working, so the shortcodes themselves will be displayed anywhere they were used.
You Put Effort Into Building Your Website; You Should Reap the Rewards
Ad revenue fuels the web. That’s a fact. Without it, we’d live in a very different world. There’s no reason the hard work you put into your website shouldn’t earn you a profit. Rather than settling for a small piece of big ad network revenue, sell your own ads.
We’ve gone over everything you need to manage ads. Yes, it’s (yet) another thing you’re going to have to put your time into. But if you do, the payoff can be well worth the investment. As your site becomes known as a good place to advertise, you’ll spend less time selling.
The ad dollars are out there. Go get some of them.
Have you ever used an ad network on your website? Do you have any fresh ideas for selling ads directly that you’d like to share? Let me know in the comments.
When selling ads directly, do you have any guidelines for pricing?
Honestly Matt,
The prices you try to charge will be based on website traffic, what type of ad someone wants, and where it is placed. You can set your own prices and then negotiate based on what someone is looking to do.