WordPress menus can be frustrating at times. There are so many different things you can do with them. But oftentimes, WordPress locks you in when it comes to structure and conditional logic. That is, unless you know code or implement a plugin.
If you want to add conditional logic to WordPress menus, there are a couple different ways you can do it.
Using conditional logic in WordPress will allow to create more dynamic WordPress menus. Creating a dynamic WordPress menu with conditional logic is useful for things like:
- Hiding Menus on Certain Pages
- Showing Different Menus for Logged-In Users
- Custom Styling on Certain Menus
Let’s take a look at what conditional logic is and how we can easily add it to WordPress menus.
What is Conditional Logic?
If you take conditional logic to its root, it is basically an “if-then statement” in which p is a hypothesis and q is a conclusion. In other words, if xxxx happens in a certain way, then xxxx should be the conclusion.
In WordPress, conditional logic is used on things like WordPress forms. This can help you display certain functionality on a form that you otherwise could not.
A good example of this is a hidden payment field based on an answer or perhaps a drop down box of answers based on a question in the from. Forms will dynamically changed from user to user based on the answers given and the selections made.
The same concept applies when you add conditional logic to WordPress menus. You create a dynamic WordPress menu based on conditional logic. These menus will appear and act how you tell them based on certain actions that users perform.
Let’s take a look at a couple of ways you can easily add conditional logic to WordPress menus.
The If Menu Plugin
The easiest way to create dynamic WordPress menus with conditional logic is via a WordPress plugin. I found a great one that is easy to setup and use. The plugin we will use today to add conditional logic to a WordPress menu is called If Menu.
If Menu allows you to control what menu items your site visitors see based on certain visibility rules. Some of the main functions of this plugin include:
- The ability for an admin to display a menu item only if current site user is logged in.
- Hide different menu items based on mobile device usage.
- Display certain menu items for admin and editors.
- Hide login and registration links when a user is already logged in.
- Show menu items based on the location of a user.
- Display hidden menu items for users with memberships.
- Show different language menu items based on English or Spanish.
Add Conditional Logic to WordPress Menus Using a Plugin
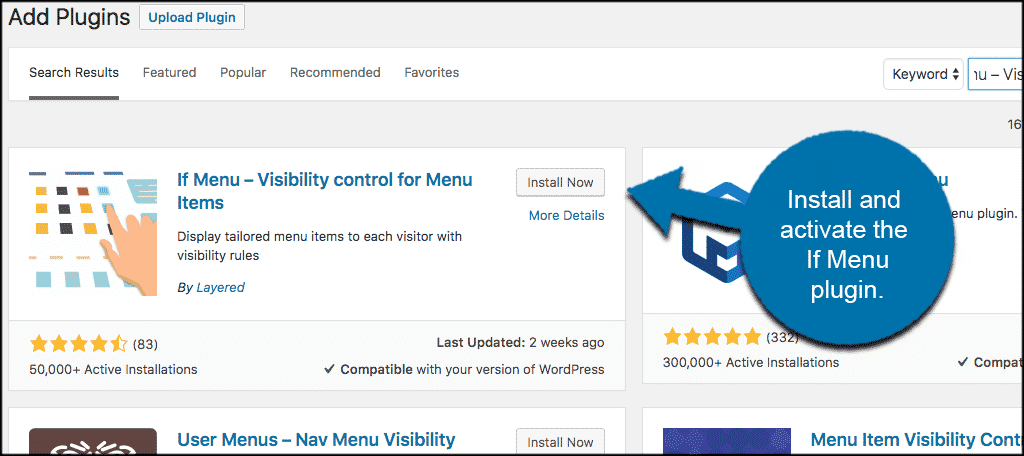
To add conditional logic to a WordPress menus using this plugin, the first thing you want to do is install and activate the If Menu plugin.
Once the plugin has been installed and activated, click on Appearance > Menus, and you can immediately start make your adjustments.

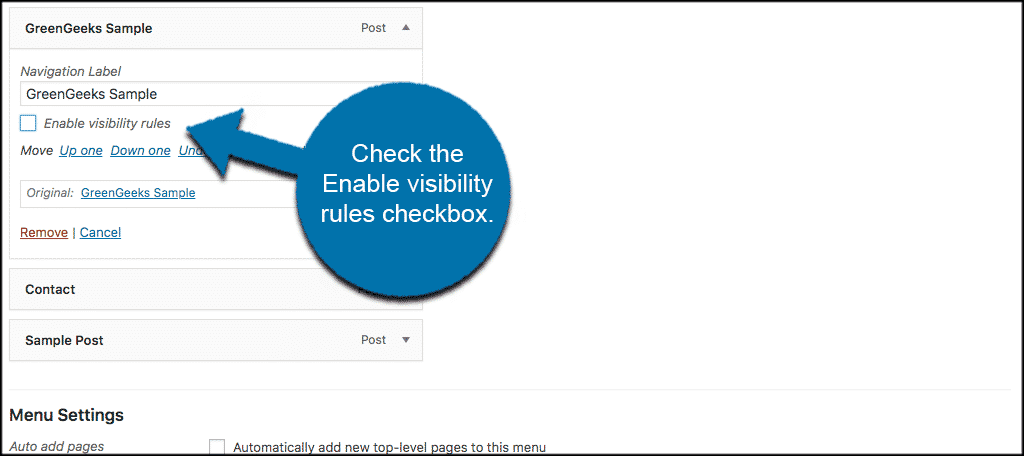
To do this, simply select any menu you want to work on. Within that menu, select a menu item and click to open a drop down area.
Inside the menu item drop down, you will see a checkbox called “Enable visibility rules.” Check this box now.
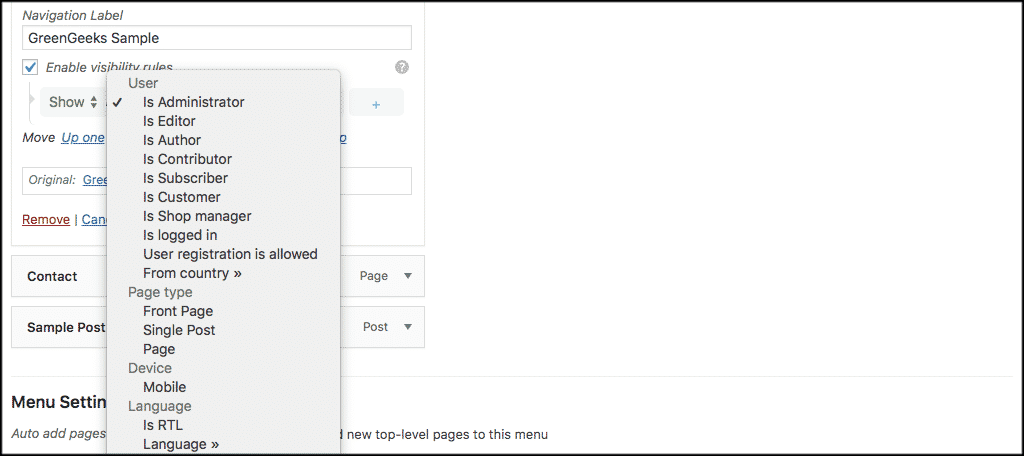
When you check that box, you will see all the options for the conditional logic items pop up in two drop down menus. You simply create the conditional logic you want for each menu item.
Visibility rules can be handled however you wish with a few clicks.
First, select “Show” or “Hide” in the drop down menu.

Now move to the next drop down area and make your selection for the “If Is” section.
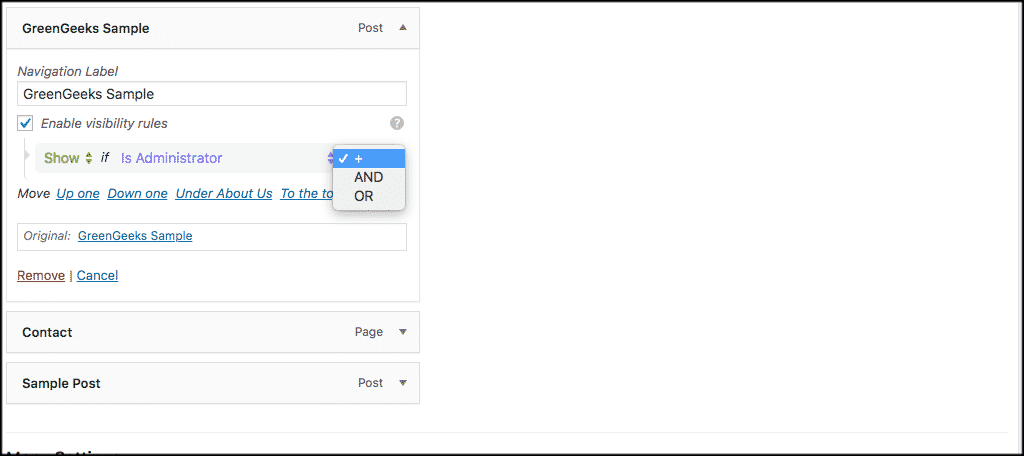
When you have made those two selections that particular menu item will now display based on the conditional logic you have applied to it.
In this example, I have the menu item set to “Show” if the user “Is Administrator.”
You can also add more than one type of conditional logic to a menu item. Simply click on the “+” symbol on the right and another drop down menu will appear. This will enable you to apply another type of conditional logic to the menu item and make it even more dynamic.
Once you have made all your choices for the items in the WordPress menu you are working on, click on the “Save Menu” button to apply all changes.
Add Your Own Conditions to If Menu Using Code
There are a couple of extra steps you can take here to add more conditions to your menu items. WordPress actually has a complete list of conditional tags that you can use across all of your projects.
If you would like to view their detailed list you can find it in the WordPress codex for conditional tags.
All of the conditional tags you find on that page can be used with the If Menu plugin. To do that, you need to combine the condition tag you want to use with the code below.
In this example, say you want to show or hide a menu item on custom post type pages.
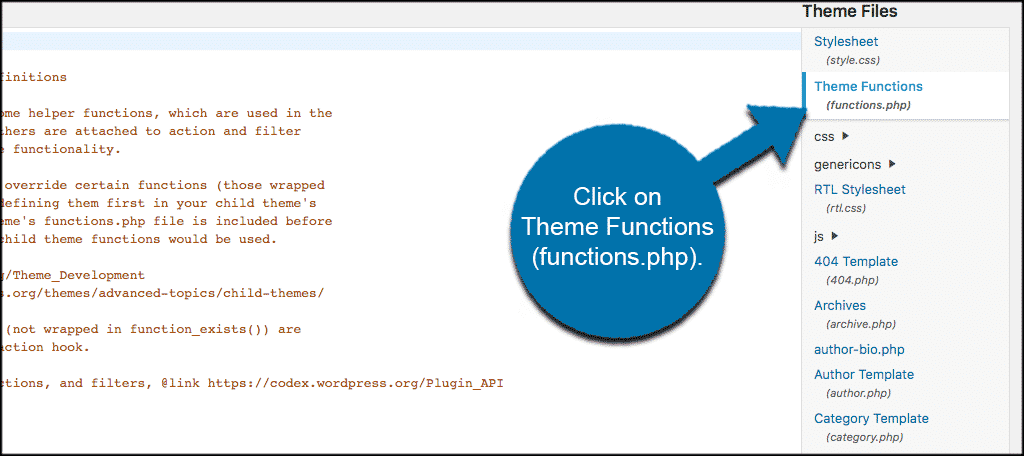
So, you can accomplish this by adding the following code to the theme’s functions.php file. You can access the file by clicking on Appearance > Theme Editor. On the edit themes page, click on the Theme Functions (functions.php) file.
Add the code below to the file:
add_filter( 'if_menu_conditions', 'greengeeks_new_menu_conditions' ); function greengeeks_new_menu_conditions( $conditions ) { $conditions[] = array('name' => 'If it is Custom Post Type archive', // name of the condition 'condition' => function($item) { // callback - must return TRUE or FALSE return is_post_type_archive(); } ); return $conditions; }There you have it. You can use the code above to add other conditions to your WordPress menus as well. I hope this article has shown you how to easily add conditional logic to WordPress menus.
Have you used conditional logic for other parts of your WordPress website? Have you found that using conditional logic in WordPress menus allows you to create and deploy more dynamic layouts for your site users to enjoy?