If you have ever wanted to reorganize the WordPress admin menu, I have some very good news for you. You can, with the Admin Menu Editor plugin. It allows you to move any item on the menu into any position,
This will let you fully customize your WordPress experience and it takes less than five minutes to accomplish. The plugin also lets you decide which user roles can see which items on the menu, so it’s great for teams.
Today, I’ll show you how to customize the admin menu in WordPress.
Is There An Advantage to Edit the Admin Menu?
Yes and no.
In truth, there are no performance enhancements associated with editing the admin menu’s appearance. It will simply change the appearance for you and your staff. However, to say that this won’t improve your work efficiency, well that’s subjective.
Everyone is different, and in some cases, an appearance change can help improve work efficiency. This can save you time getting too specific sections of your website and it can help remove distractions from the menu.
Therefore, how effective editing WordPress admin menus is entirely up to the individual.
How to Customize the WordPress Admin Menu
Step 1: Install Admin Menu Editor
The Admin Menu Editor plugin allows you to alter the order and appearance of admin menu items in WordPress. With it, you cannot only reorganize the items but completely hide them from yourself or other users. And this is done with a drag and drop interface, so it’s easy to do.
One of the coolest features is being able to make your own custom menus. For instance, you could build a menu for a staff member that only includes the links they need to work. This can streamline the process and help new staff.
Let’s start by clicking on Plugins and selecting the Add New option on the left-hand admin panel.

Search for Admin Menu Editor in the available search box. This will pull up additional plugins that you may find helpful.
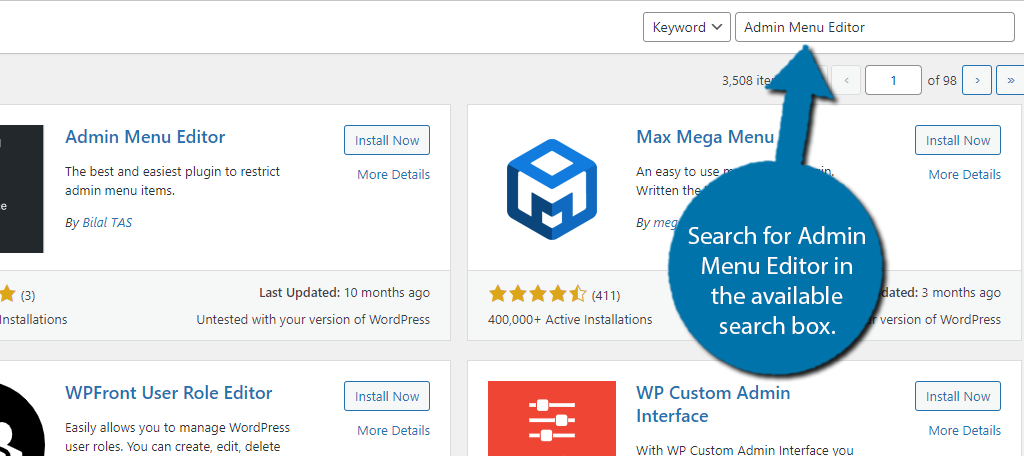
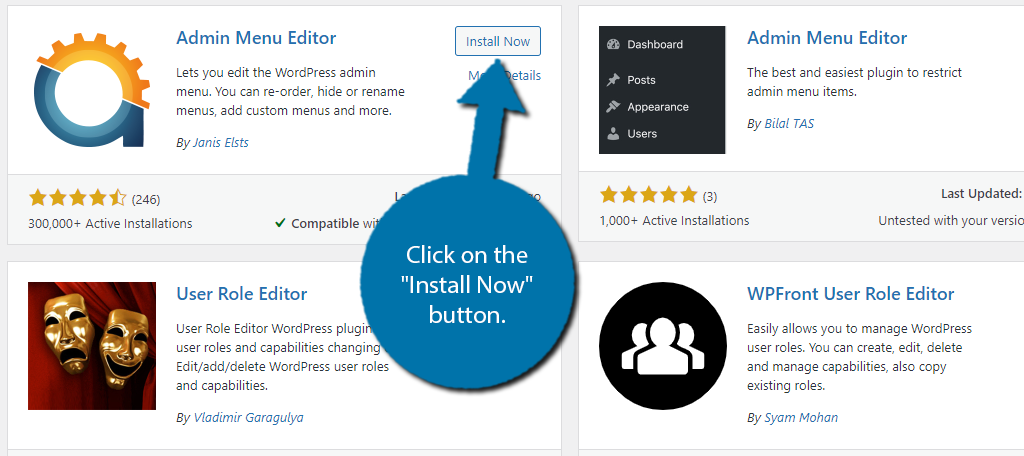
Scroll down until you find the Admin Menu Editor plugin and click on the “Install Now” button and activate the plugin for use.
Note: There are actually two plugins that have this name, make sure the plugin is by Janis Elsts.
Step 2: Reorganize the Menu
While there is a settings tab we could configure first, I will cover this at the end. Mostly because the settings will influence global settings and other things that will not impact the actual menu editing. Instead, the first thing we will look at is how to reorganize the menu.
On the left-hand admin panel click on Settings and select the Menu Editor option.
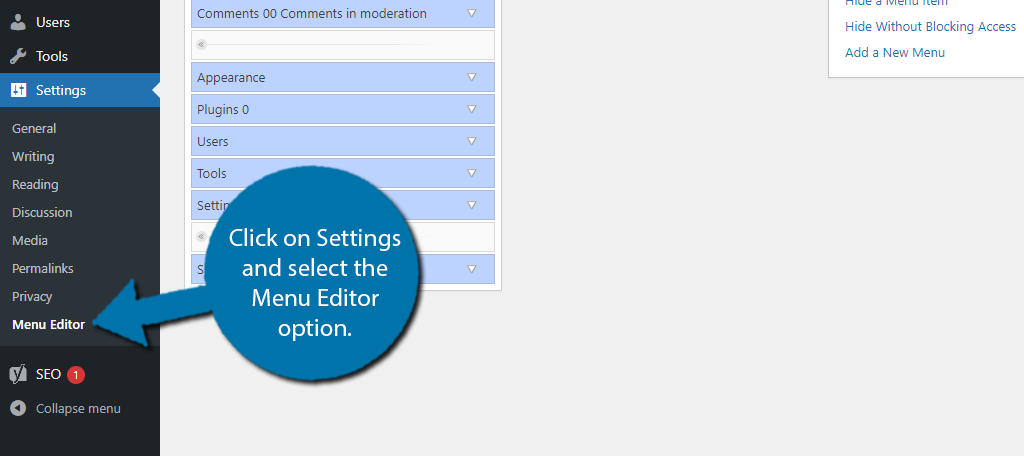
On the left side of the screen, you should see a replica of your admin menu. You can expand each item by clicking the small arrow.
![]()
Here, you can change the name of the menu title, where it links to, and choose which user roles have access to it.
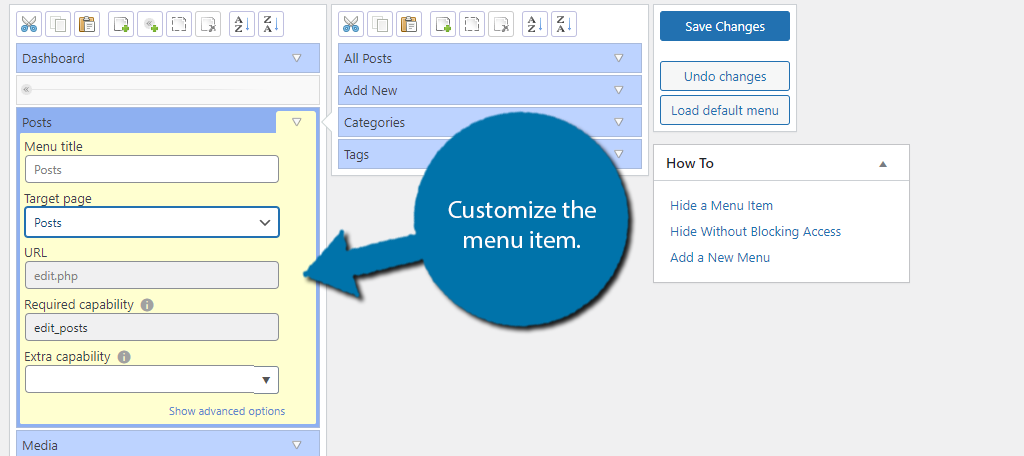
The menu to the right of this represents the submenu items you would find by clicking on it. In the case of Posts, you would find All Posts, Add New, Categories, and Tags. You can use the small arrow to customize them the same way.
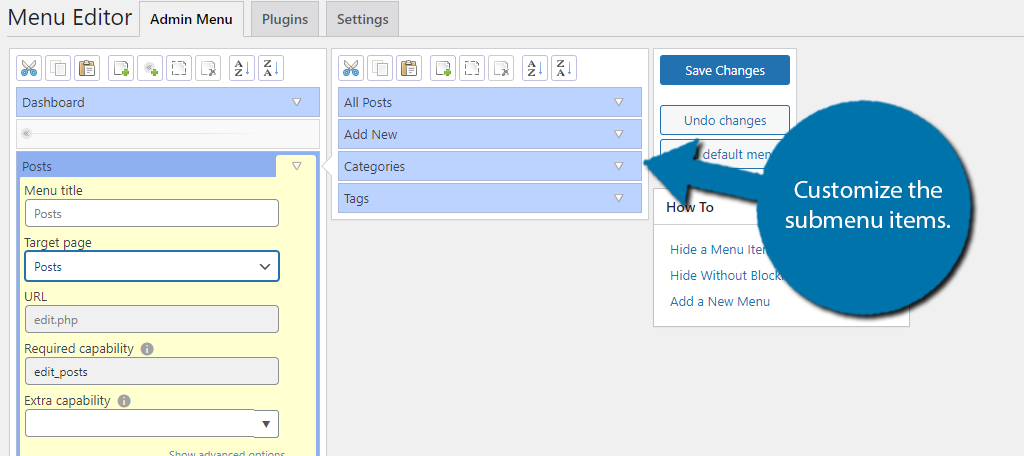
And for both menu and submenu items, you can click and drag the item to any location. This will allow you to reorganize your menus as you see fit.
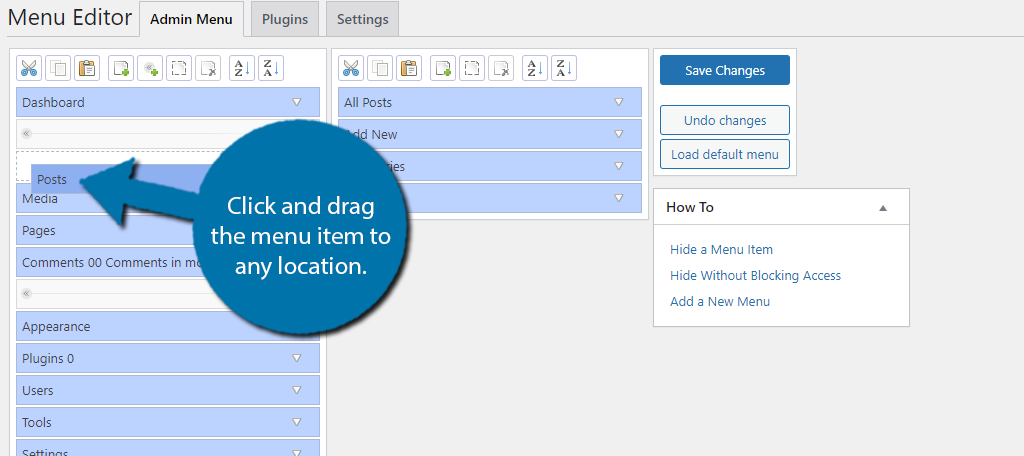
Click on the “Save Changes” button to save the work.
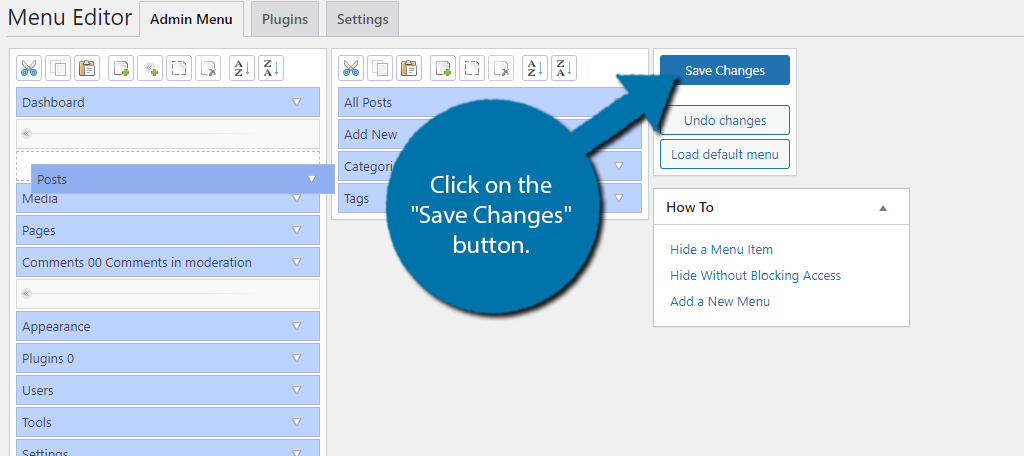
Note: You will also find the “Undo Changes” and “Load default menu” buttons here. These can help you revert the menu to the original state.
Step 3: Create A New Menu Item
One of the bigger benefits of this plugin is the ability to create your own menu items. With it, you can create menus for specific employees, positions, just about anything else you may need.
To do so, click on the New menu icon.
![]()
This will add a custom menu item to the existing menu. Similar to the other items, you can change the name, the target page, and add extra capabilities (decide user roles). You can also drag it into any location. This also applies to submenu items.
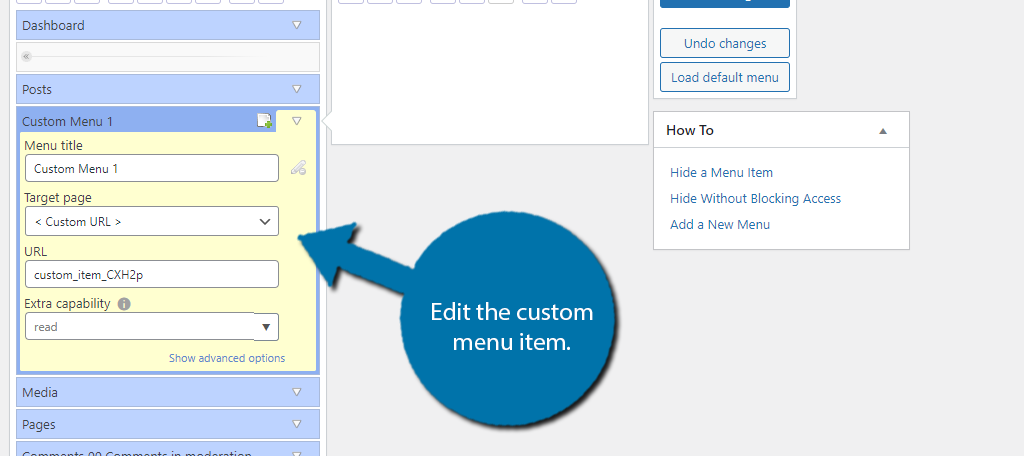
You can repeat these steps to add multiple custom menu items. Don’t forget to save your work.
Step 4: Delete or Hide Menu Items
There may come a day when you want to delete existing menu items or the new ones you just made. In either case, it is easy to do so.
The plugin actually provides two ways to do this. The first is to actually delete the menu item and the second is to hide the menu item from view, although it is still accessible.
To fully delete the menu item, click on the menu item you wish to delete and click on the Delete menu icon.
![]()
A small popup will appear asking if you are sure. Confirm the deletion and the menu item is gone.
Note: You can restore any default menu item by using the “Load default menu” button. However custom menu items are permanently deleted. You would have to make them again.
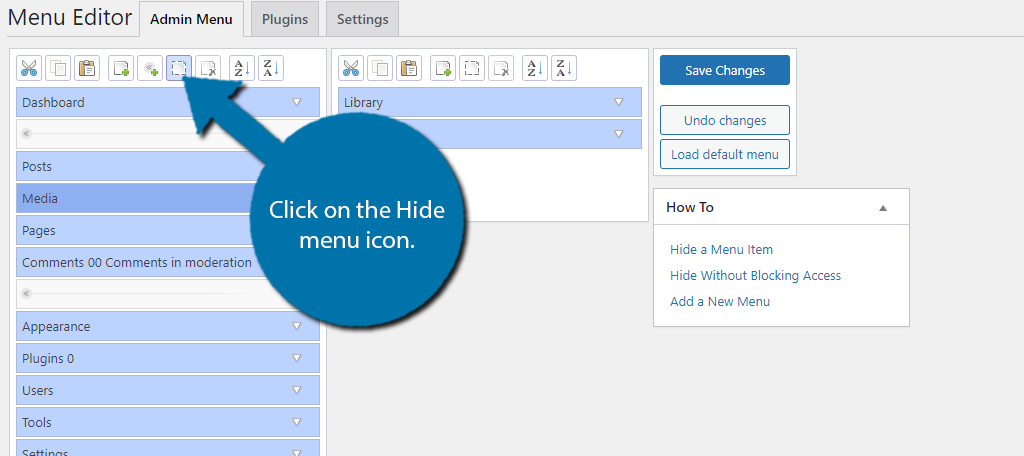
To hide it, select the menu item and click on the hide menu icon.
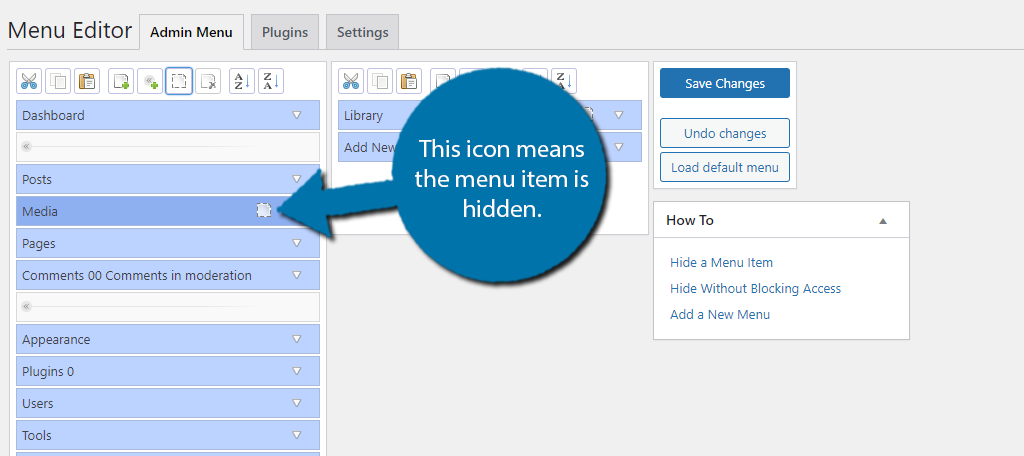
Hidden menu items will have the hidden symbol next to their name. You can restore the item by click on the hide icon again.
Remember to save your work after making changes.
Step 5: Plugins and Settings
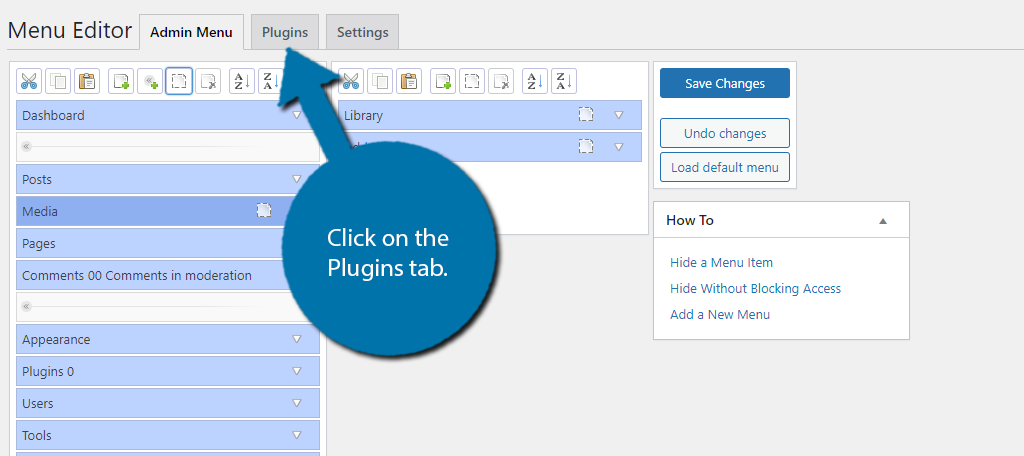
The Admin Menu Editor also allows you to hide specific plugins and settings. At the top, you may have noticed two additional tabs for Plugins and Settings respectively.
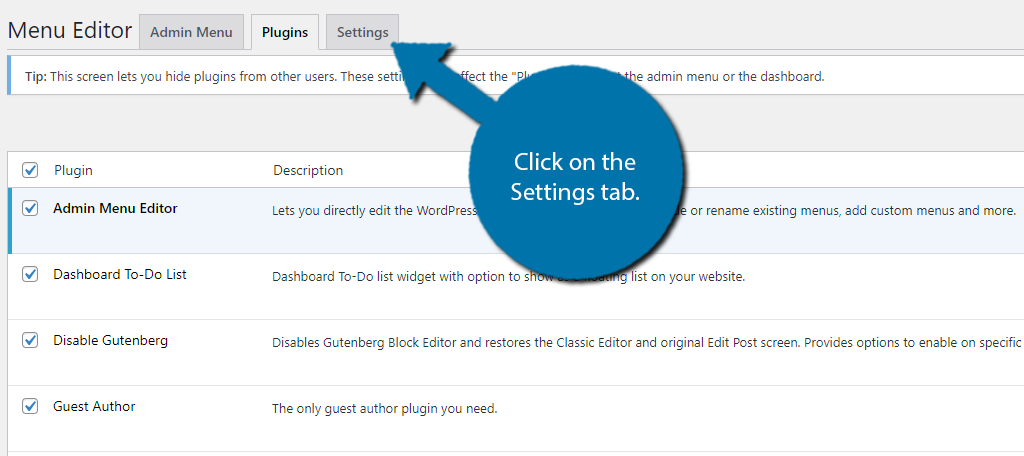
Click on the Plugins tab.
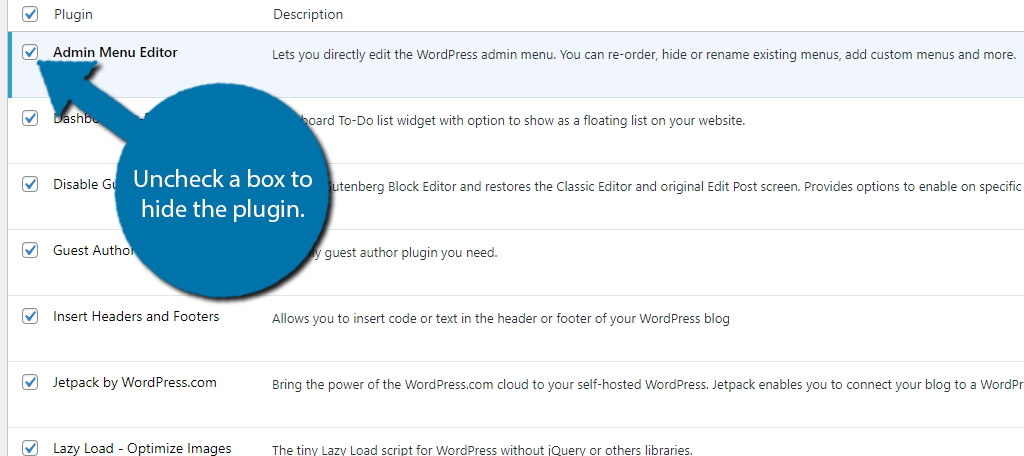
Here, you will see a full list of currently installed plugins (they do not have to be active). By default, they are visible to everyone. To change this, simply uncheck the box.
Note: The final option on this list is for new plugins. This means you can make all new plugins automatically hidden. This ensures that you won’t have to come to this page every time you add a new plugin.
Save any changes you made and click on the Settings tab.
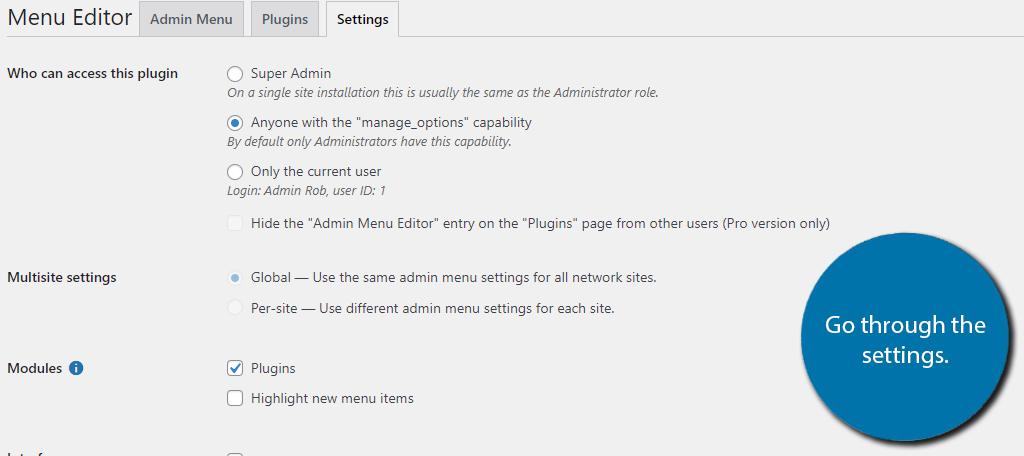
The Settings tab contains a series of radio buttons and checkboxes. For most websites, the default options will be sufficient. Simply go through the settings to determine the best options for your website.
Congratulations on learning how to use the Admin Menu Editor to easily edit a menu in WordPress.
If you delete the plugin, the menus will be restored to their default positions.
Customize Your Workspace
As developers, it’s our job to manage the website and create content for visitors to enjoy. However, one aspect of the website that is always overlooked is the backend. Making it more efficient for the work you will be carrying out is essential, and this is only one option.
Another consideration should be editing the WordPress dashboard. You can create a variety of shortcuts and at a glance charts to appear in this space. This is great for things like Google Analytics. You can even add to-do lists to help you remember deadlines and content ideas.
How easy did you find the WordPress Admin Menu Editor plugin to use? Do you think WordPress should have admin menu editing by default?
Now this was an easy to understand and well presented tutorial, thanks
You’re very welcome.