Do you have a website that is geared toward video posts? Are you a content creator who works mostly with video? If so, then you need to have a good way to post a well-thought-out video gallery on your WordPress website.
There are several ways you can create and display a WordPress video gallery. You can write your own code, or use any number of related plugins that can help you get the job done.
Today, I am going to show you how to use a smooth video gallery WordPress plugin that will not only help you display your videos in different gallery settings, but will also give you several different tools and options.
Let’s take a look at the gallery plugin we are going to use today and see all that it has to offer.
Video Gallery – Vimeo and YouTube Gallery
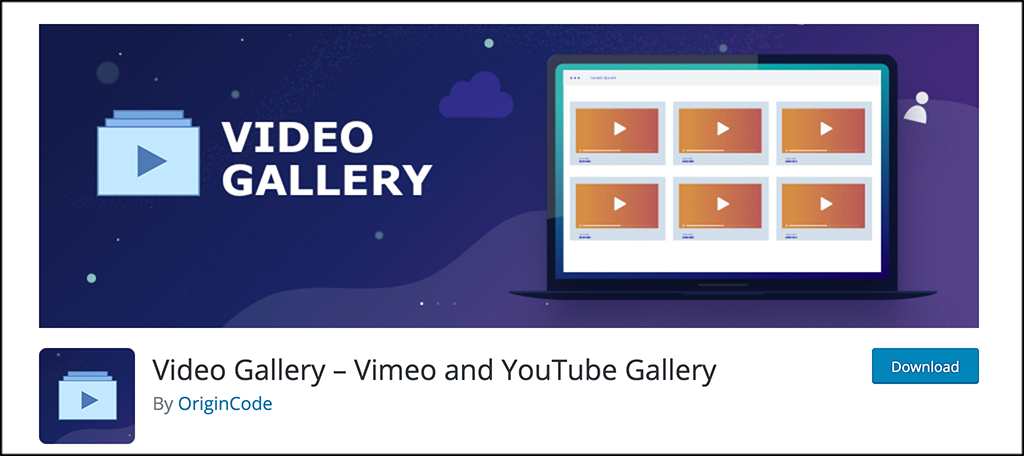
Video Gallery – Vimeo and YouTube Gallery is the perfect plugin to have if you have a gallery website. Created by OriginCode, this video gallery plugin for WordPress is a responsive multifunctional tool that provides multiple ways and designs for uploading and displaying a video.
The plugin works whether you are trying to create a Vimeo or YouTube gallery, as it is fully compatible with both. You can also create a gallery that mixes both types of videos without any issues.
Video gallery creation is simple, fun, and clean. Once the plugin is activated, you will have several really great options for displaying your galleries. Even the free version of the plugin gives you plenty to create amazing layouts and fill them with descriptions, content, and other options.
The plugin is very lightweight and won’t slow your website down at all. Once activated, you will be able to build as many galleries as you want. You will have the ability to upload videos from YouTube and Vimeo, add titles, add descriptions, and display links.
You also get to choose from one of seven ways to display your gallery. These include:
- Video/Content Popup
- Content Slider
- Lightbox Video Gallery
- Video Slider
- Thumbnails Gallery View
- Justified Gallery View
- Blog Style View
The plugin is simple and straightforward. It makes it very easy to build and display video galleries all over your WordPress website.
Let’s get the plugin going and add a video gallery together.
Note: This WordPress gallery plugin does have a pro version that gives you a ton of other options. We will touch on it below a little. If you think you need or want the pro version, then feel free to go check it out. However, the tutorial below is based on the free version of the plugin.
Add a Video Gallery to WordPress Website
There are a few things you need to do before you can add a WordPress video gallery. Let’s go over the steps together and also take a look around the plugin real quick.
After that, we will add a gallery together and you will be off and running.
Step 1: Install and Activate the Plugin
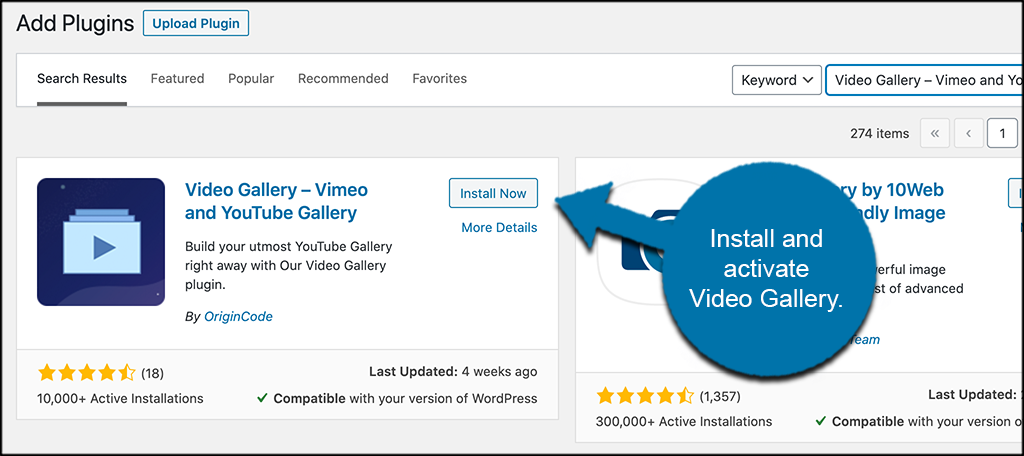
In order to start creating video galleries, you first need to install and activate the plugin. You can do this by heading over to the Plugins page in the WordPress admin dashboard.
Once there, simply use the search field to search the plugin by name. When it pops up, install and activate it from there.
Step 2: View Video Gallery Options
As noted above, this plugin is pretty straightforward. However, there are a couple of things we can explore, even though you can only access the content if you have the pro version of the plugin.
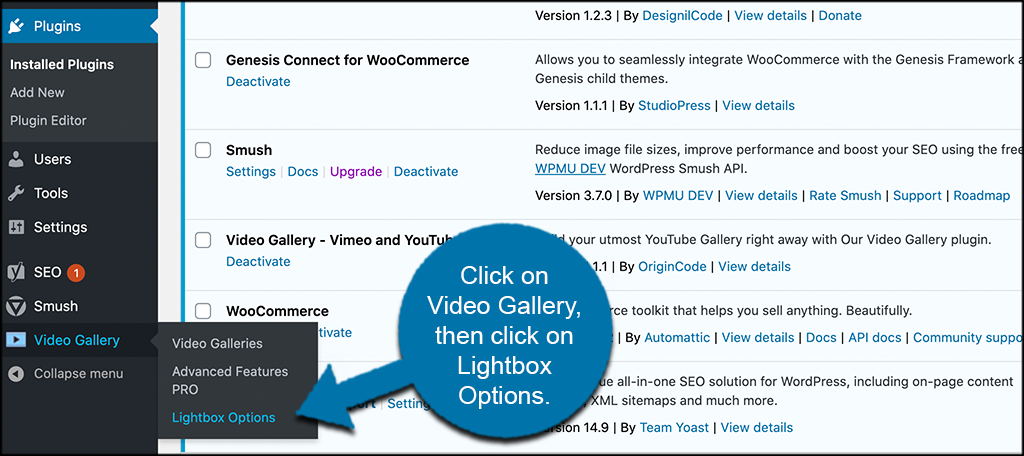
First, click on Video Gallery > Lightbox Options located in the left side menu area of the dashboard. This appears after you have activated the plugin.
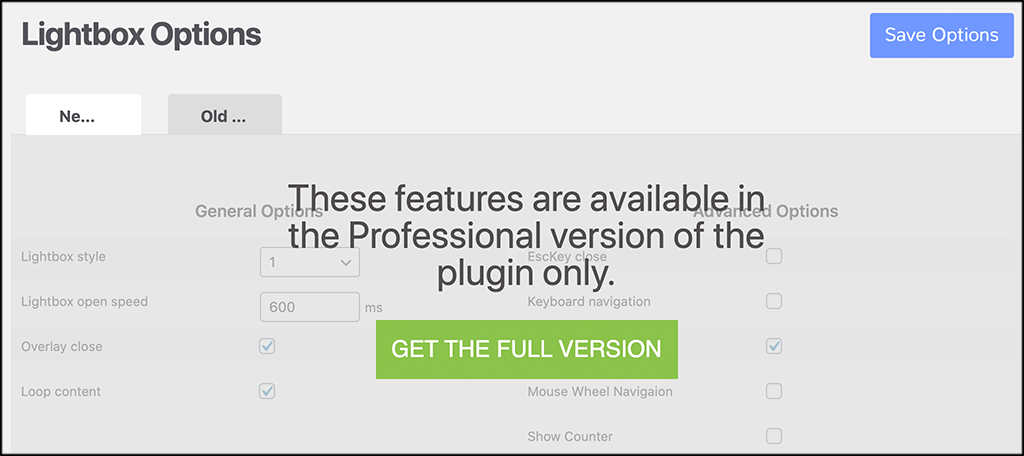
This will take you to the lightbox options page. You can see you will need to get the full version of the plugin to access any of this.
Now, once you have viewed that, click on the Advanced Pro Features link and bounce over there real quick.
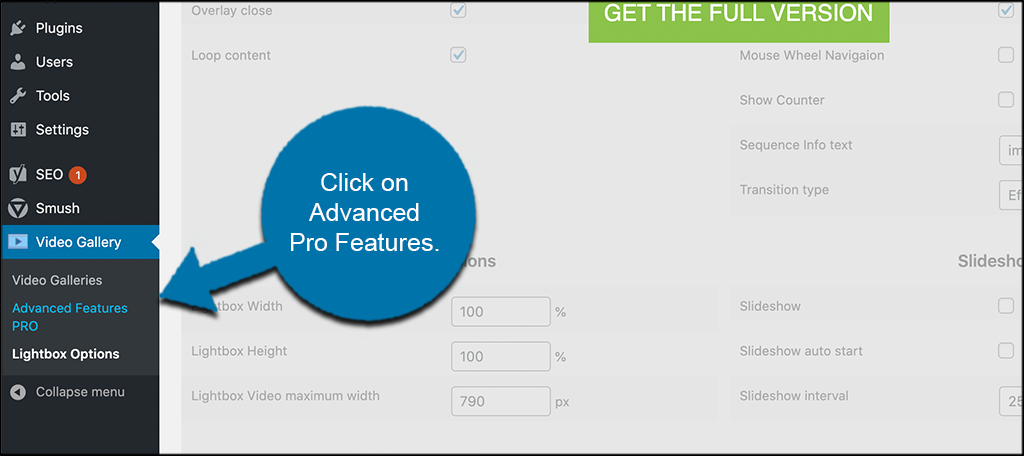
Again, you can see all the extra options that are available if you go get the full version of the plugin. There is a button right there that will lead you to the pro version. Feel free to grab it if you need it.
Note: OriginCode charges by site license. So the purchase price will vary based on how many licenses you want.
Step 3: Add a Video Gallery
At this point, you have seen all the available options the plugin has. Now it is time to add your first video gallery. Click on the Video Galleries link in the left menu area.
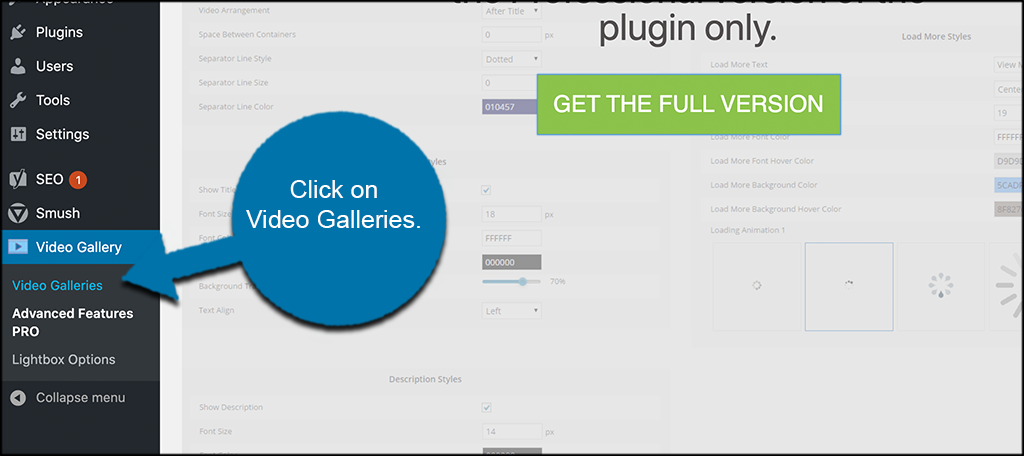
This will take you to the page that houses all the galleries you have or that you will create. Go ahead and click on the “Add New Video Gallery” button.
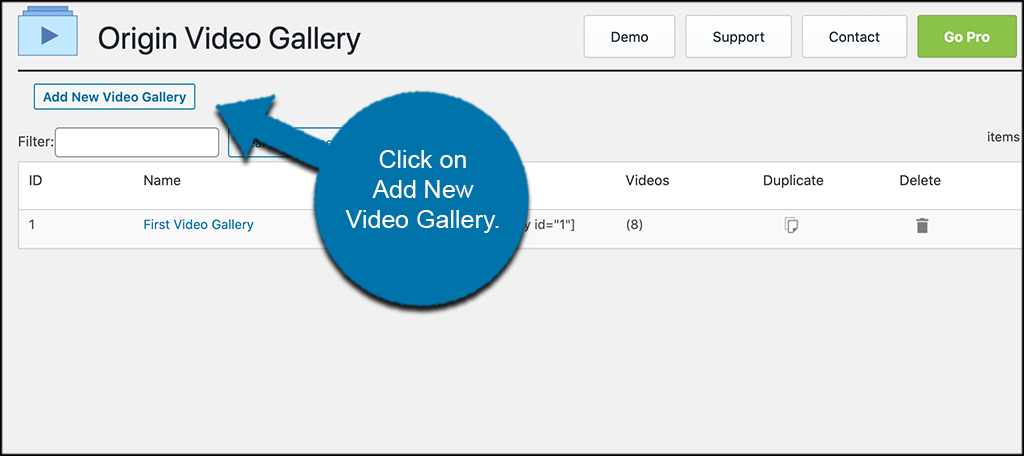
This will open up a video gallery editor where you will add and create a gallery. It is pretty simple and straightforward.
Let’s add a video. Click on the “Add New Video” button on the top right.
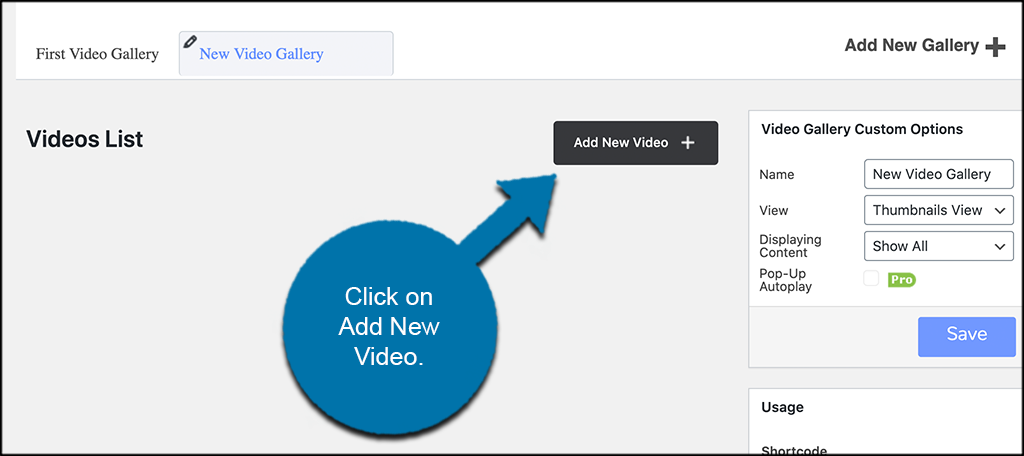
This brings up a popup box where you need to add all the relevant options from YouTube or Vimeo that you want to be displayed. You need to add the URL of the video you want to show, a title, a description, and any links you may want.
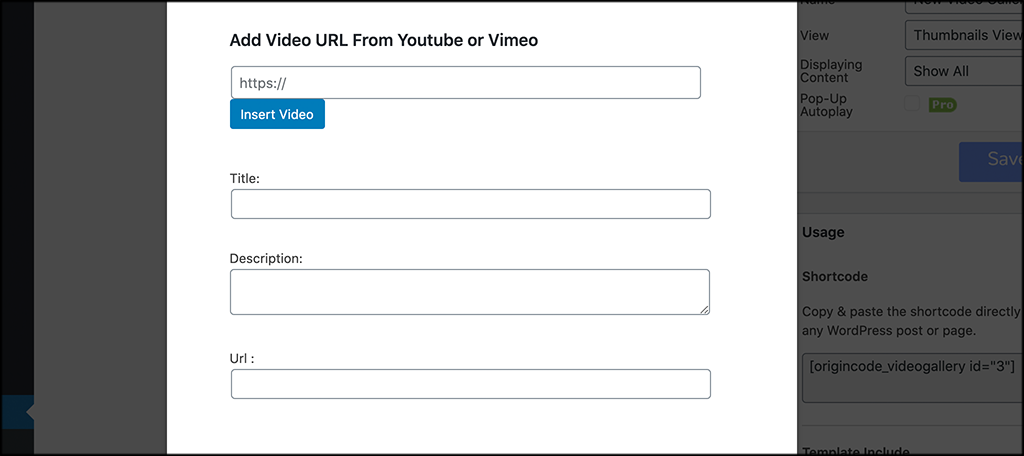
Note: All of the options are optional except the actual link to the video.
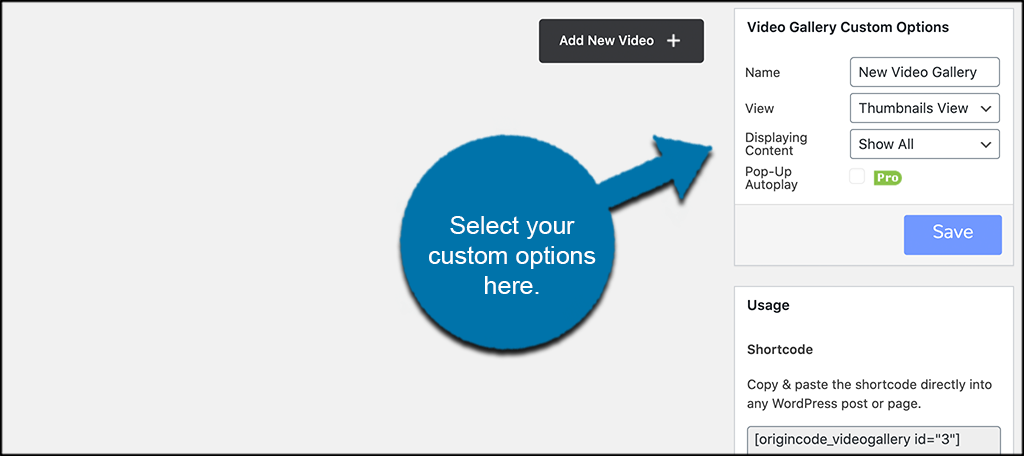
Once you are done, go ahead and add more videos using the same button and the same process. Add as many as you want to this gallery.
Once you are done adding videos, take a quick look to the right. There, you see a few custom options for your video gallery. You can name your gallery, choose a layout view, and choose how content will display.
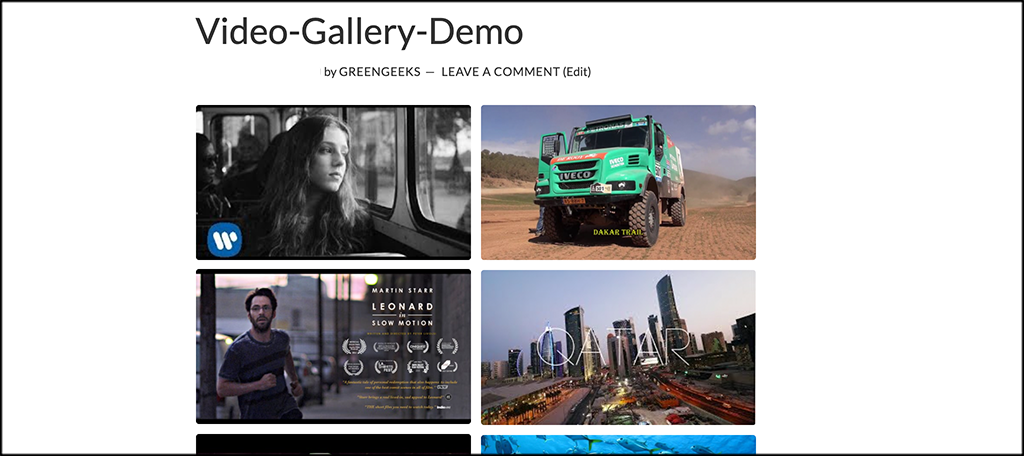
Your gallery will look a little like the demo below once you have added all your videos and decided on the options.

When you are done, click on the “Save” button. That’s it. You have created your first video gallery. You can repeat this as many times as you want to create more galleries.
Step 4: Add Video Gallery to Post or Page
Now that you have a video gallery built, you can add it to a post or page. The steps are the same for both. Head over to the post or page section of your WordPress website and open up a new or saved document.
Now, take the shortcode that was provided once you saved the gallery and paste that into the post or page.
Click Publish or preview and check it out.
If you like it, great! If you want to make some adjustments, then simply go back to the video gallery editor and change what you need.
That’s it! You are all done.
Final Thoughts
A video gallery website can get a lot of attention and traffic if it is handled correctly. One of the best ways to create amazing video galleries is to use a plugin like Video Gallery.
This WordPress plugin will give you enough options to create and display amazing video layouts while at the same time keeping it smooth and simple.
I hope this article showed you how easy it is to add a video gallery to WordPress. Now you can create as many as you want and display them all over your website.
Have you ever tried to build a gallery without a plugin? What are some other options you have tried to display them properly?