Facebook is by far the most popular social media website in the world and integrating it with your WordPress website is imperative for success. In many cases, this could be as simple as adding a Facebook Like button to your blog, auto-posting from WordPress to Facebook, and more.
Instead, we will be adding a social feature from Facebook directly to your website. And of course, I am talking about the Facebook messenger. This is the most fastest-growing messenger in the world, which already has access to almost 2 billion users. This means your visitors will know how to use it and be familiar with the entire system.
Today, I will demonstrate how to use the WP-Chatbot for Facebook Messenger plugin to add a Facebook messenger bot in WordPress.
Why Add A Facebook Messenger Bot In WordPress?
As I said, Facebook messenger has nearly 2 billion users and is expected to reach 3 billion by 2022. Thus, it should be a no brainer to adopt one of the most popular messenger apps on your website today.
You may be wondering what exactly a messenger bot is, but I am sure you have seen one before. For example, have you ever visited a website and see a messenger window popup that is asking if you need help today?
While you may have been impressed at the fast response time, those initial messages are handled through bots. These are a great way to get customers in contact with real agents and boost sales.
Thus, adding any type of messenger bot in WordPress should be a priority for any website.
You can also spend some time adding other Facebook integrationtion into WordPress like a login option or a like button. These can really benefit users and help drive up Facebook engagment.
Installing WP-Chatbot for Facebook Messenger
The WP-Chatbot for Facebook Messenger is one of the best ways to add a Facebook messenger bot in WordPress. It has a host of features that include adding live chat support to any website, continuing chat even when visitors leave your website, access to analytics through the Facebook Developer account, and much more.
Note: Before you start, make sure to create a Facebook business page, obtain your Facebook Page ID, and add your website into the whitelisted pages section of Facebook. You will need to do this before being able to finish the initial setup.
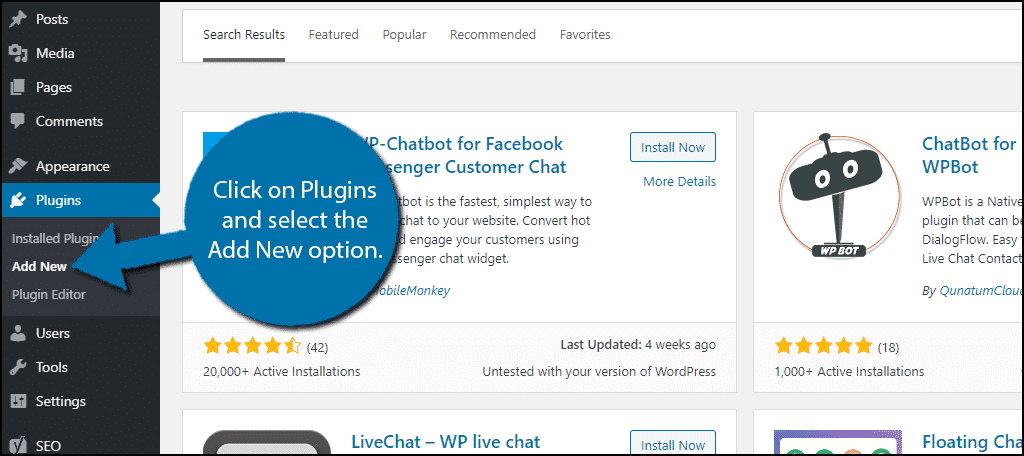
Let’s start by clicking on Plugins and selecting the Add New option on the left-hand admin panel.
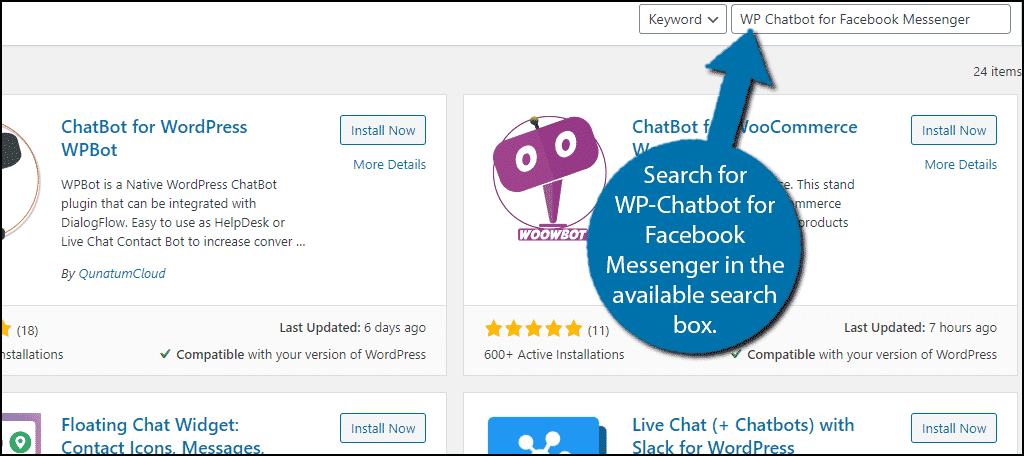
Search for WP-Chatbot for Facebook Messenger in the available search box. This will pull up additional plugins that you may find helpful.
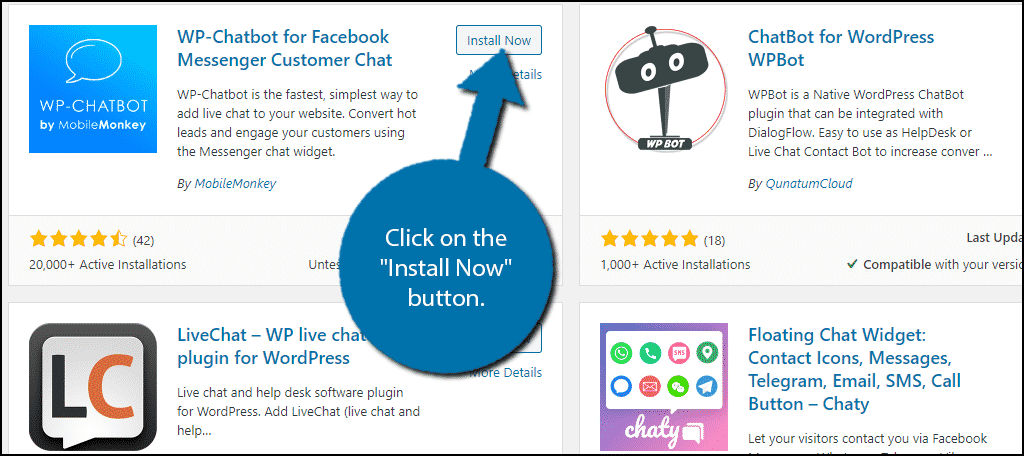
Scroll down until you find the WP-Chatbot for Facebook Messenger plugin. Click on the “Install Now” button and activate the plugin for use.
Upon installation, you should see a message that says” Uh oh. Your WP-Chatbox setup is incomplete!” You will need to complete this setup before you can use the plugin.
Connecting WP-Chatbot with Facebook
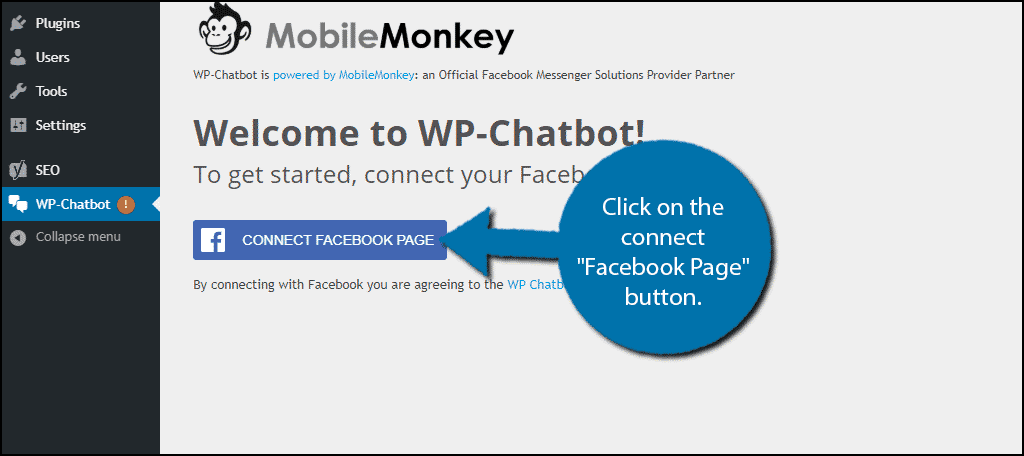
The first step in this setup is to connect with your Facebook page. Click on the connect “Facebook Page” button.
Upon clicking the button, you will be directed to Facebook. The plugin will attempt to connect with the Facebook account you are currently logged into as. Thus, you should make sure you are logged in on your business account.
Click on the “Continue As Your Name” button.
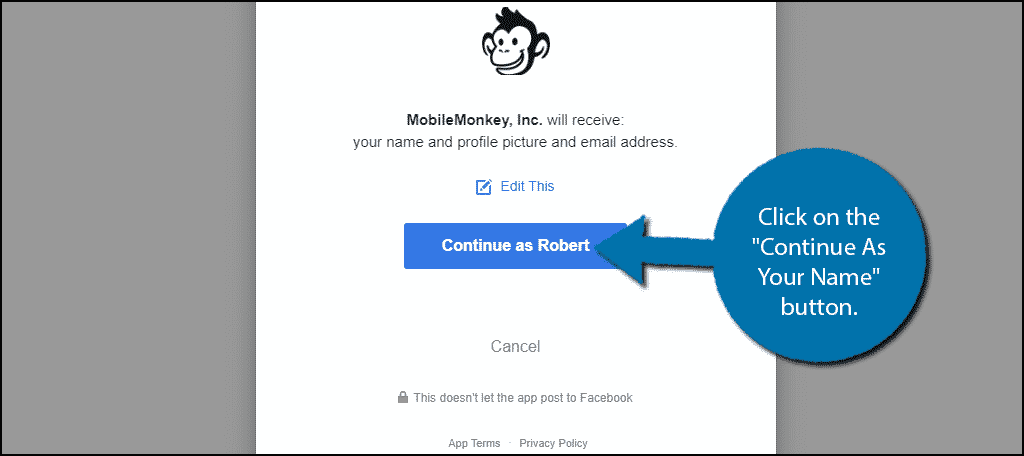
Another window will appear, with permission information. Click on the “OK” button. Once done, you will return to WordPress.
If you have a business page set up, you should now see it. Click on the “Select” button to connect the plugin with that page.
Note: If you do not have a business page set up, you will not be able to continue with the plugin.
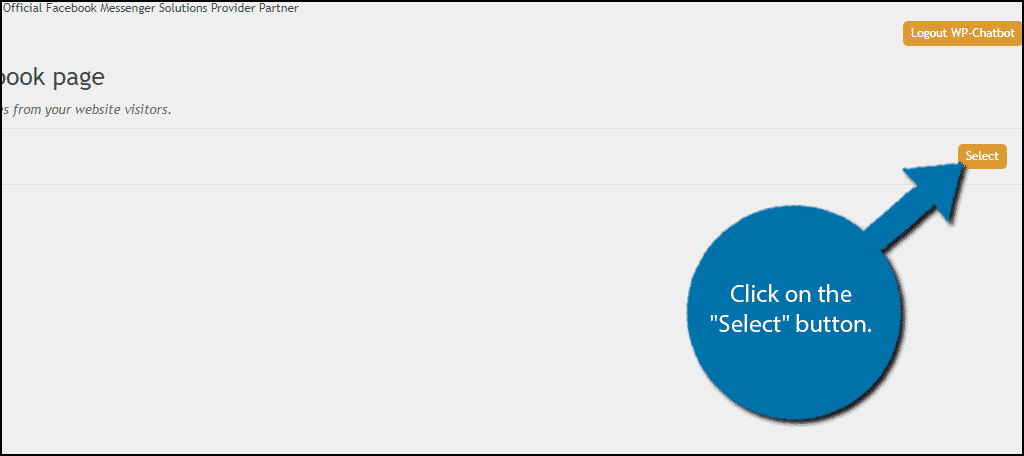
The plugin should now be connected with your Facebook business page.
Setting Up WP-Chatbot
Now that you are connected to Facebook, you can actually begin setting up your messenger bot. It is broken up into 2 parts. The bot’s behavior and customization options.
This tutorial will focus on setting your bot’s behavior and messages.
Initial Message
The first option is the initial message visitors will see in the chat. It is important to keep in mind all of the reasons someone would contact you. For this reason, it needs to be a very broad or generic statement such as “How can we help you today?” or “Would you like to connect with a sales agent?”
Fill out the initial message however you like.

Answering Service
The next section is labeled Answering Service. It will allow the bot to ask some general questions to the visitor. It is off by default and you can choose to leave it like this. However, if you want to turn it on, click on the slider.
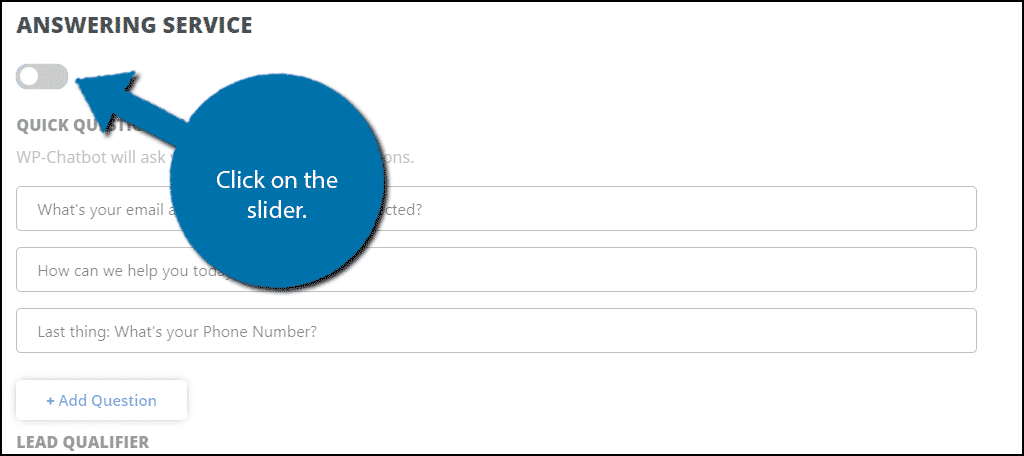
By default, there are 3 generic questions the bot will ask. Feel free to delete these and add your own. If you want more than 3 questions, simply click on the “+ Add Question” button.

This will help you gather a bit of information about what the visitor needs. That way, you can prepare to answer specific needs.
Lead Qualifiers
Next, you will see the Lead Qualifier section. This is another way to have your messenger bot ask questions. The default question is “What is your budget?” and allows you to select multiple options. This can help sales agents get to promote the right packages and products to customers.
However, you can make the question and answer choice whatever you want. Which, makes it useful for any type of website. To do so, simply click on that element of the question and you will be able to change the information. If you want more questions, simply click on the “+ Add Question” button.
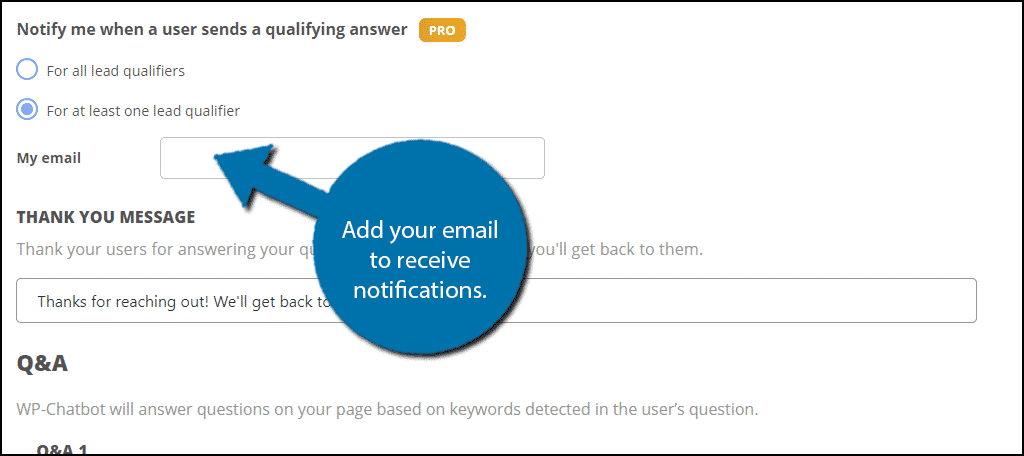
Underneath this, you can add your email address to receive regular notifications when questions are answered.
Note: This is a pro feature.
Thank You Message
Next, you can customize the thank you message. Visitors will see this when they answer your bot’s questions.
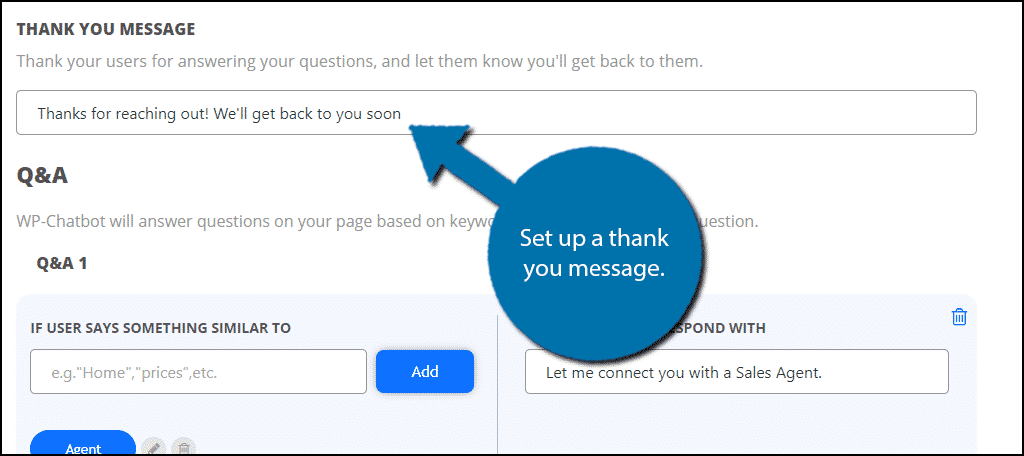
Try to be as courteous as possible!
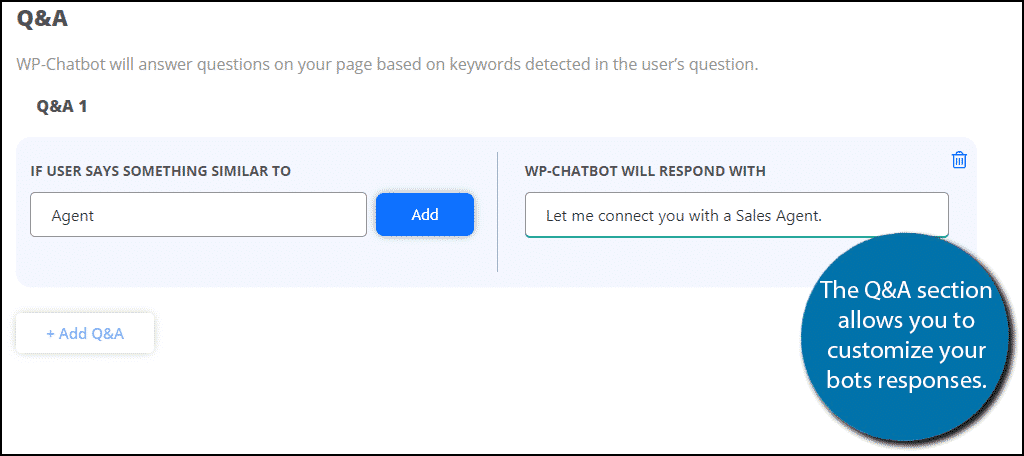
Q&A Section
The last part is the Q&A section. Here you can add keywords that visitors will say to trigger a response. For example, they may say “I would like to speak to a sales agent.” If you use “agent” as the keyword, you can make the bot respond appropriately. It is a very powerful feature.
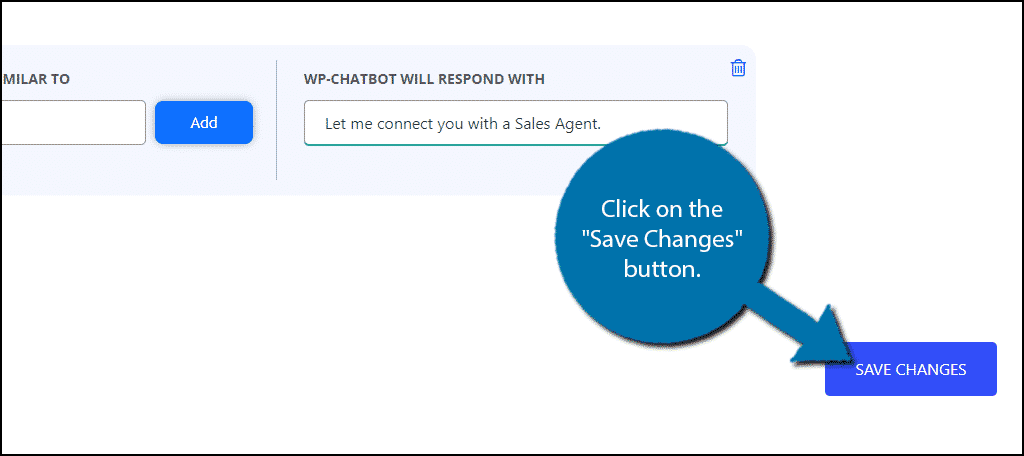
Click on the “Save Changes” button when you are done.
Customize
The second part of the setup process is the customize tab. This will determine how things look, how you bot addresses logged in users versus visitors who are not logged in, languages, and other settings.
The choices you make here are completely dependent on your website. Therefore, I recommend carefully going through each setting and picking the option that is best for your website.
Remember to save the changes you make.
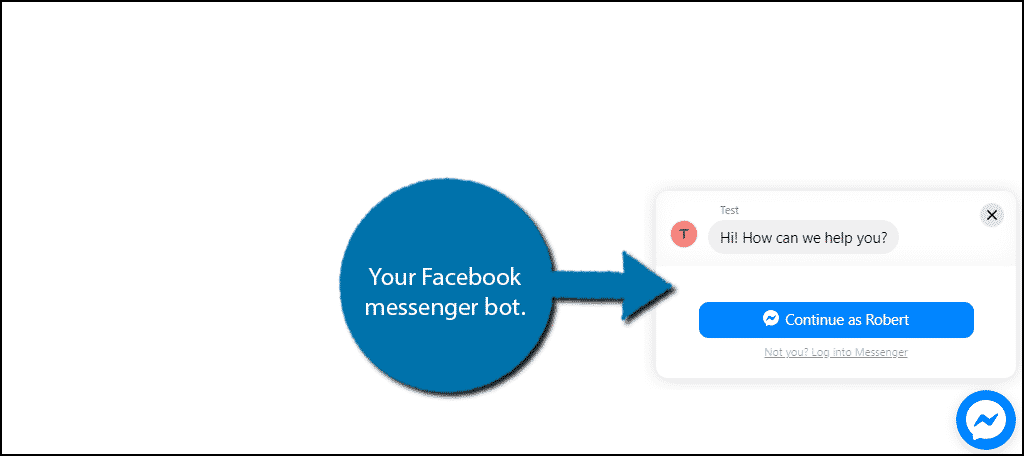
You can now visit your website to see the Facebook messenger bot in action.
Congratulations!
Have Your Team Ready
Let’s be perfectly honest, bots can be extremely frustrating to talk to as a customer. Most customers want to get to a live representative as fast as possible, assuming they are not just playing around.
Thus, you need to make sure you and your team are ready to directly communicate with visitors in a quick manner. The longer a customer interacts with a bot or waits for help is time they are considering going somewhere else. Having lightning-fast communication is vital in keeping customers interested.
Did you run into any problems during the setup process? How many questions did you allow your bot to say?
This article is appealing and very well-written. The first two sentences encouraged me to read more.