Are you a gardener, landscaper, or plant lover in general? Perhaps you have a gardening blog and you are looking for a way to display plant types, plot profiles, and other yearly facts regarding plants. If so, then you need to use the FloraPress WordPress plugin to accomplish this quickly and easily.
Today, I want to show you how you can use a smooth plant and gardening plugin on your website. This will allow you to list all sorts of plant and floral related content on your site.
There are other ways that you can fill out your garden website design, but having FloraPress as part of it will really help set your site apart from others.
Let’s take a look at the plugin and see all that it has to offer.
FloraPress
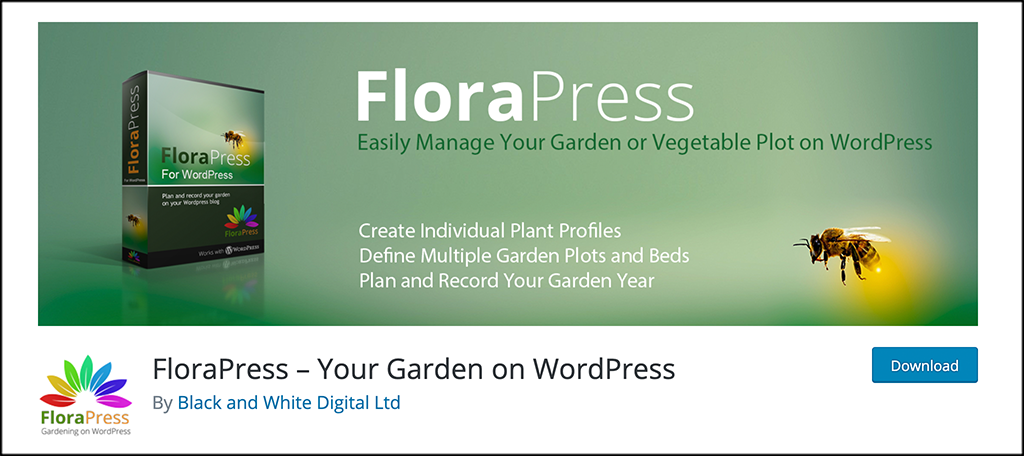
FloraPress is a clean and smooth WordPress plugin that will allow you to easily manage plant and garden information on your website or blog. It is also very lightweight despite all the functionality it brings to the table. Your site will not be slowed down if you use it.
The FloraPress plugin is compatible with just about all gardening themes in WordPress. You won’t have to worry about plugin conflict either, as it runs well and will not provide conflict issues.
This gardening plugin for WordPress comes packed full of features including three core modules; a plant directory, a garden year planner, and a garden year journal. It gives you a ton of options to look through and the ability to add all sorts of profiles and lists.
The plugin will automatically build pages when it is installed and activated. However, you can also use a series of shortcodes to display all the information you want on any post or page.
Having a landscaping blog in WordPress is a great idea! With this plugin, your site will be taken to the next level.
Let’s take a look at how you can get the plugin on your site and start managing your garden.
Managing a Garden in WordPress
There are several things that this plugin allows. I am going to show you how to get it all installed and going on your WordPress site. Before you know it, you will be on the road to building and managing your very own garden in WordPress.
Step 1: Install and Activate the Plugin
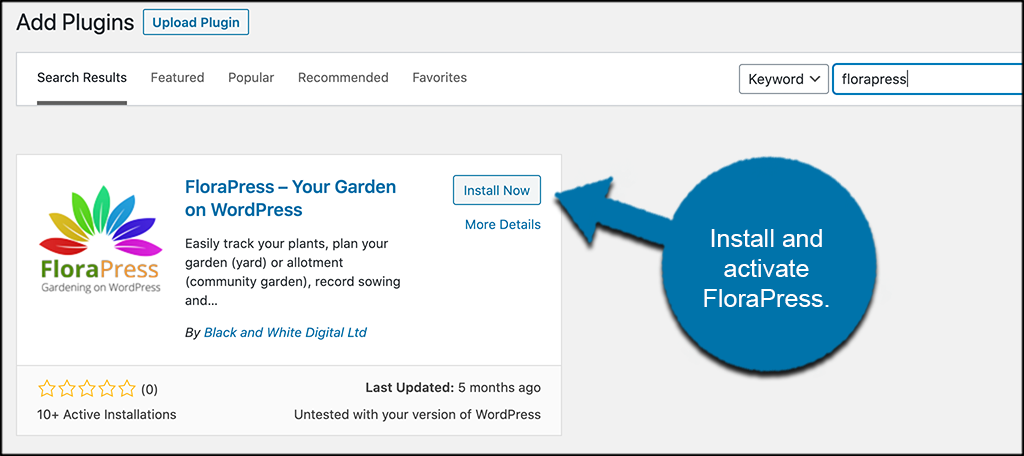
In order to start using FloraPress, you first need to install and activate the plugin. You can do this by heading over to the Plugins page of your WordPress admin dashboard.
Simply use the search field to search the plugin by name. When it pops up, install and activate it directly from there.
Step 2: Go to FloraPress Options
Once the plugin has been installed and activated, there are several things you will see in the left side menu area of your dashboard. FloraPress has a lot of separate places where you can add content based on what you need.
However, before you start adding any content, let’s take a look at the plugin info and options. To do this, click on FloraPress > Options. This will take you to some information and options for the plugin.
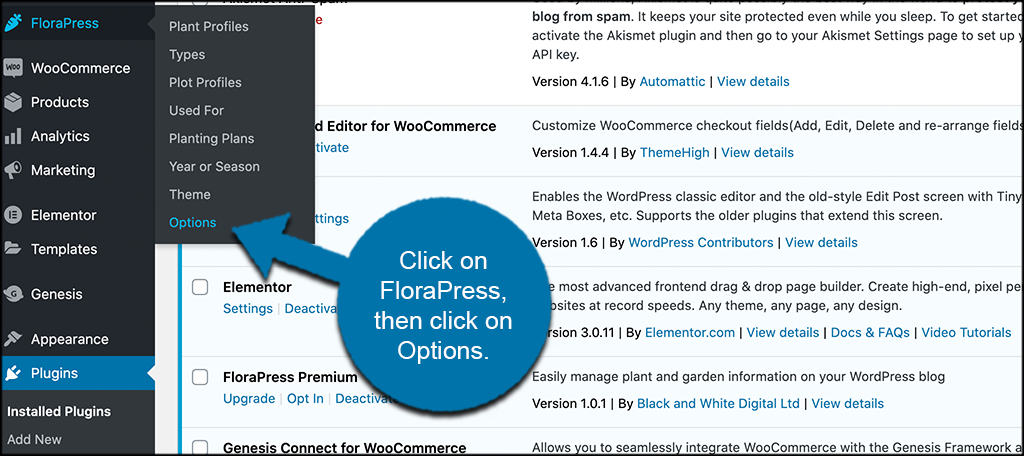
You will notice that this is an available option on the left menu after you have activated the plugin.
There are two tabs that you can see in the options section of the plugin. These tabs include “Display Your Information” and “Options.”
Display Your Information
This tab gives you valuable information as to how and where you can display all of the content you add to the plugin over time. You see that some pages are automatically built to display relevant content. However, you can also use a series of shortcodes to display the content on any post or page you want.

Options
This tab gives you a few options in regard to displaying measurements and other front-end views. Go ahead and select what you want and click the “Save Changes” button.

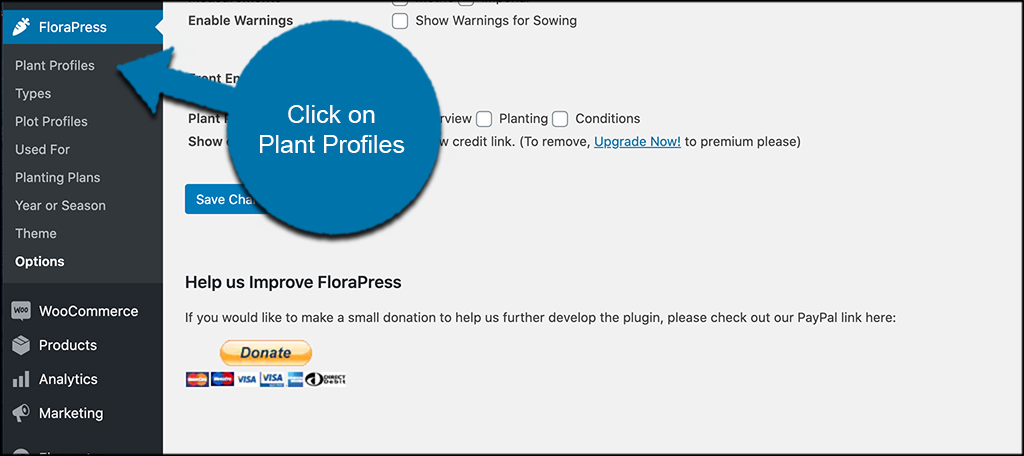
Step 3: Start Plant and Garden Content
At this point, you are ready to start adding content and building your website up into a massive floral and gardening powerhouse. In the left side menu area, you can choose what type of content you want to add first. You can see there are several options including:
- Plant Profiles
- Types
- Plot Profiles
- Used For
- Planting Plans
- Year or Season

You can see that we need to select what we are going to add. Additions work the same. So, since this is the case, we are going to go over how to add Plant Profiles, and how to add Types. All the other content is added the same way, via the editor, or via using a category layout.
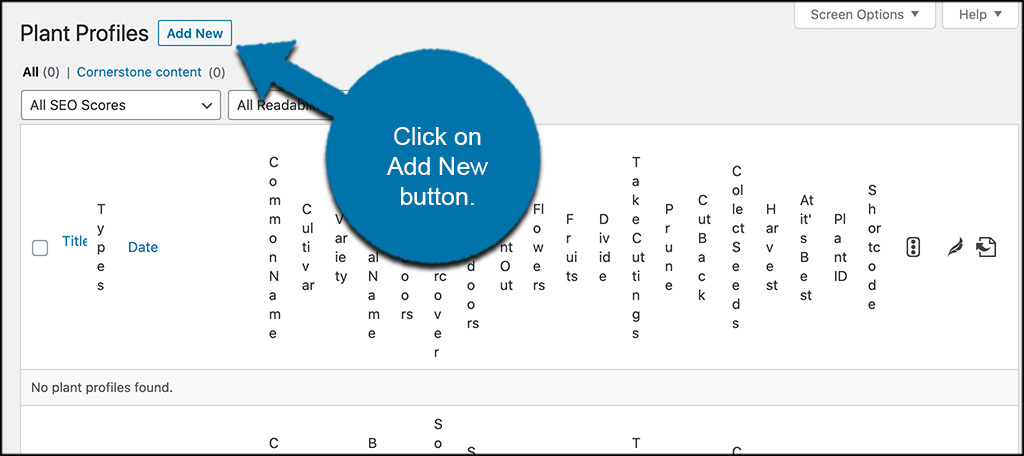
Add a Plant Profile
To add a plant profile, click on the “Plant Profiles” link that is located in the FloraPress menu of items.
Now, click on the “Add New” button to open the editor and add a new plant profile.
Go ahead and give your new plant profile a name and description.
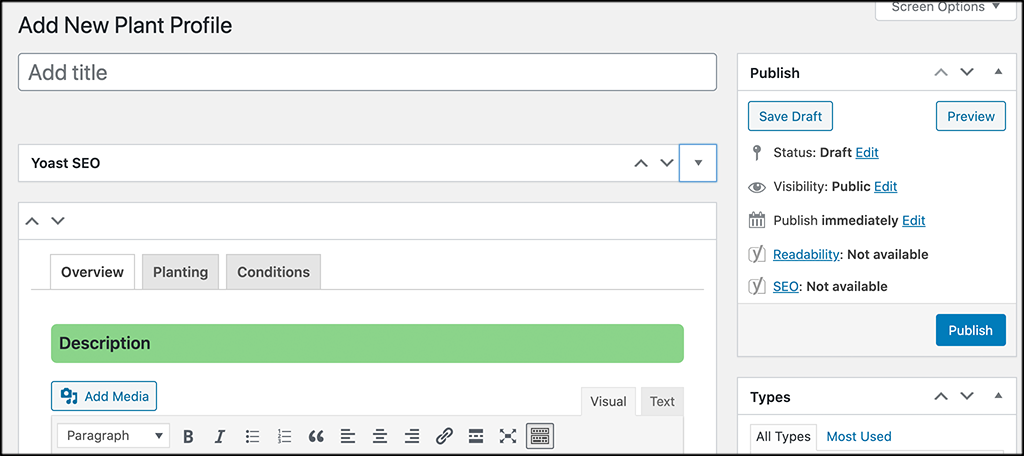
Feel free to click through and use the “Planting” and “Conditions” tab to add even more relevant info you may have to the plant description area.
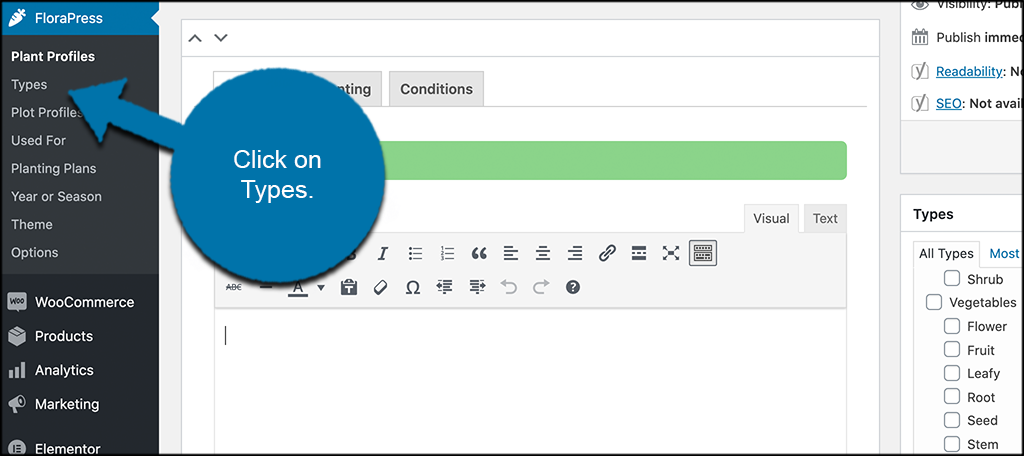
Look to the right and you will see the “Types” widget box. Click on the type or types of plant options that you want to use here.
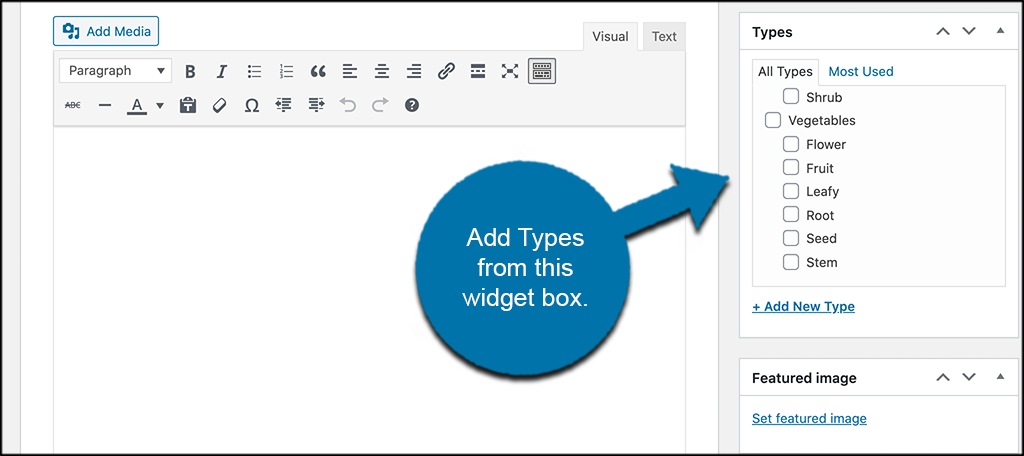
Note: You can add and delete “types” in the types section of the plugin. They will display here.
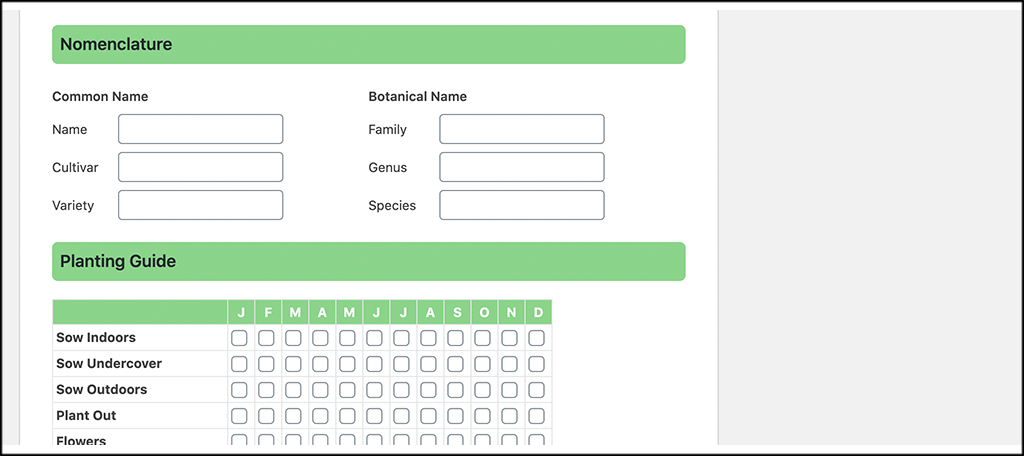
Now, scroll down a little more and add the rest of the relevant information to this new plant type using the options and functionality the editor provides.
When you have gone through everything and you are finished, click on the “Publish” button and you are all set. The new plant type is added to the relevant page, or you can use the generated shortcode to display it wherever you would like on your website.
Add Types
To add “Types,” click on the relevant “Types” link located under the FloraPress menu of items on the left.
You will see a category style page come up. Here, all the current types added are displayed. You can add a type, delete a type, or categorize however you want.
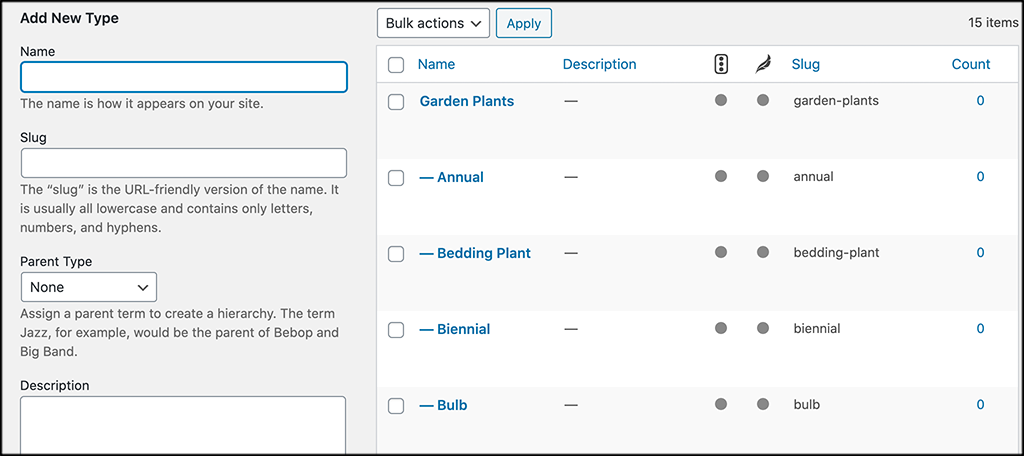
Whatever additions, subtractions, and edits you make here will automatically display in the “Types” widget box inside the Plant Profile editor.
That’s it! Plot Profiles, Used For, Year or Season, all work the same as above. You can go through all of these and add as much content as you want.
Note: There is a pro version of this plugin available. The free version gives you a ton of options but will limit the number of profiles you can add to 10.
Additional Question Answered
You may have a few questions while you are working with the FloraPress plugin. Here are some common ones along with their answers. As always, you can also contact the plugin developer for more answers and troubleshooting options.
Is FloraPress Compatible with Multisite?
Yes, you can use the plugin in conjunction with Multisite.
Do I Need the Pro Version?
For functionality and features, no. However, you are limited to 10 plant profiles using the free version.
I Want to Add a Feature
You can contact the plugin developer, as they are very friendly when it comes to feature requests.
Final Thoughts
Most garden themes in WordPress have a decent amount of functionality when it comes to building and design. However, if you want to take a plant-based and gardening blog or website to the next level, then FloraPress is definitely a plugin to look into.
I hope this tutorial showed you how easy it is to build a plant-based and gardening site using a plugin. You could try to do this manually, but it will take a lot more time and effort. Give the FloraPress plugin a look.
Have you been trying to blog and build this type of site manually? Is there another plugin you have seen that you like better than this one?