Are you interested in building a database in WordPress that can keep track of anything? If so, the Participants Database plugin is exactly what you are looking for. This plugin allows you to create a database while providing the ability to define all the fields of information you want to store for each record.
It was originally built to help organizations get the voter turnout they hoped for. Thus, they could record all of the necessary information like name, home address, volunteers name, and much more. The point is you can make the database into anything.
Today, I will demonstrate how to use the Participants Database plugin to build your database.
Why Create A Customizable Database
There is a WordPress database plugin for just about everything, so why would anybody want one that wasn’t tailored to a specific need?
Many database plugins that are made for a specific topic or niche can be limiting, even for the people or organizations they were made for. Oftentimes, you might find a field missing that is very important to your website. And sometimes you can’t add it in.
With a customizable database, you will never run into this problem.
It also avoids the dilemma of needing multiple database plugins for your website. For example, you may have a database dedicated to your customers and another dedicated for your website content (like a game database).
You could achieve both of these results with the Participants Database plugin.
How to Create Databases with Participants Database
Step 1: Install Participants Database
Participants Database is a database plugin for WordPress that is fully customizable. There is no limit on the number of items you can add to a database. It comes with a variety of pre-made fields for data entry like name, address, phone number, email, etc.
However, the real power of this plugin comes from creating your own fields. And it isn’t hard to do at all. In fact, as you will see, this plugin is very simple to use. Thus, it’s perfect for beginners.
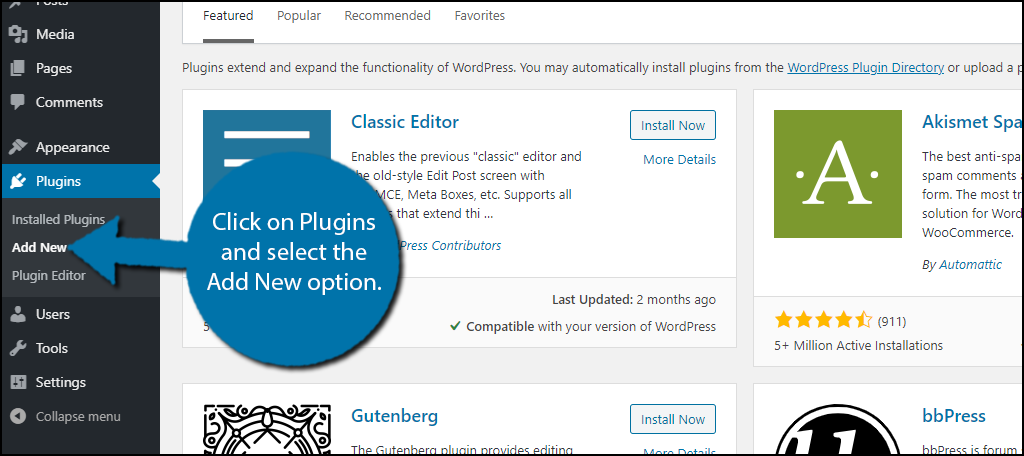
Let’s start by clicking on Plugins and selecting the Add New option on the left-hand admin panel.
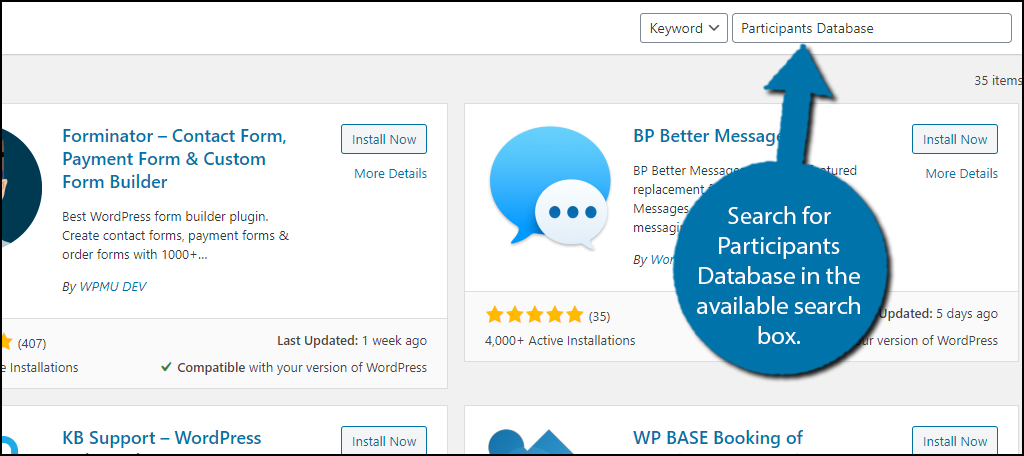
Search for Participants Database in the available search box. This will pull up additional plugins that you may find helpful.
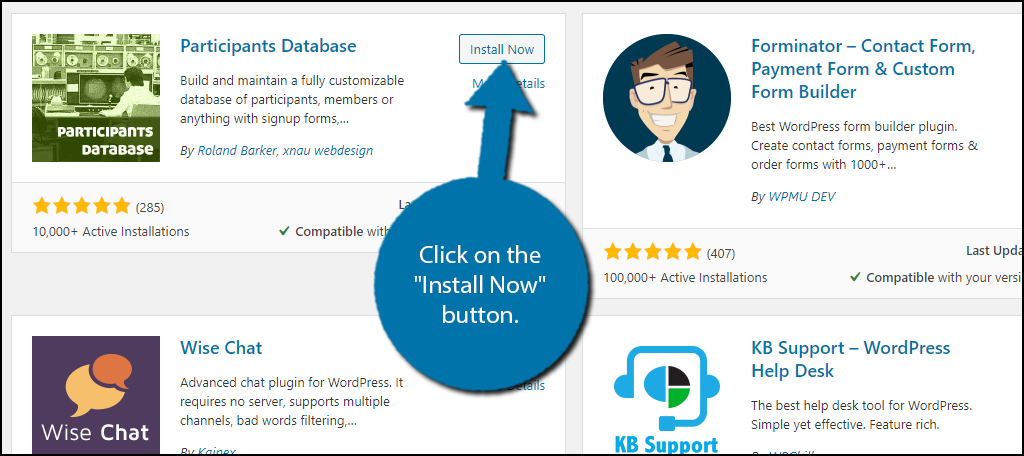
Scroll down until you find the Participants Database plugin and click on the “Install Now” button and activate the plugin for use.
Note: It is worth mentioning that this database is not meant for public viewing on your website. While it is possible to grant users access to their specific files, this will not allow you to create a database to share info with visitors. You will need a different plugin for that.
Step 2: Customize the Database Fields
The plugin is actually ready to go after activation. While you might expect that the first step is to actually add data, that’s not the case here, or at least, it shouldn’t be. Instead, you should customize the database fields.
By default, the plugin has a lot of fields available to fill out. Every website has different needs, so some may find them useful and some may not. However, if you looking to build a different kind of database that isn’t about customers or users, your going to need this step.
For instance, you might be building a database about actors. Instead of their address, you might want a field that lists their movies, or maybe a specific field dedicated to their upcoming movie or latest film.
All of these things can be done in the customization field.
To find it, click on Participants Database and select the Manag Database Fields option.
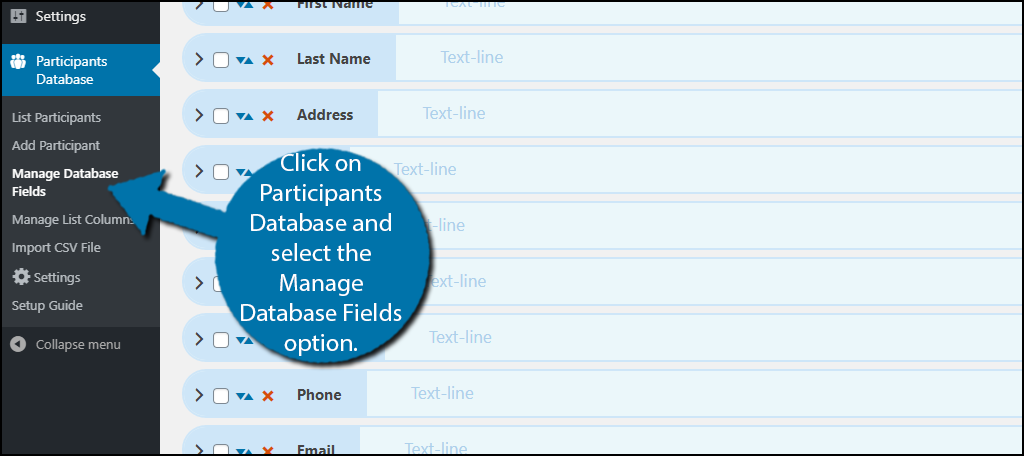
This section is broken up into multiple tabs. Each tab contains pre-built fields that you can customize. Since each one works the exact same way, let’s take a look at the first one, Participant Info.
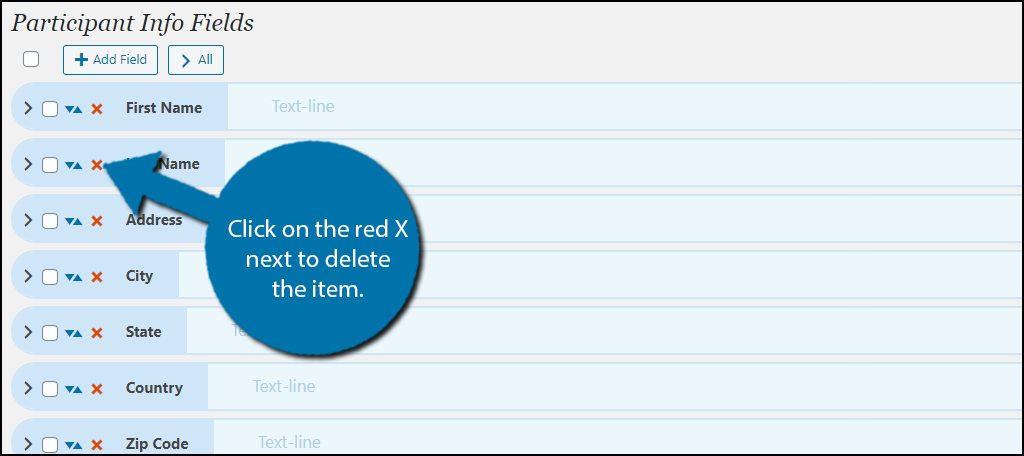
By default, this section has fields for the first and last name, address, city, state, country, zip code, phone, email, and an opt-in to a mailing list. Basically, everything you need for a basic customer database.
To delete an item, click on the red X next to their name.
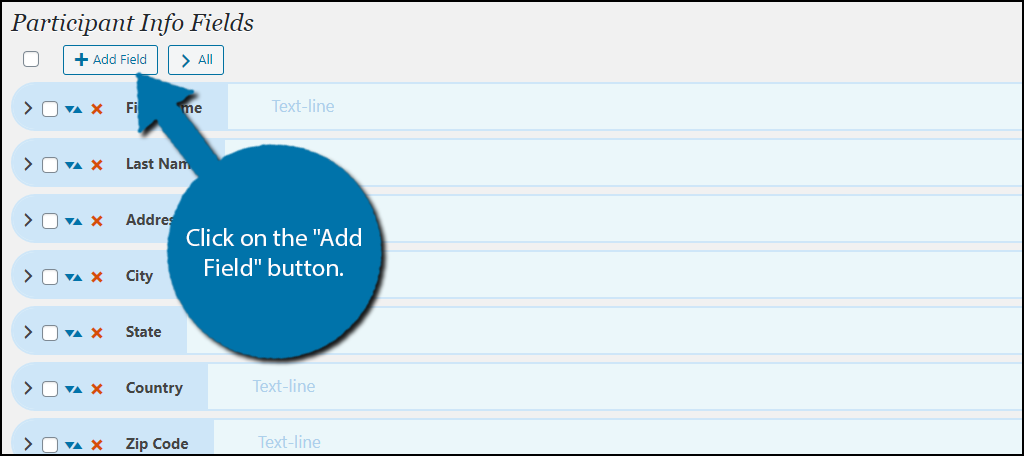
You can also rearrange the items by using the blue arrow. To add a new field option, click on the “Add Field” button.
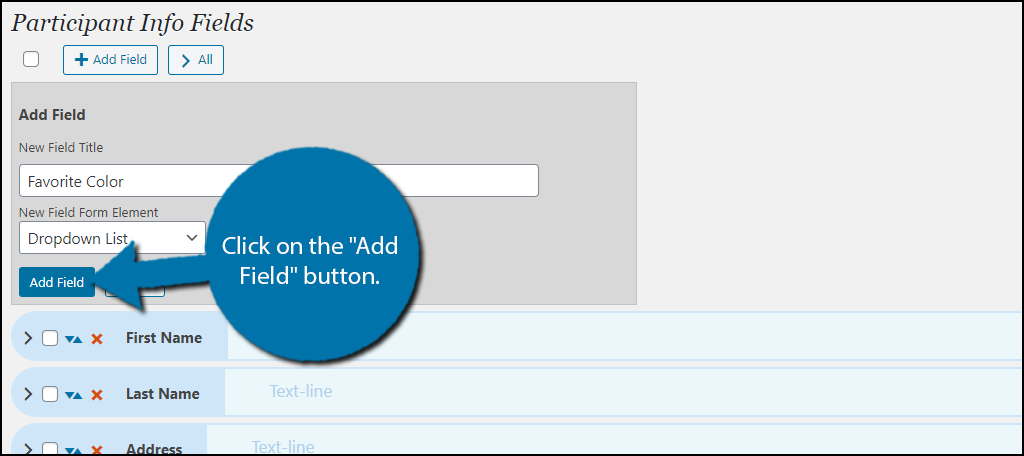
You can then enter the name of the new field and select the field element type (text box, drop-down, checkbox, etc.). Click on the “Add Field” button when you are done.
Repeat these steps to customize the fields to your liking. There is no limit of the number of fields you can add, but just remember someone is going to have to fill them in.
Step 3: Add Data
With all of the fields setup, it’s time to start filling them in. Keep in mind that if you are planning on adding a large amount of data, you could spend a lot of time here.
However, the individual process of adding information is quite quick if you have the info in front of you.
Note: Some users may already have their information in a spreadsheet. This plugin allows you to import CSV files and add the information to the database. Pay close attention to the format requirements for imported sheets.
On the left-hand admin panel, click on Participants Database and select the Add Participants option.
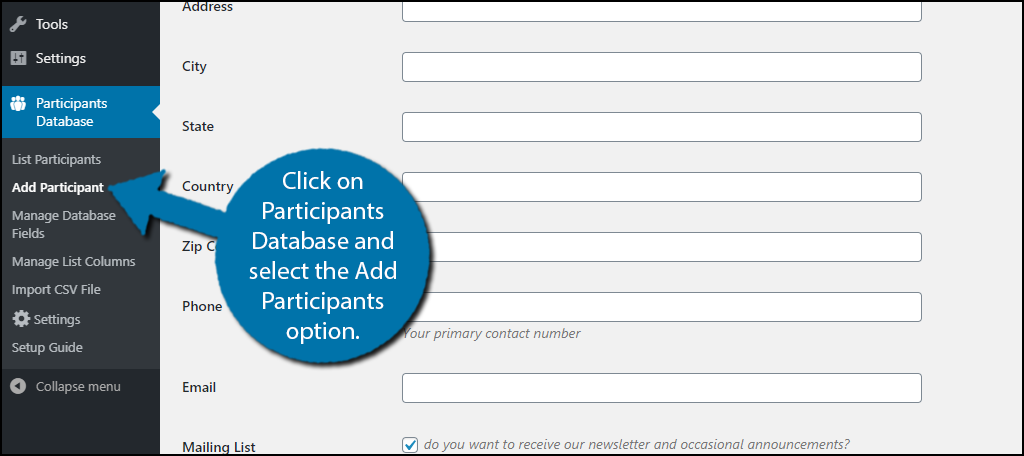
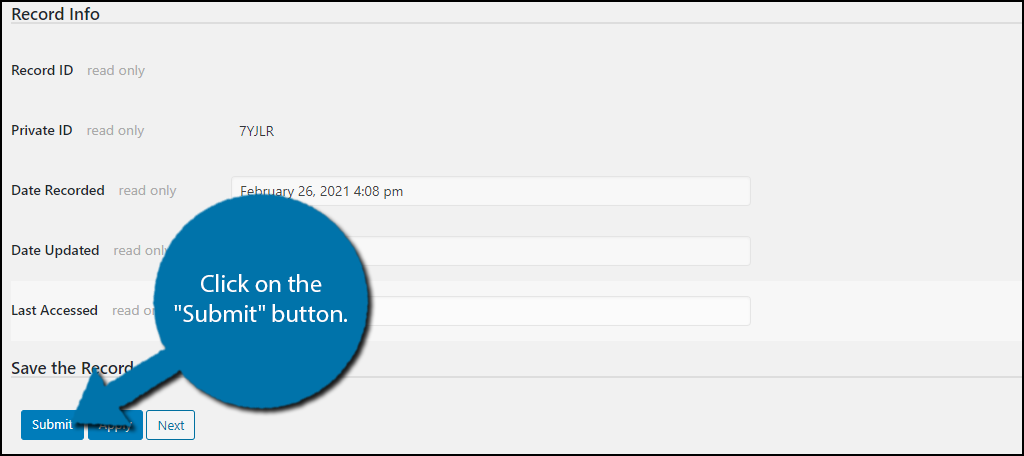
Here you will see all of the fields you need to fill out. At the bottom of the page, you will find some read-only fields that record the time edits are made to the information. This can be useful if you are running a business and need to keep track of such info.
Simply go through each option and enter the necessary data. When you are done, click on the “Submit” button.
Note: If you are updating info, click on the “Apply” button to save the changes.
Keep in mind that you do not have to manually enter all of the information. You can use the following shortcode to add a signup form to a post or page:
[ht_message mstyle=”info” title=”” show_icon=”” id=”” class=”” style=”” ][pdb_signup][/ht_message]
The signup form will look like this:
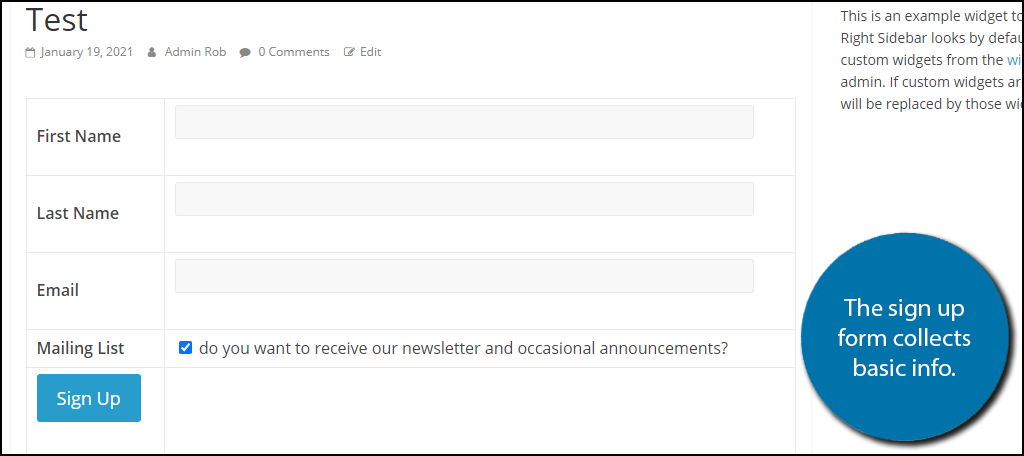
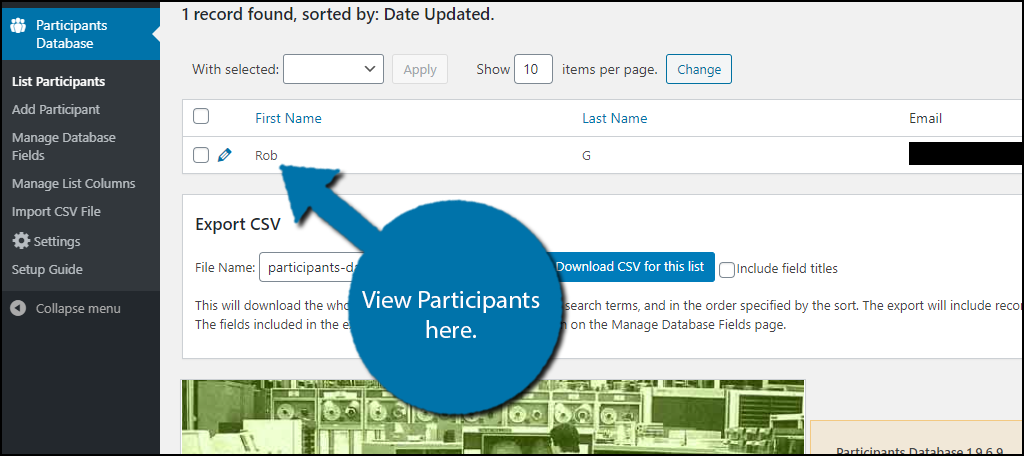
This is ideal for someone looking to build an email subscriber database. You can view all of the database information by selecting the List Participants option.
Congratulations on setting up your own customizable user record database in WordPress.
Stay in Control of Information Collection
In an effort to make database plugins more accessible, many of the plugins available offer way more information fields than necessary. This is sometimes very annoying to website owners that want databases that only consist of the information they need.
For instance, if you only operate in the United States, you are not going to need a country option. And unfortunately, many of these plugins lock the customization element behind a paywall or just don’t include one.
This plugin solves all of these problems by being free and easy to use.
However, it is worth mentioning that some database plugins really do an excellent job at providing customization options within their own niche. This can lead to better results, especially when these databases are going to be displayed to visitors.
How easy did you find the Participants Database plugin to use? What kind of database did you build in WordPress?