One of the most commonly installed plugins for WordPress is a contact form. Perhaps you’ve heard of—or used—Contact Form 7 or Contact Form by WPForms. If so, you know that the humble contact form plugin for WordPress has come a long way.
Allow me to introduce another plugin to consider when you’re looking for a contact form to use in WordPress, Everest Forms. If you’re the “Just give me a form that works” type, there are templates for you. If you have specific needs, you can build a form from scratch.
There’s something for everyone.
Since the dawn of time, humans have been all about communication. And since the dawn of the web, much of that communication has come about through the use of contact forms. Just try to think of another early web technology that we still use as much as we use contact forms. It’s not easy.
Well, outside of email anyway.
Image maps? Frames?
But every website still needs a contact form.
You already know the basics, so let’s get to the specifics.
Installing the Everest Forms WordPress Plugin
Log in to your WordPress admin panel.
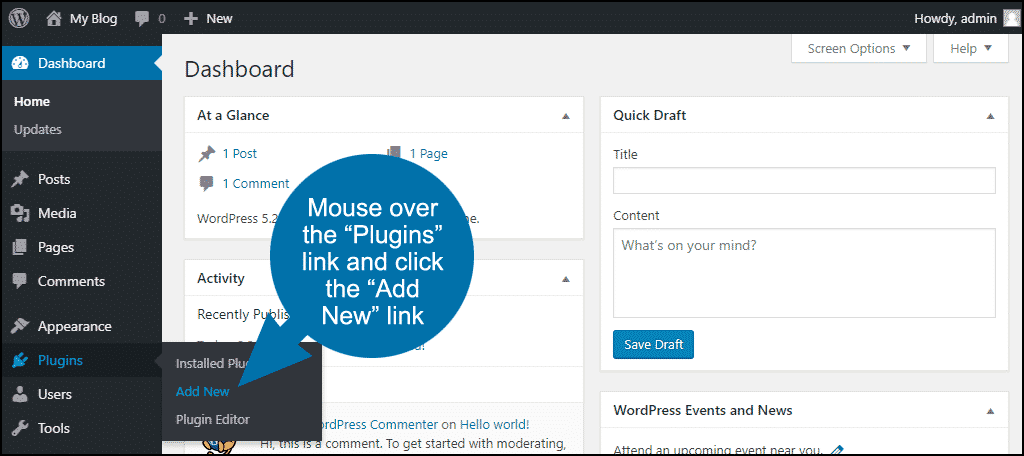
In the left column navigation, mouse over the “Plugins” link and click the “Add New” link.
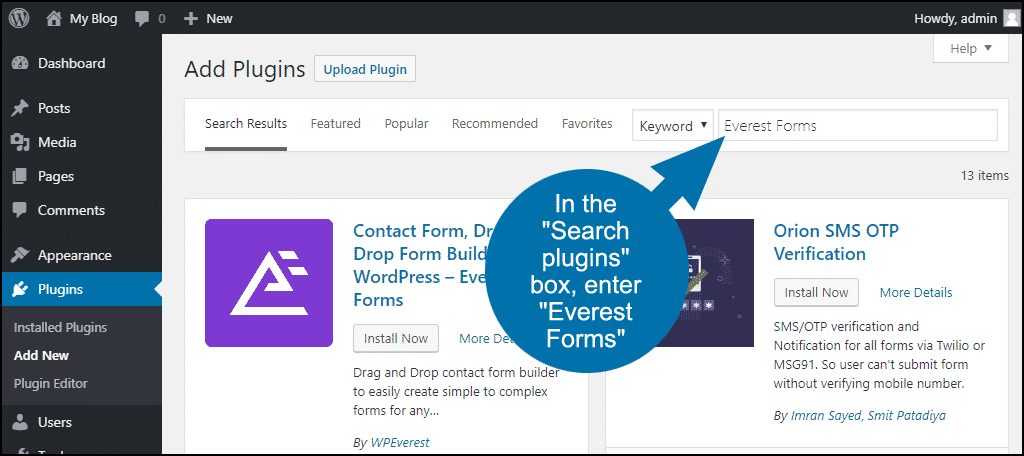
In the “Search plugins…” box, enter “Everest Forms.”
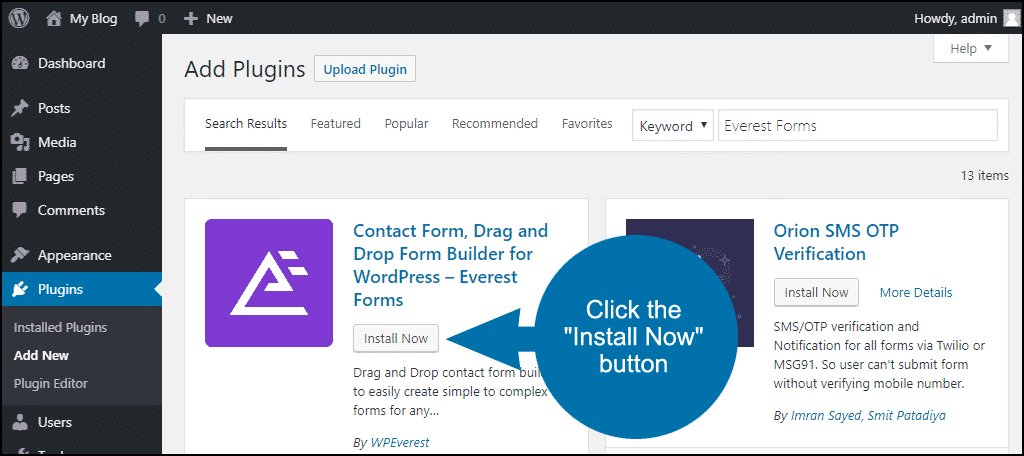
Once you have located the plugin, click the “Install Now” button.
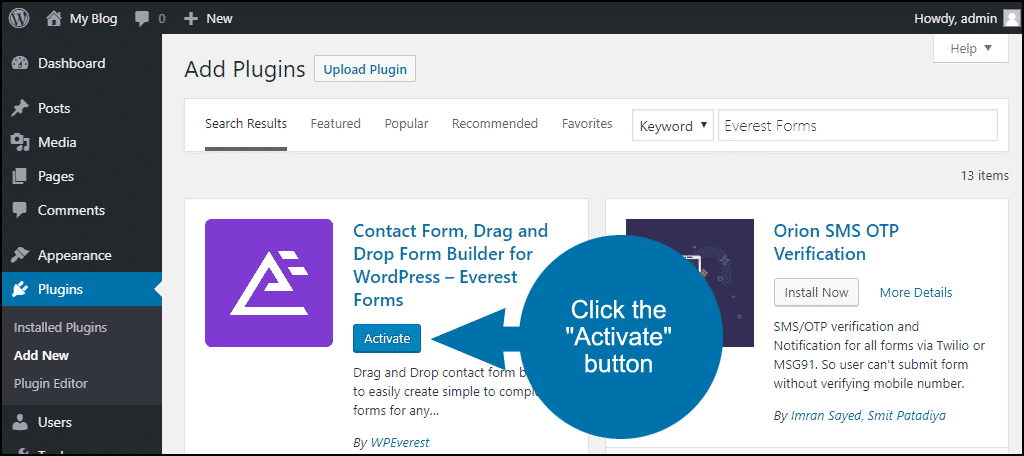
When the plugin has been installed, click the “Activate” button.
Using Everest Forms
After activating the plugin, you should be redirected to a “Welcome to Everest Forms” page in WordPress admin. The welcome page contains a video, a link to in-depth Everest Forms documentation, and a link to create your first form.
We’re not going to use anything on that page (though you may want to bookmark the “Read The Full Guide” URL).

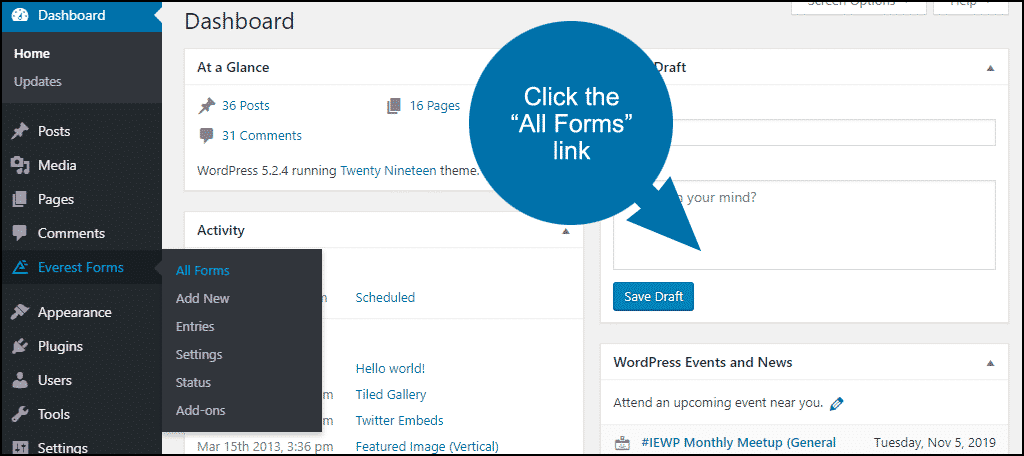
In the left column navigation, mouse over the “Everest Forms” link and click the “All Forms” link.
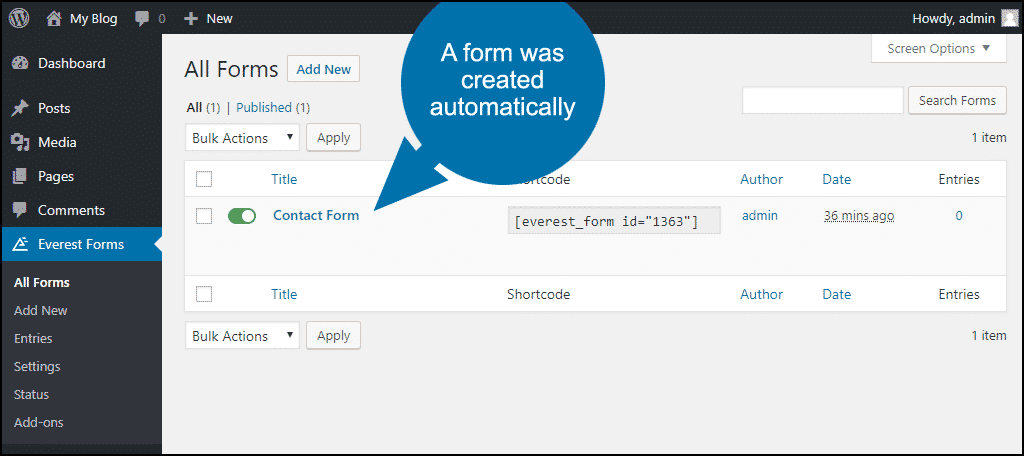
As you can see, a form has already been created by the plugin.
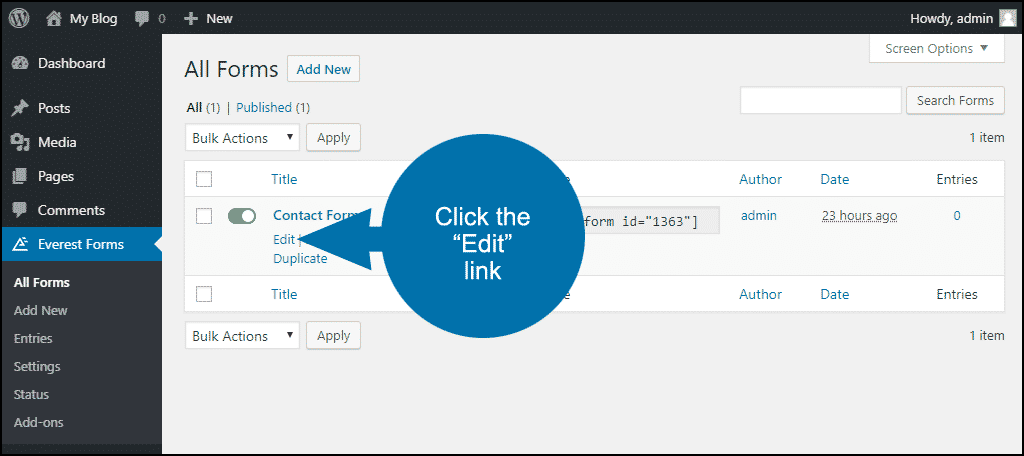
Configuring the Default Form
Click the “Edit” link.
The form is on the right, and the available drag and drop field additions are on the left.
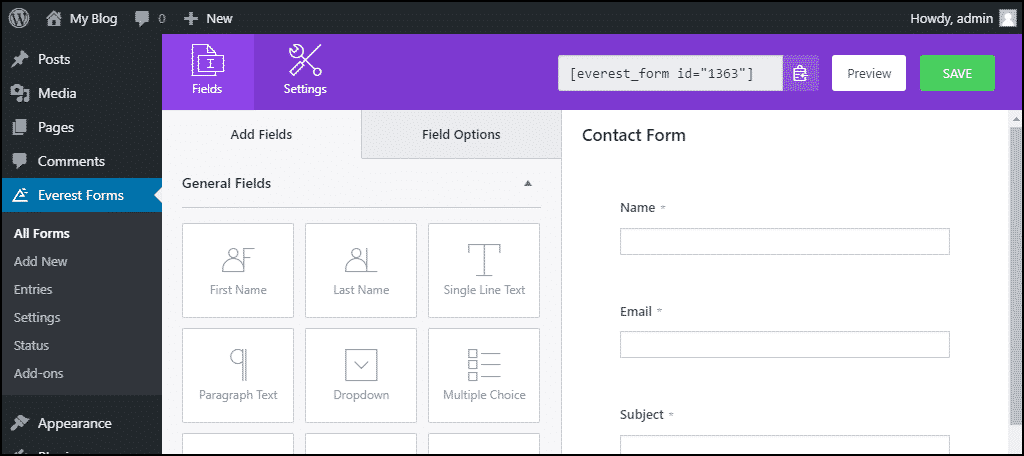
The field options that are greyed out are not available in the free version of the plugin.
Drag the field that you want to add from left to right.
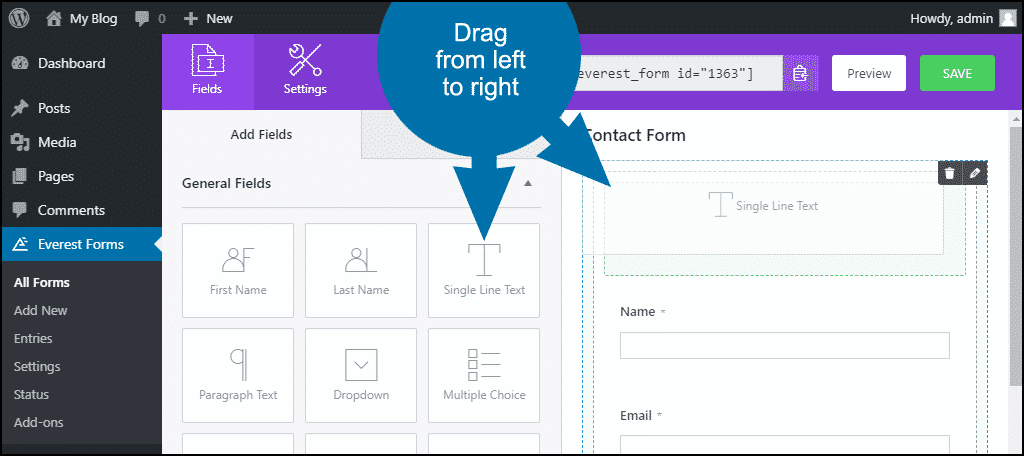
Then customize the field on the left side.
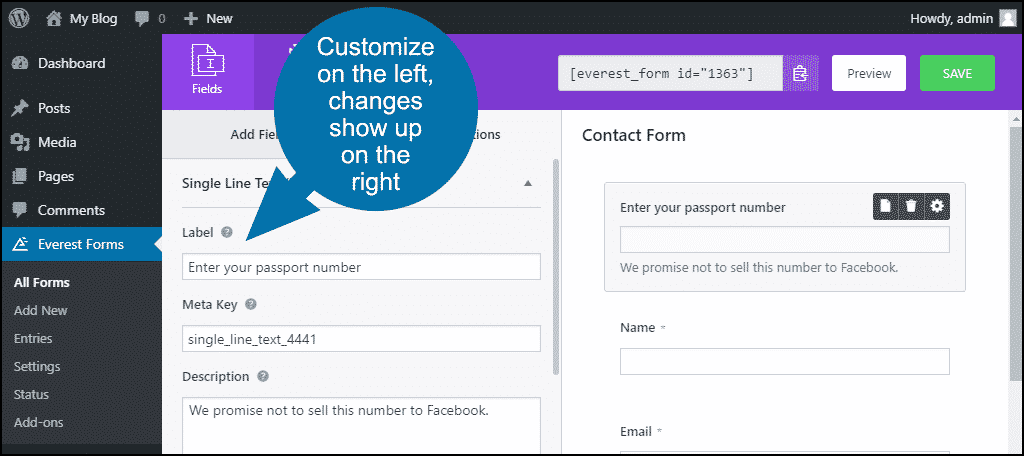
The available Field Options vary depending on the field type.
Advanced Options
- Placeholder Text – text that appears in the field before the user enters anything. Usually used to show an example, the preferred format, or other instructions or suggestions.
- Hide Label – checking this box hides the field label from the user.
- Default Value – is similar to placeholder text, but you can choose a variable from the list to insert. If you select a default value, it will replace any placeholder text.
- CSS Classes – if you want to make a field visually different from the rest of the fields on the form, you can enter CSS here that will only apply to this field.
- Input Mask – if you need the input to follow a specific format, you can force the user to follow it by using an input mask. You can find more details from the Everest Forms documentation.
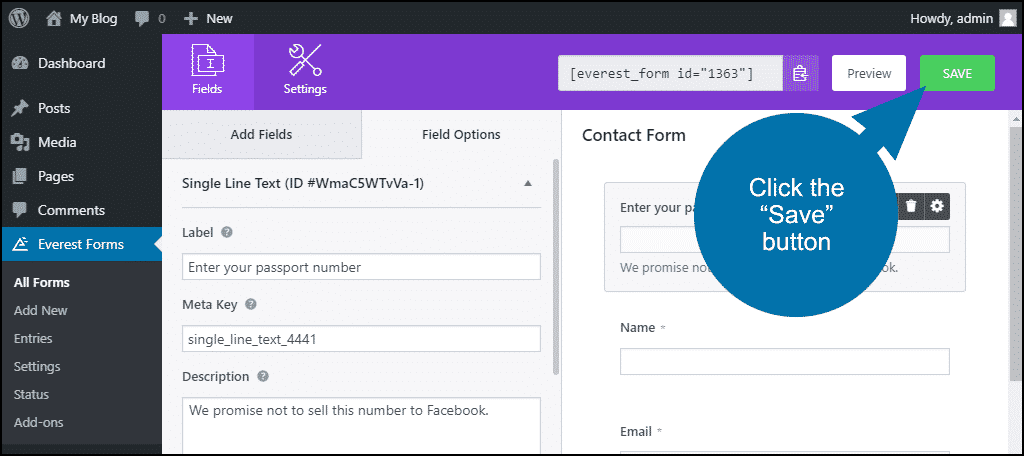
Click the “Save” button to save any changes or additions.
Creating a New Form
In the left column navigation, mouse over the “Everest Forms” link and click the “Add New” link.
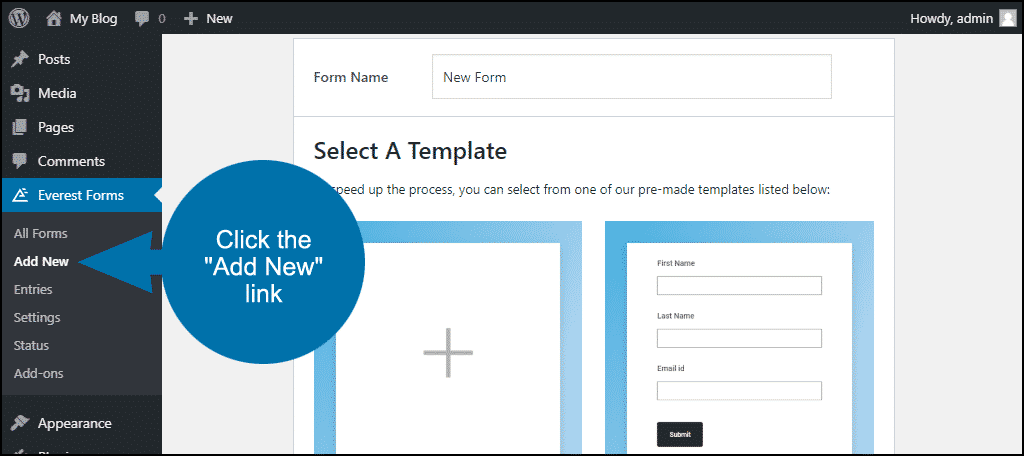
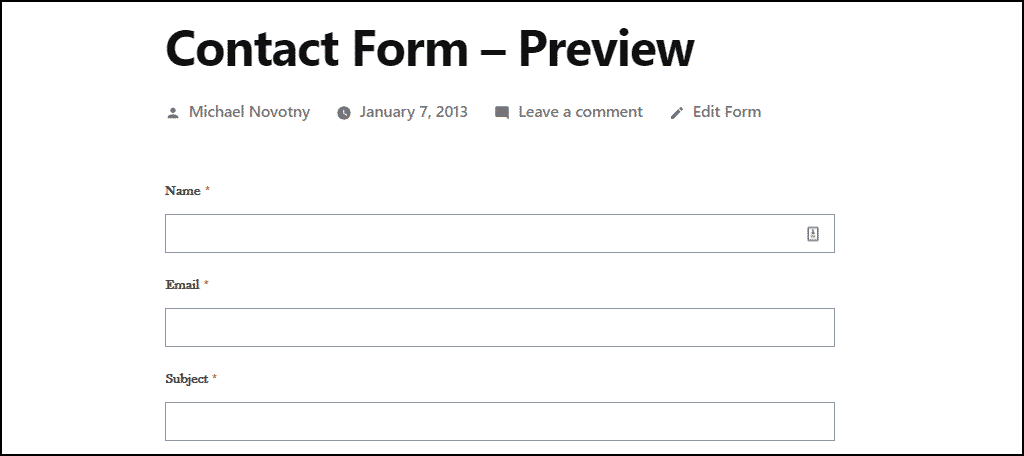
The first page is where you name the form and choose to start with a blank form or use the basic contact template. Since we already saw that basic contact form template (that’s what the demo contact form was), we’ll start from scratch.

Now you can see that we’re back to the same layout as before. The form is on the right, and the available drag and drop field additions are on the left.
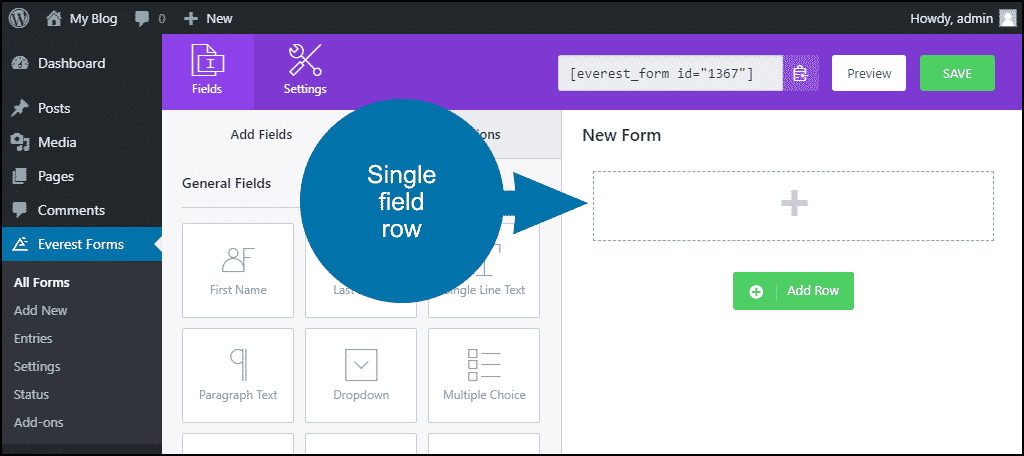
One thing worth noting is the row format on the right, in the blank template. By default, it creates a row with two fields.
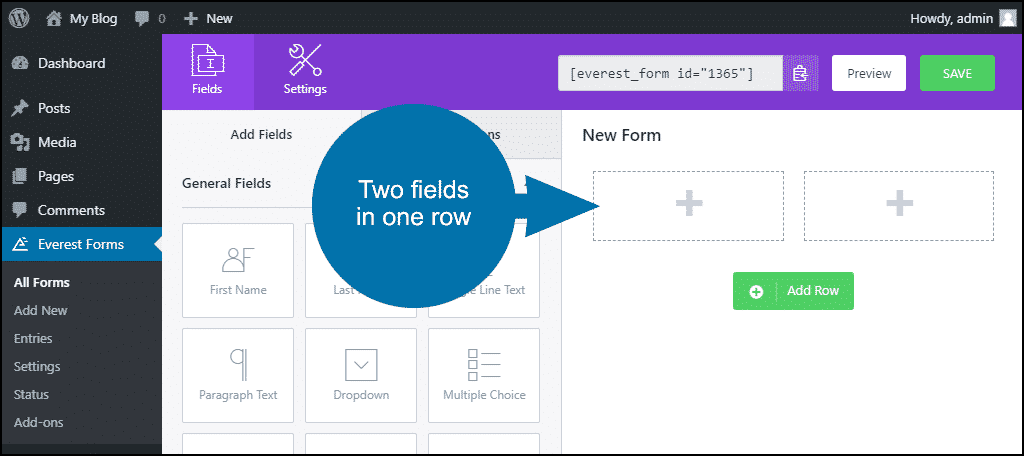
That might be useful for forms with a lot of short fields. But more often than not, you’ll want one field per row. Here’s how you change that.
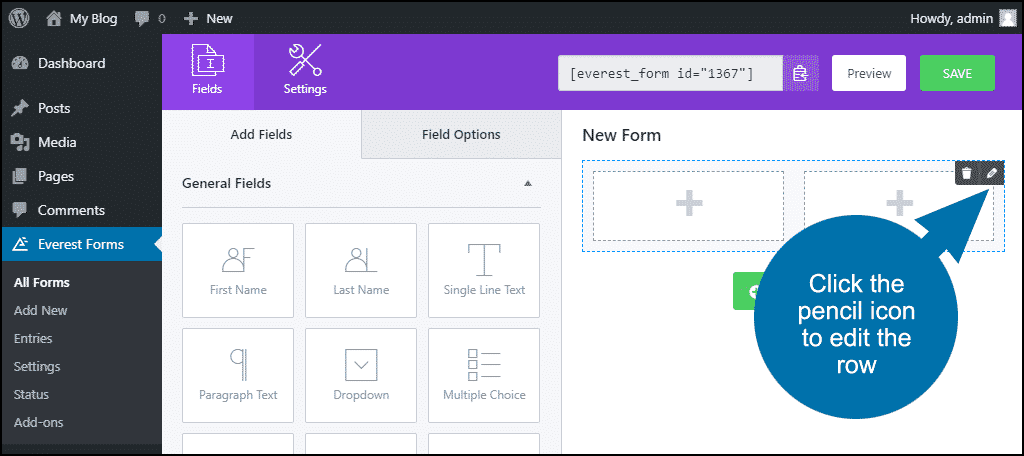
Mouse over the row, and you’ll see two icons pop up: a trash can (delete), and a pencil (edit). Click the pencil.
A “Row Settings” popup will appear. Click the single field row image on the left.
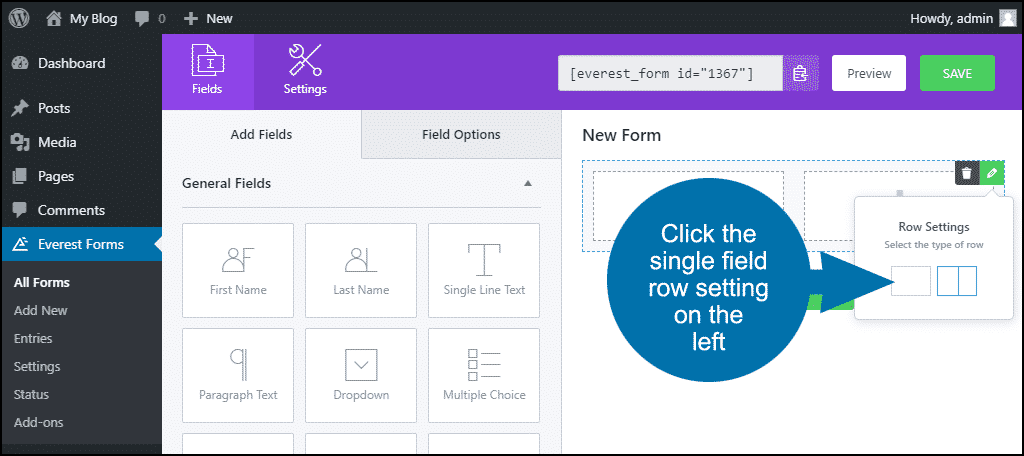
That results in a single field row.
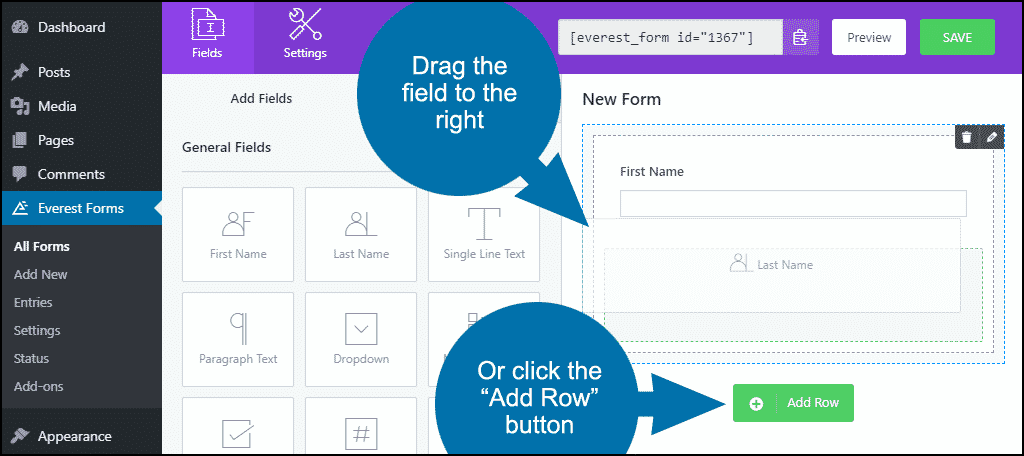
Now you can drag your fields over and edit them.
To add fields, you can either click the “Add Row” button for a new row or drag a field into an existing one.
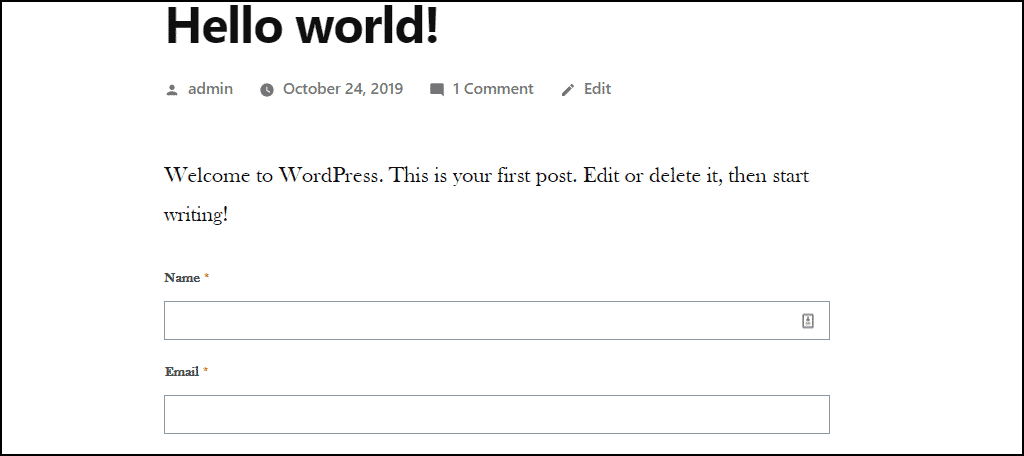
Displaying a Form on a Page or in a Post
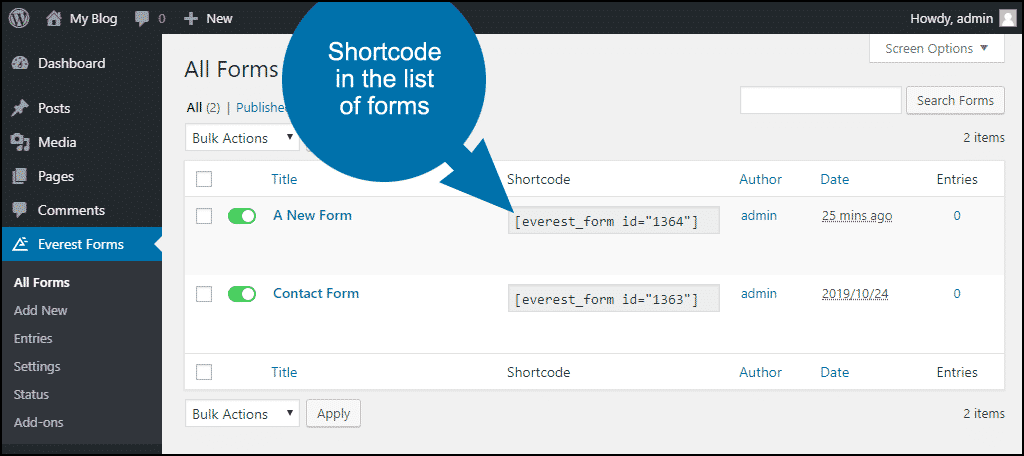
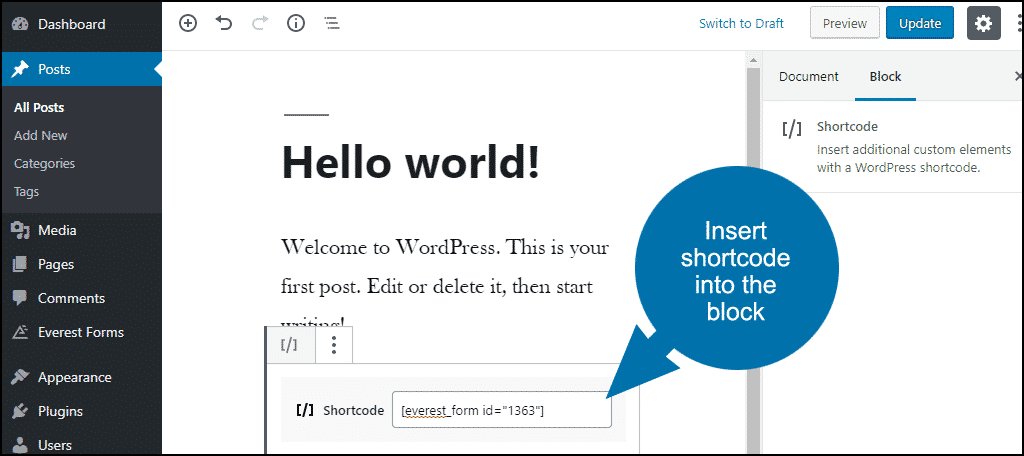
After you’ve created a form, you place it onto a page or post using a shortcode. The shortcode is created when the form is created, in this format: “[everest_form id=”1363″].”
You can find the shortcode in the list of forms:
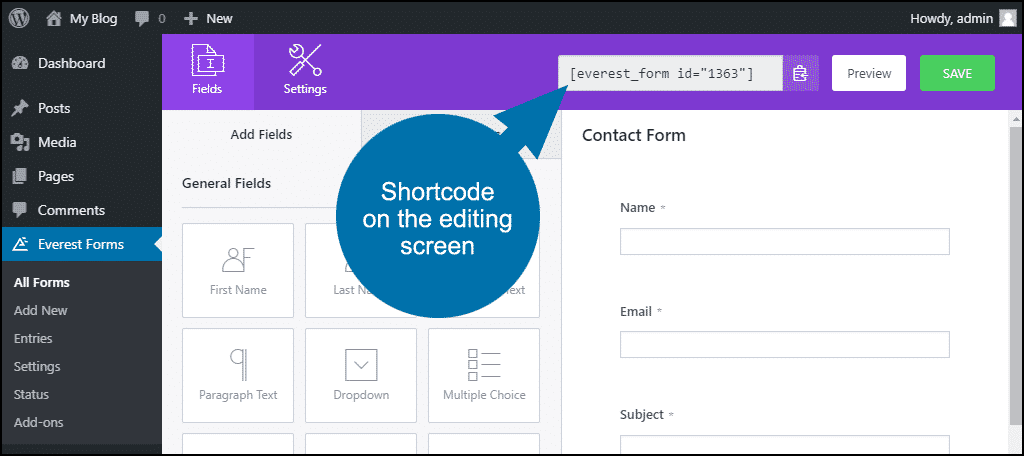
You can also find the shortcode directly from the editing screen of the form itself.
Copy the shortcode, open a shortcode block in a new or existing page or post, and paste in the shortcode. (If you’re using the classic WordPress editor, paste the shortcode into the page or post wherever you want it to appear.)
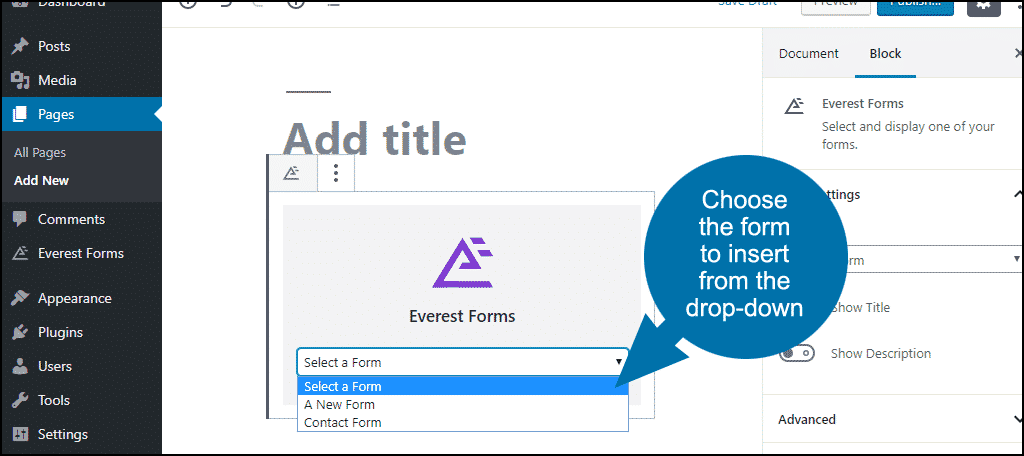
The Gutenberg Block
If you are using the WordPress Gutenberg editor, there’s an easier way to insert a form into a page or post.
The plugin creates an “Everest Forms” block you can find in the Widgets section.
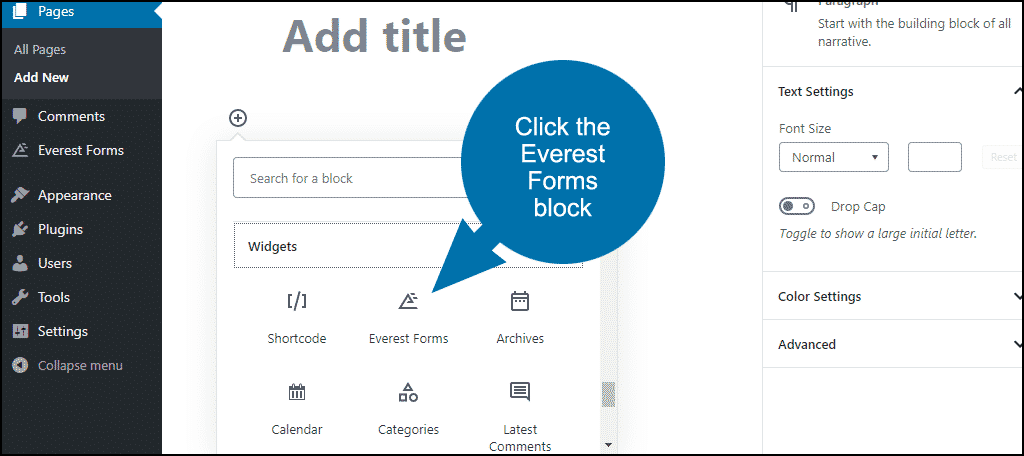
Just click it and choose which form you want to insert from a dropdown menu.
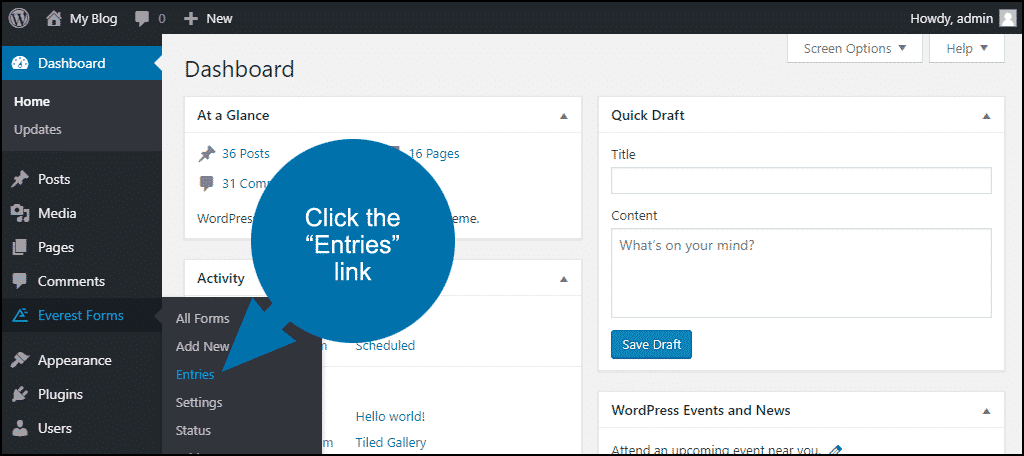
Viewing Form Responses
In the left column navigation, mouse over the “Everest Forms” link and click the “Entries” link.
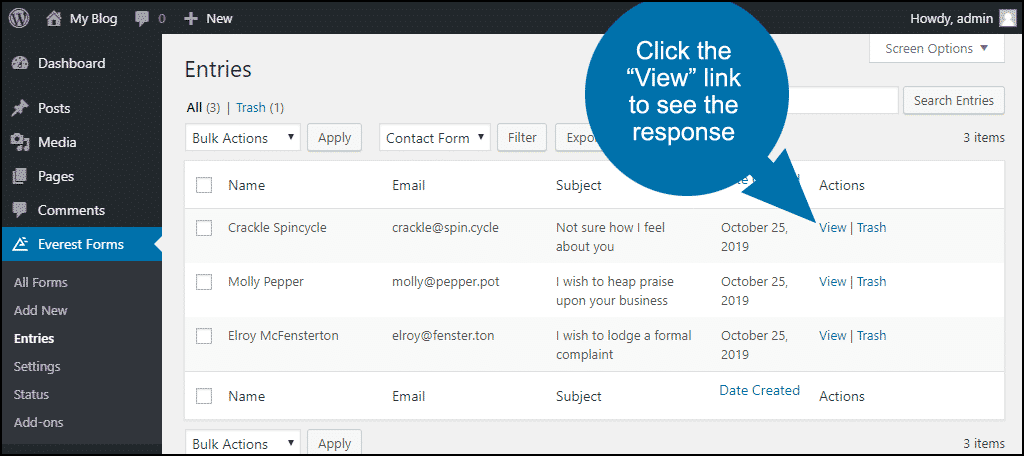
By default, the responses to the first form in your list are displayed. To see responses from another form, select it from the dropdown and click the “Filter” button.

Click the “View” link to see the form response.
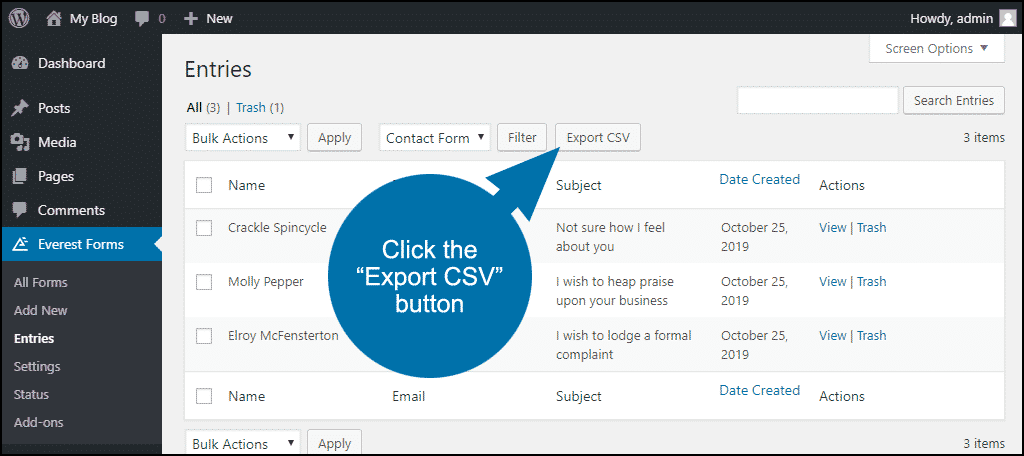
Downloading Form Responses
Viewing responses one by one is okay if you aren’t dealing with a lot of messages. But if you do have a lot of responses, you can download all of them in a CSV file.
Click the “Export CSV” button.
There’s More to Everest Than Meets the Eye
This is an introductory tutorial, so we’ve only covered the fundamental functions of the plugin. But as you become more familiar with Everest, you’ll uncover more features that can take your forms to the next level.
There are also some cool add-ons available, but they all require upgrading to the paid version of the plugin, so I won’t cover them here. To see them, mouse over the “Everest Forms” link in the plugin navigation and click the “Add-ons” link.
To me, the benefit of a plugin like Everest Forms is that it stores the form responses in the WordPress database. That’s preferable to using a simpler snippet of form code that can only email responses to an address. This is additionally helpful in a team environment when you need multiple people to see the responses.
You can write code to access the responses in the database, or even work out integrations to other applications.
I’m not going to ask if you use a contact form, because I know that you do. 😉 But do you use a form that stores responses in a database, or one that emails responses? Can you see any benefit to having form responses in a database? Let me know in the comments.
Can i link the messages to my email. That the messages send directly to my email. This article doesn’t say how. And I filled in the form and I didnt see the entry. Please help
There should be a setting option where you can add that information.